Displays
This page covers finding displays, reading their status, and changing them from the web interface.
For step-by-step help, see Set up a wall (finding and adding displays) and Day-to-day care (watching displays and changing their settings).
The overview
The overview (Overview in the menu) lists every wall, and the displays on it, with live status. Displays that are not on a wall are listed under Not on a wall. See The web interface for how the overview is laid out.
Each display is a tile. A tile shows:
- the display's name, or its
row:columnposition on the wall, or its serial number (see display labels); - the state: online, offline, unknown, or wrong display when another display answers at that address. A host that has no SiteManager interface shows not monitored;
- the worst active alert, with the reason in words;
- the VM temperature in degrees Celsius and the camera frame rate, when the tile is large enough.
Select a tile to open the display page. The line under a wall's name gives its generated size in pixels, with the gaps and any extra outputs included, the same figure as on the wall page.
Two badges can appear next to the state:
- unsaved: settings were applied to the display but not saved on it yet. They are lost when the display reboots. See Settings.
- drifted: the last drift check found settings that differ from the display's profile.
A display counts as offline after two missed readings. See Monitoring and history.
To make a wall, open Walls in the menu. See Walls and Cornerstone files.
Display labels
SiteManager shows each display by one label, everywhere: on the overview, in lists, in alerts, in jobs and in the command line.
- A display with a name shows its name.
- An unnamed display on a wall's grid shows its position as
row:column, counting from 1.1:2is the top row, second column. - Any other unnamed display shows its serial number.
The label is worked out from the site and never stored, so it follows the display when you move it. If two displays in one list have the same label, for example 1:1 on two walls, SiteManager adds the serial number: 1:1 (V9900002F).
On the command line, sitemanager displays list keeps the NAME column and adds a LABEL column. See Command reference.
Find and add displays
Open Discover in the menu. There are three ways to find displays. All of them work with IPv4 addresses. Found displays appear below the forms. Nothing joins the site until you add it.
- Broadcast sends a discovery message on the local network. Every display on the same subnet answers.
- Sweep a network range checks every address in an IPv4 range written as a CIDR, for example
192.0.2.0/24. Use it for displays on another subnet or behind a router, where a broadcast does not reach. A range can hold at most 4094 addresses, so use/20or smaller. - Add by IP or list adds one display at the address you give with Add by IP. Import list adds many displays from a list of addresses, one per line, or a CSV. A list can hold at most 4094 addresses.
The results show each address with its serial number, model and firmware version. Select Add to site to put a display in the site. A display that is already in the site is marked in site.
SiteManager identifies displays by serial number, so:
- If a known display turns up at a new address, SiteManager updates the address and tells you under Changes, for example
R0000001A moved from 192.0.2.11 to 192.0.2.21. - A host that answers but reports no serial number cannot be added.
- A host that answers on the touch port but has no SiteManager interface is listed with a note, and cannot be managed.
The command line does the same with sitemanager discover broadcast, sitemanager discover sweep CIDR and sitemanager displays add IP. See Command reference.
The display page
Select a display on the overview to open its page. Tabs at the top lead to Overview, Settings, Tracker parameters and History. The Overview tab shows:
- the display's tile, with its live status;
- Actions: Identify, Reboot and Calibrate (see Actions);
- Properties: Name with Rename, Wall with Move to wall, and Profile with Use profile. A display with no profile of its own says which profile it inherits from its wall;
- Security, Firmware updates on the display and SSH keys, for a display whose firmware supports them (see Display security);
- Details: Identity (the serial number, model, and the firmware version at the last discovery), Capabilities (see Diagnostics and capabilities) and Remove from site.
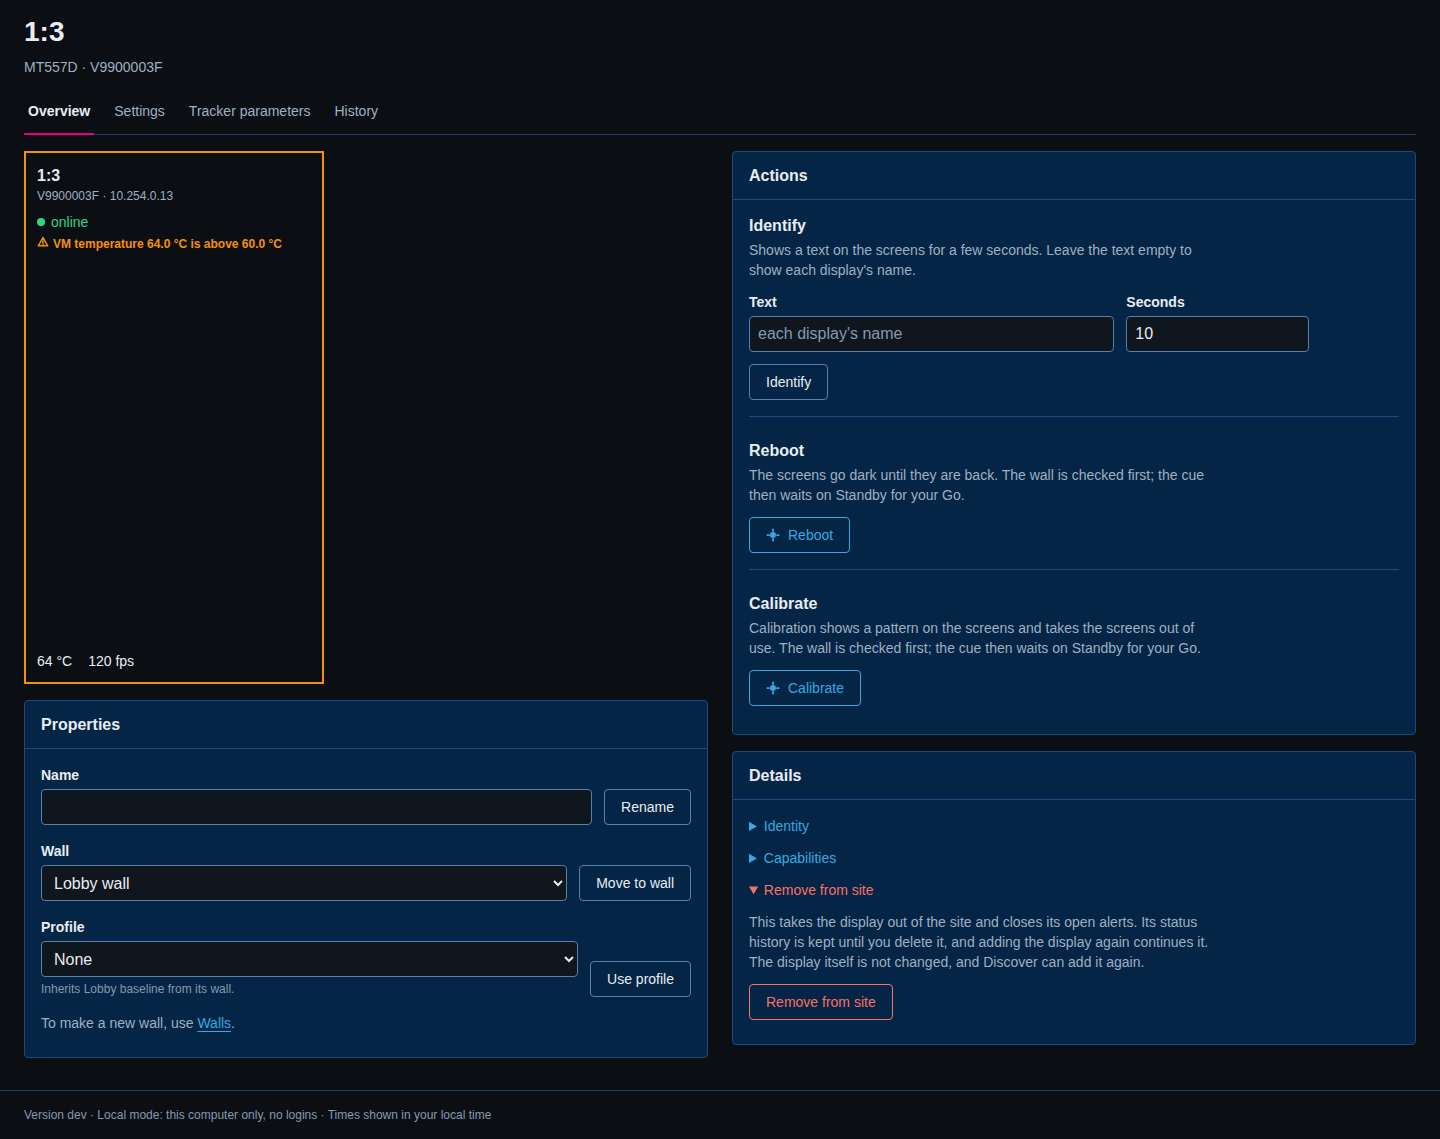
Renaming a display changes only the name SiteManager shows. It does not write to the display.
Remove a display
Open Remove from site under Details and select the button. The note there says: this takes the display out of the site and closes its open alerts, its status history is kept until you delete it, and adding the display again continues it. It does not change the display, and Discover can add it again.
A display that SiteManager holds an access key for cannot just be removed: the page asks you to choose Release it, then remove it or Remove it and leave it locked. See Removing a secured display.
SiteManager keeps the status history of a removed display. If you add the same serial number again, the history carries on. Until then you can still read it: open the history page of the removed display, or run sitemanager history SERIAL. The kept history counts toward the limit of 128 recorded displays.
An administrator can delete the history of a removed display for good. On the history page of the removed display, select Delete this display's history. From the command line, use sitemanager history SERIAL --delete. The delete is written to the audit log, and it is refused while the display is still in the site. See Monitoring and history.
Change several displays at once
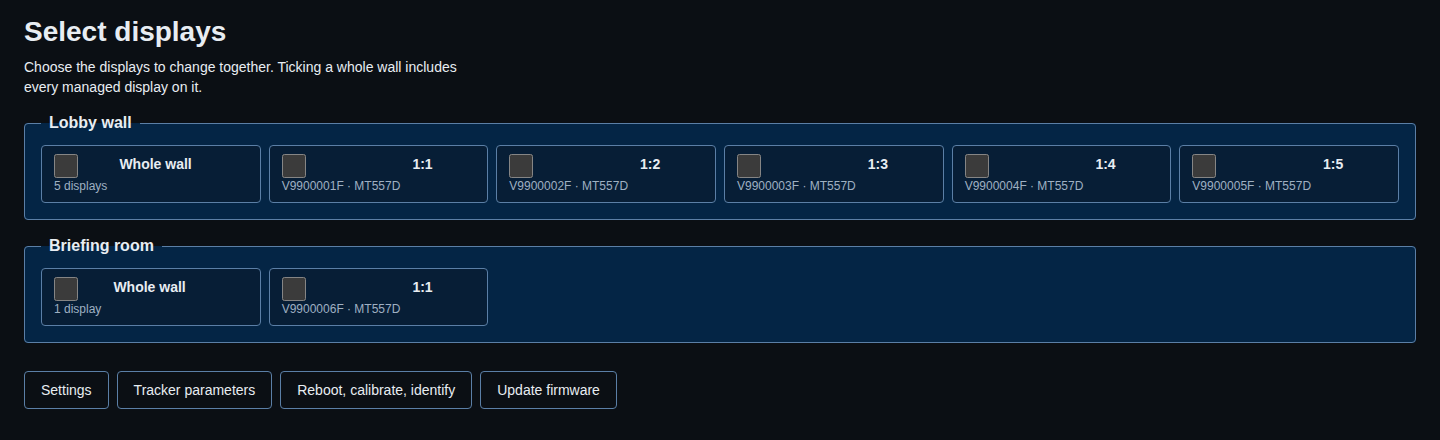
Open Select displays in the menu. Tick the displays, or tick Whole wall to include every managed display on that wall. Then choose what to do:
- Settings
- Tracker parameters
- Reboot, calibrate, identify
- Update firmware (see Firmware)
Settings
The Settings page shows one group of settings at a time, in tabs. It starts from the displays you chose under Select displays. Change selection goes back. If you open Settings in the menu before choosing any displays, the page asks which displays you mean. Choose them there, and select Settings.
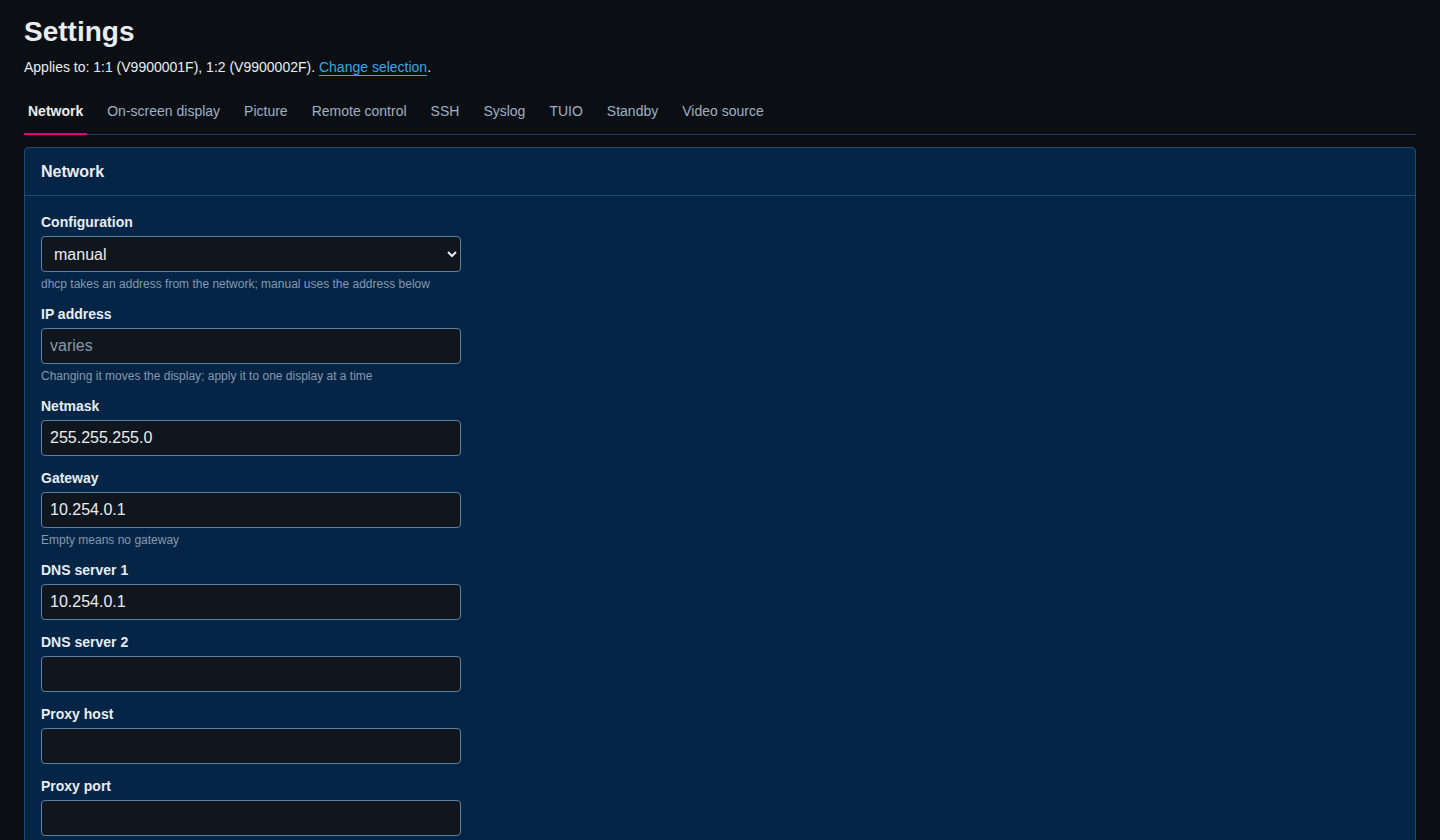
The tabs are:
- Network: address configuration (
dhcpormanual), IP address, netmask, gateway, two DNS servers, and the proxy host, port, user and password. - On-screen display: whether touch operates the on-screen display, and its timeout in seconds.
0means it never closes. For displays whose firmware supports them, it also holds the operator PIN, the orientation and the menu trigger hold time (3 to 15 seconds, 8 if never set). Other displays do not show these, and the page says so. The PIN applies at once and is not saved separately; Remove PIN removes it. The orientation is for one display at a time. See Set an operator PIN and Set the orientation. - Picture: brightness, from 0 to 1. Below 0.05 the screen is nearly black.
- Remote control: whether remote control is enabled, and its port.
- SSH: whether SSH is enabled.
- Syslog: whether the display sends its log to a syslog host, the host, port, protocol (
udportcp) and minimum severity. - TUIO: whether TUIO output is enabled, its host and port, the packet size, and whether hands, fingers and objects are sent.
- Standby: standby on or off. It takes effect at once and is not a saved setting.
- Video source:
osdorexternal. It takes effect at once and is not a saved setting. The page also shows whether the external and internal signals are present.
To change settings:
- Pick the displays and open the group you want.
- Change the fields. A field that reads varies has different values on the selected displays, and is left alone unless you change it.
- Select Apply settings to N displays.
- Read the result. For each display it says OK, failed or outcome unknown, with the reason for a failure and the old and new value of each changed field.
- Select Save to the displays, or Discard to throw the change away.
Applied settings are not saved yet
Like changes made in the display's own on-screen menu, applied settings stay pending on the display until you save them. A display that reboots before you save loses them. The unsaved badge shows which displays have pending changes. Discard also undoes pending tracker parameter changes.
Notes on specific fields:
- Changing the IP address moves the display. Apply it to one display at a time. Before it applies a change to the address or to DHCP, the page asks you to confirm, because the display disconnects for a moment.
- The proxy Password is write-only. SiteManager never shows it, and only says whether one is set. It sends a password only when you type a new one. To remove it, tick clear.
From the command line, use sitemanager settings. See Command reference.
Tracker parameters
Tracker parameters shows the settings of the display's touch tracker, grouped by extension. Each parameter shows its allowed range and a short description. Change values and select Apply tracker parameters to N displays. Save or discard them as with settings.
To make displays match, use Copy to other displays: choose the display to copy from, tick the displays to copy to, and select Copy. This overwrites every tracker parameter on the chosen displays, so the page asks you to confirm.
From the command line, use sitemanager tracker.
Actions
On a display page, or after choosing Reboot, calibrate, identify, you can:
- Identify: show a text on the screens for a few seconds, from 1 to 60 seconds (10 by default). Leave Text empty to show each display's name. Use it to see which physical display is which.
- Reboot: restart the displays. The screens go dark until they are back.
- Calibrate: run the geometry calibration of the cameras. It shows a pattern on the screens and takes the displays out of use.
Reboot and calibrate become cues on Standby. SiteManager checks whether anyone is using the wall and, for a reboot, whether any display has unsaved settings. You see the result and press Go, or Stand down.
Jobs
A job is a long operation that runs in the service: a reboot, a calibration, a firmware update, or applying a profile. It keeps running if you close the browser.
Jobs in the menu lists them as cues. Each has a number (Q1, Q2 and so on), what it does, what it acts on, who started it and when. The same list, with the latest cues, is the Running order on the overview.
A cue is in one of these states:
- queued or checking: the job is about to start, or is running its checks.
- STANDBY (the job page calls it needs-confirmation): the job found something you should look at, or waits for your go-ahead. See Standby and Go.
- paused: the job waits for the wall to become idle and checks again by itself.
- running: the job is working.
- DONE, FAILED or CANCELLED: the job has ended.
- cancelling: you asked to cancel and the job has not yet stopped.
- interrupted: the service stopped while the job was running.
Select a cue to see its page: one line per display with a progress bar, and a log. On a job that waits, the page shows the Standby block, with the readings from each display under Readings from each display.
A display can be in only one active job at a time. If you start a second job on it, SiteManager refuses with a message that names the first job.
From the command line, use sitemanager jobs.