Walls, rooms and the Cornerstone files
Before you lay anything out, it helps to know the words SiteManager uses and what it writes for each of them. This page explains them with pictures from a demonstration site. It also answers the first question most people ask: do I need a wall or a room?
The short answer
- Use a wall when the picture is made by MultiTaction displays: one display, or a grid of them. SiteManager knows each display by its serial number and address. It writes
screen.xmlandconfig.txt, and it can write the[output:Name]sections ofmt-canvus.ini. - Use a room when the picture is made by projectors that overlap and blend, as in an immersive projection room. A room is a drawing and a set of numbers. SiteManager writes only
screen.xmlfor it.
A room does not contain walls, and a wall does not contain a room. They are two separate kinds of layout. One site can hold several walls and several rooms at the same time, and SiteManager writes all of them into one screen.xml. See Walls and rooms in one site.
Display
A display is one MultiTaction MT557D or MT556 display on the network. SiteManager identifies it by its serial number, not by its address, so a display that gets a new address from DHCP is still the same display. You can give a display a name. The name exists only in SiteManager and is never written to the display.
A display that is on no wall is listed on the overview under Not on a wall. An enrolled display can be on one wall at most.
Wall
A wall is a grid of displays that Canvus or Cornerstone drives as one big picture. You tell SiteManager the display model, the number of columns and rows, how big the gaps between displays are, and how the displays are turned. SiteManager works out where each display sits in graphics space.
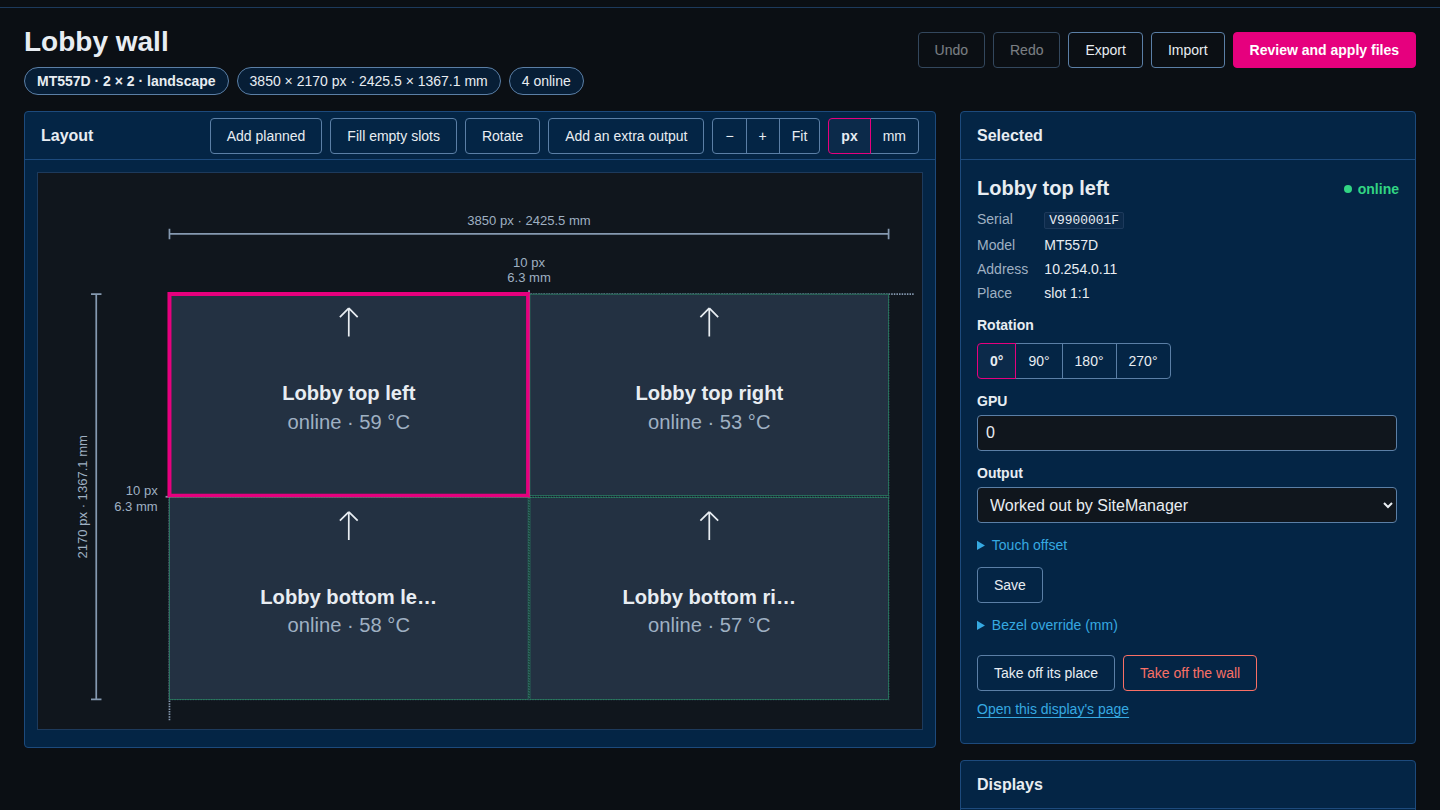
What the screenshot shows:
- The grid is drawn in the real proportions of the displays. The arrow in each tile points to the top edge of the display as it is mounted.
- The dimension lines show the size of the whole wall in pixels and in millimetres, and the gap between displays (here 10 pixels, which is 6.3 mm at this model's pixel pitch).
- Selected is the inspector. It shows the serial number, address and slot of the display, its Rotation, its GPU, the video Output it is connected to, and a Touch offset and a Bezel override (mm) under the two small arrows.
Things worth knowing:
- The grid is one model of equal cells. Every cell has the size of the chosen display model. A display can be turned (0°, 90°, 180°, 270°) in its cell.
- You can design a wall before the displays exist, with planned displays, and bind the real displays to them later. The files cannot be applied while a planned display is unbound.
- Everything you change in the designer is saved at once, but it only reaches the Cornerstone files when you preview and apply them.
A new wall made with the New wall form on the Walls page is placed beside the walls that already exist. When it starts with planned displays, they get the next GPU number that no other wall uses. A wall made from the command line (sitemanager walls add) or the JSON API starts at the origin 0,0 on GPU 0, so two such walls land on top of each other until you give one a different origin (sitemanager walls layout ID --origin X,Y).
Step by step: Set up a wall. Reference: Walls and Cornerstone files.
Extra outputs
An extra output is a screen beside the wall's grid that is not one of the grid's displays. It never takes a slot in the grid. There are two kinds:
- an enrolled MultiTaction display that is on no wall, for example a table controller; and
- an output that SiteManager does not manage at all, such as a Teams screen that is a plain video output.
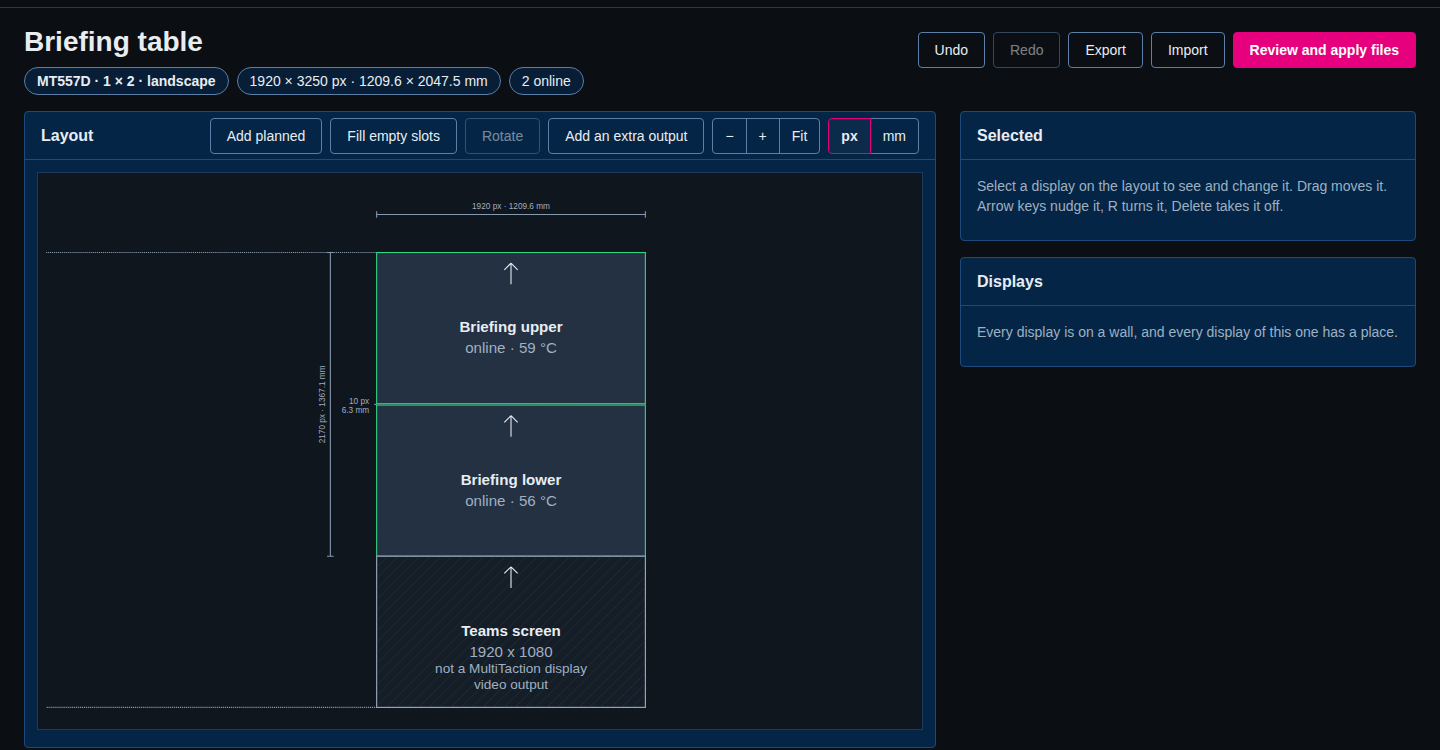
The tick box Configure as Canvus video output decides what happens in the files:
- Ticked:
mt-canvus.inigets an[output:Name]section with the screen's rectangle, so Canvus can stream to it. - Not ticked: the screen only widens the wall's window. It gets no section.
A screen that SiteManager does not manage gets no touch block in config.txt. SiteManager does not set the operating system's screen layout, Mosaic or rotation of an output. Set those in Windows or X so that each output sits where the layout draws it. See Extra outputs beside a wall.
Room
A room describes a projector installation in surface pixels. It has:
- Surfaces: the projection surfaces (a wall of the room, the floor). Each one has a size in pixels, a place in graphics space, and a grid of projectors that cover it.
- Projectors: one picture each, with the output window and slot it is rendered into.
- Overlap bands: where two neighbouring projectors overlap, drawn hatched. A band has an overlap width, a fade width and a crop for each projector.
- Masks: black rectangles that hide a part of a projector's picture, for example a doorway.
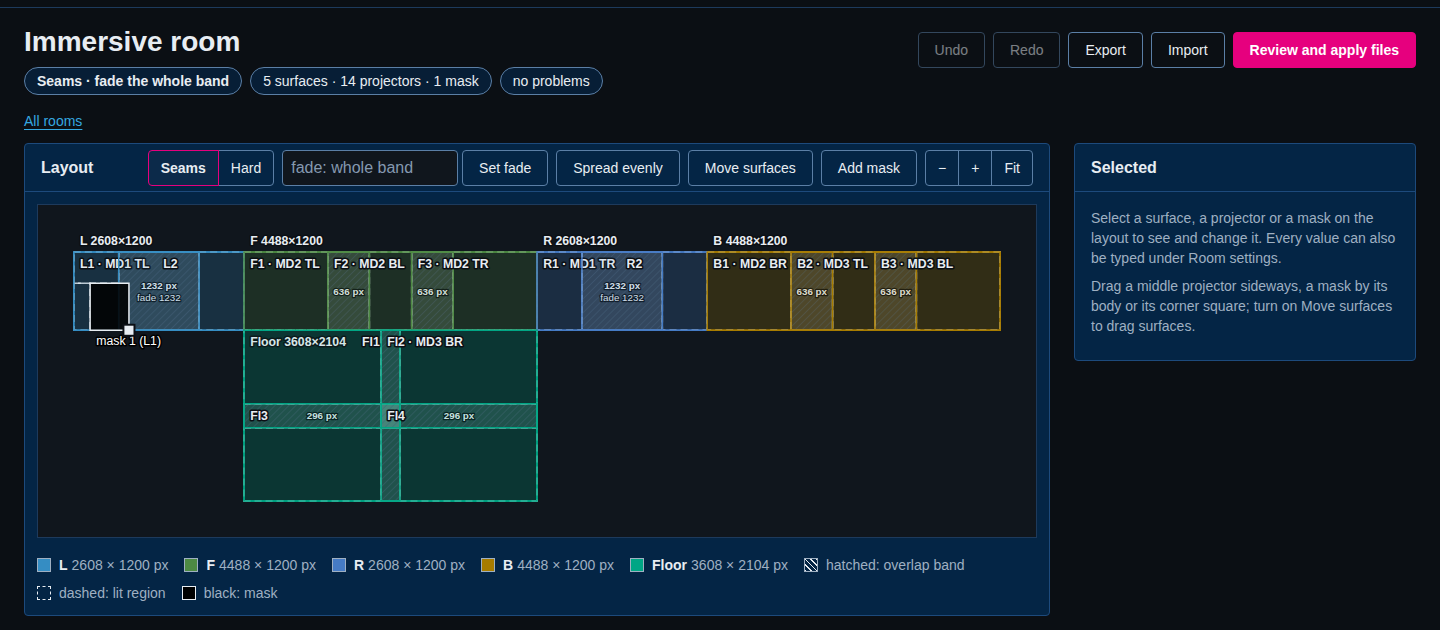
The room in the screenshot has five surfaces (named L, F, R, B and Floor), fourteen projectors and one mask. The label 636 px on a band is its overlap width, and fade 1232 is the width that is faded.
Each projector renders into a window and a slot of that window. A window is an output such as a Mosaic display, and its slots are its quadrants (TL, TR, BL, BR). The next screenshot is the room's Desktop map. It draws the room's windows (MD1 to MD4) with every projector in its slot.
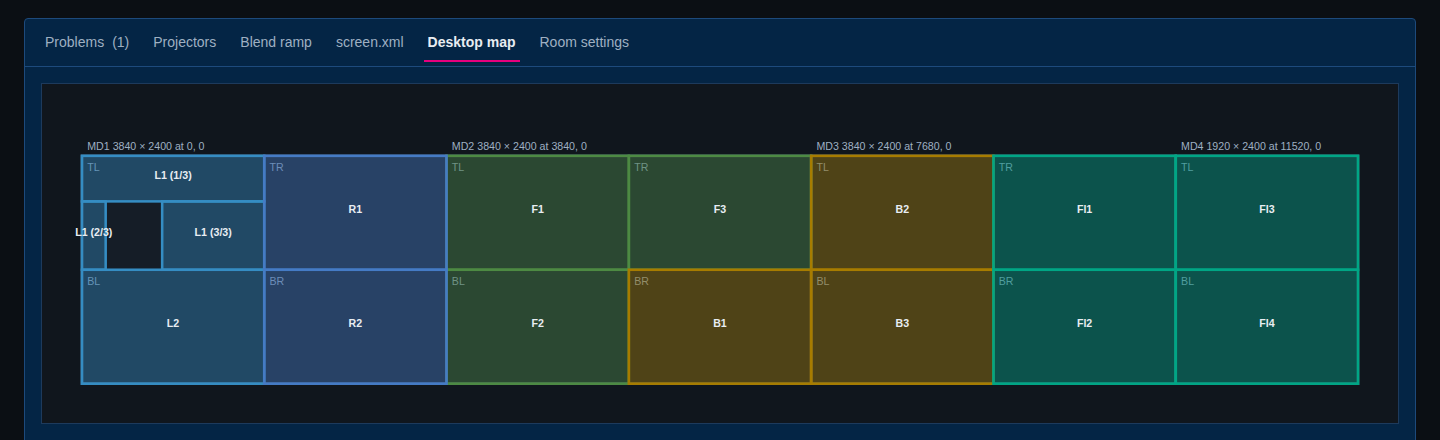
A room has no devices on the network. SiteManager does not enrol, read or change projectors, so a room has no status and no alerts. The only thing a room produces is its part of screen.xml.
In Seams mode every projector renders its whole picture and the seams define the blend zone, which Luminous blends at scan-out. In Hard mode every projector renders only its share of each overlap, as a butt joint. Use Hard to check the geometry. See Overlap bands.
Step by step: Set up a room. Reference: Projector rooms.
When to use a wall and when a room
Ask what makes the picture.
- MultiTaction displays, with touch: a wall. This is the common case, from one display on a stand to a large video wall.
- A MultiTaction display or a Teams screen next to a wall: a wall with an extra output.
- Projectors with edge blending: a room.
- Both in one building: one wall (or several) and one room. They are separate layouts in one site.
If you are not sure, count the things you can find on the network. Displays have addresses and appear in Discover. Projectors do not.
Walls and rooms in one site
- A site can have any number of walls and any number of rooms. A room never contains a wall. A wall never contains a room.
- Every wall and every room goes into the same
screen.xml. SiteManager joins their windows in one file. The windows are namedGPU1,GPU2and so on, in order, in the file. - Walls that use the same GPU share one window. SiteManager makes one window for each GPU number. In the demonstration site both walls use GPU 0, so the Desktop map names the window Wall Lobby wall, Briefing table · GPU1, after both walls. A wall made with the New wall form and planned displays gets the next free GPU number, so it gets its own window. If two walls on one GPU have a large empty space between them, SiteManager warns you and suggests another GPU for one of them.
- A room brings its own windows. The room in the demonstration site has four windows, one for each Mosaic display of the room.
-
Nothing keeps a wall's window and a room's window apart. If two windows would cover the same part of the same X screen, the Desktop map tab of a wall or a room says so in words. The next screenshot shows the Lobby wall and Briefing table window on top of the room's windows.
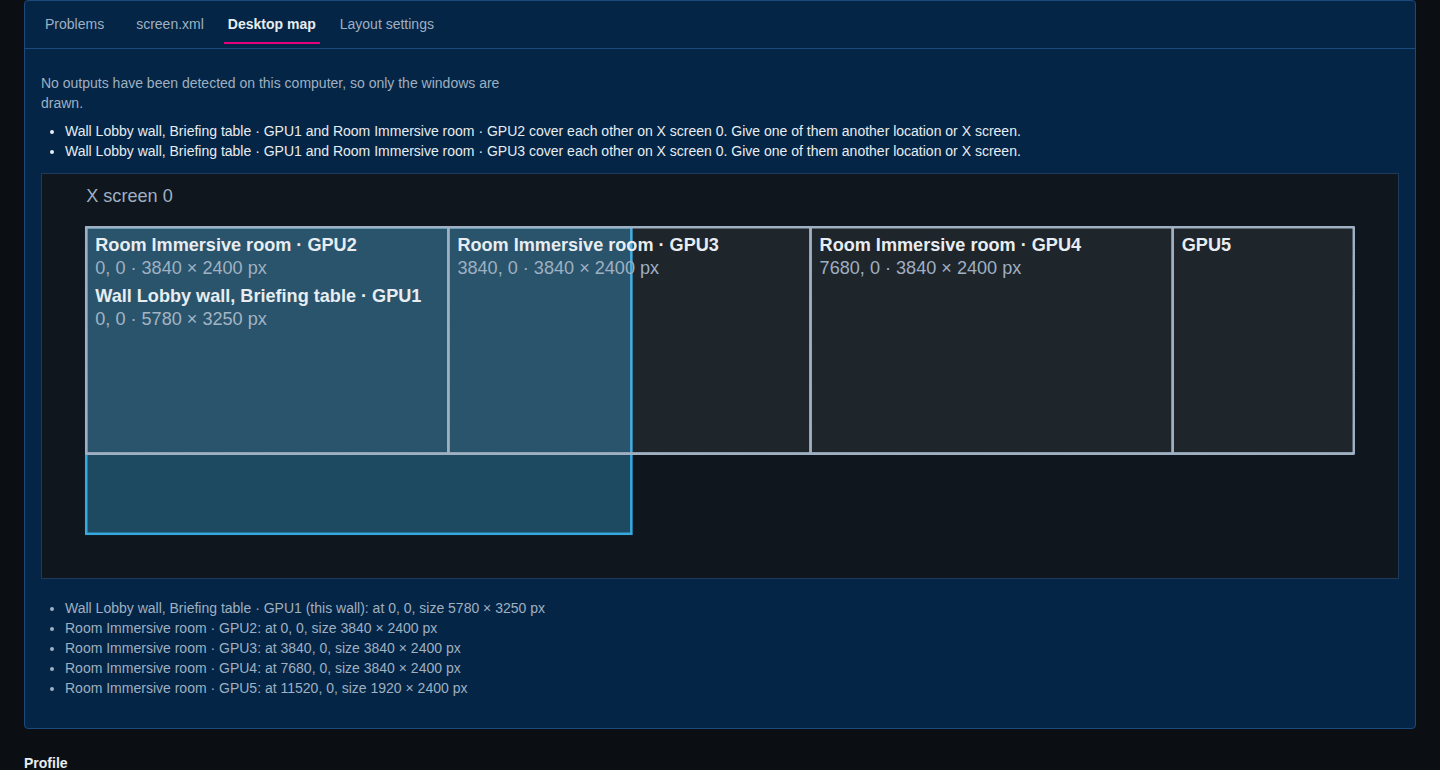
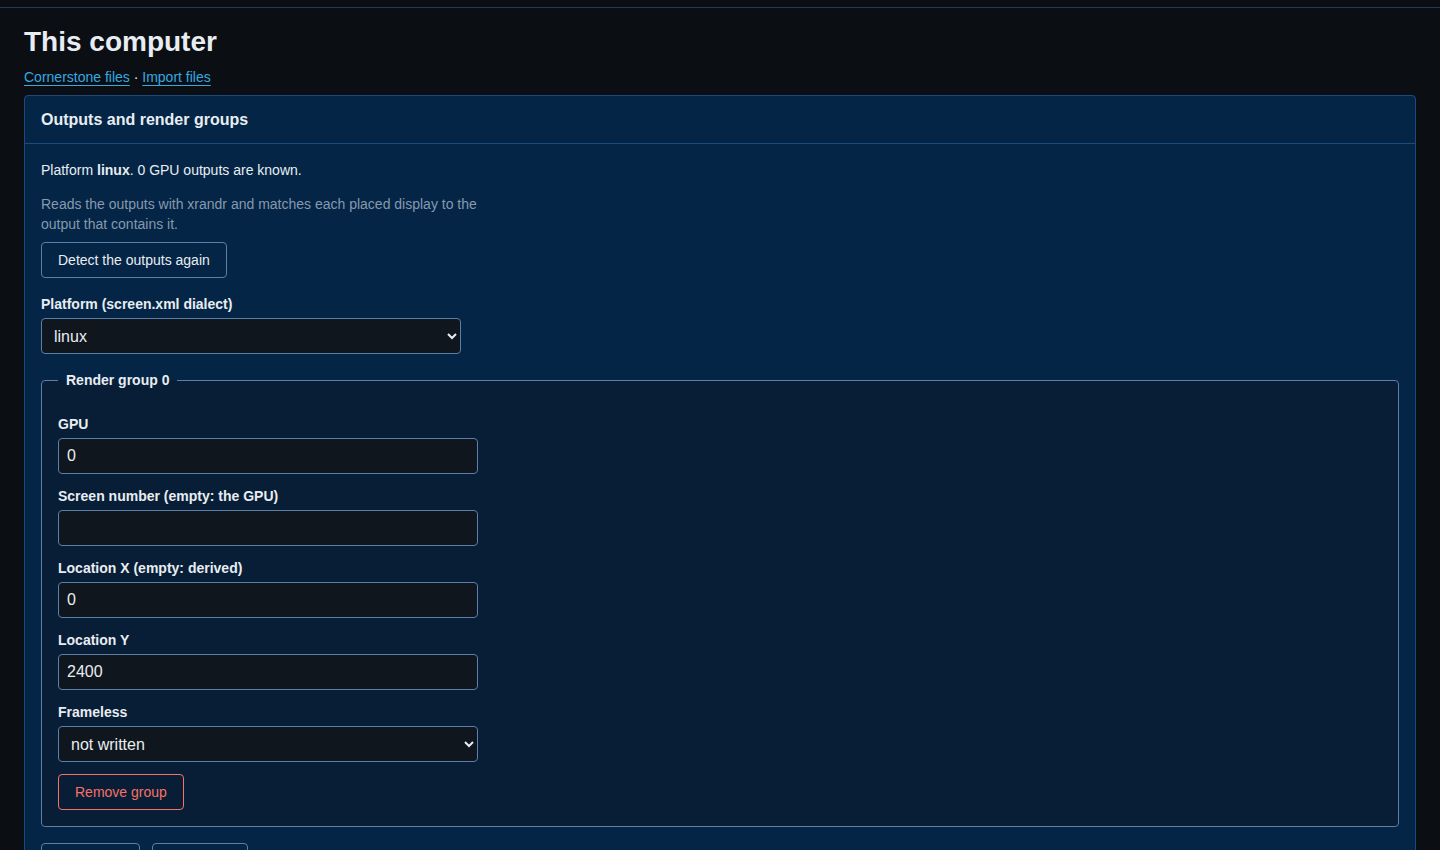
Give one of them another location. In this case the wall's window was moved down on This computer, by setting Location Y of its render group to 2400, under the room's windows.
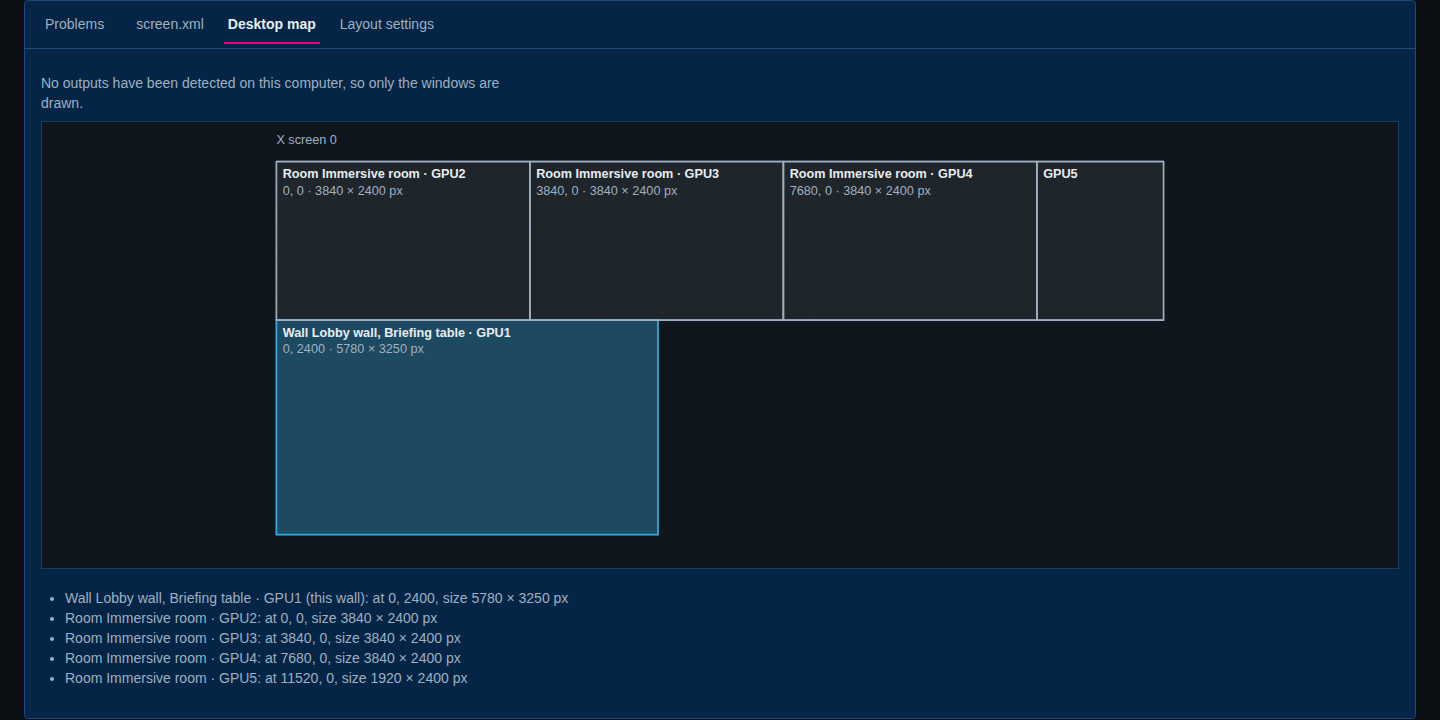
Window names on the map say what the window renders: Wall and the names of the walls on it, or Room and the room's name, then the window's name in screen.xml. A wall's own windows are solid and blue on that wall's page. Another wall's windows are dashed. A room's windows are dotted.
GPU, screen and window
Four words that are easy to mix up:
- GPU is a number you give each display on a wall in the inspector (the default is 0). All displays with the same GPU number end up in one window.
- Window is a window in
screen.xml, such asGPU1. Its position and size are in desktop pixels. A window is a window of the application, not a physical screen. - X screen is the Linux X screen the window is on. SiteManager writes it as
screennumberon Linux only. By default it is the same as the GPU number. Windows and macOS do not get this line. - Output is a physical video output of the computer, with the name the operating system gives it (on Linux, the names
xrandrprints).
The page This computer holds the render groups. A render group is the setting for one GPU number: its Screen number, Location X and Location Y, and Frameless. Leave a field empty to let SiteManager work it out. On Linux, Detect the outputs again reads the video outputs (with xrandr) and matches each placed display to the output that contains it. The Platform setting chooses the dialect of screen.xml: linux, windows or darwin.
On Windows and macOS, when there are several windows and SiteManager cannot tell where each one goes, it packs the windows from left to right and tells you it guessed. Set the locations in the render groups if the real desktop is different.
The three files SiteManager writes
SiteManager writes three files for Cornerstone, the framework Canvus and Showcase are built on. They go to the folders of the user who runs the service, or to the files named with the --screen-xml, --config-txt and --canvus-ini options. See Write the Cornerstone files for the folders.
screen.xml: where the pictures go
screen.xml says which windows Cornerstone opens and which part of the graphics each window shows. SiteManager writes:
- A comment at the top: Generated by SiteManager from the site file. Changes you make by hand are replaced the next time SiteManager applies the layout.
- Options before the windows, only when they are set:
vsyncandseam-blendfrom Render options (screen.xml) on This computer, andlayer-size. The layer size is what you type under Render options. If you type nothing and the site has a Canvus video output, SiteManager writes the size of the walls, without the video outputs, so that the layers stay as big as the displays. - One window for each GPU with displays on it:
location,size, on Linux thescreennumber, andframelessif you set it. The window holds one area,Area1, that shows the graphics rectangle of those displays. Extra outputs that sit beside a wall widen its window. - For each room window: a window that is
frameless, with one area for every piece of every projector that renders into it. Each area has its location and size in the window, the part of the graphics it shows, itsseams, akeystone, and the blend settings of the room if there are any. - Windows that came from an imported file and that SiteManager cannot model are written back as they were.
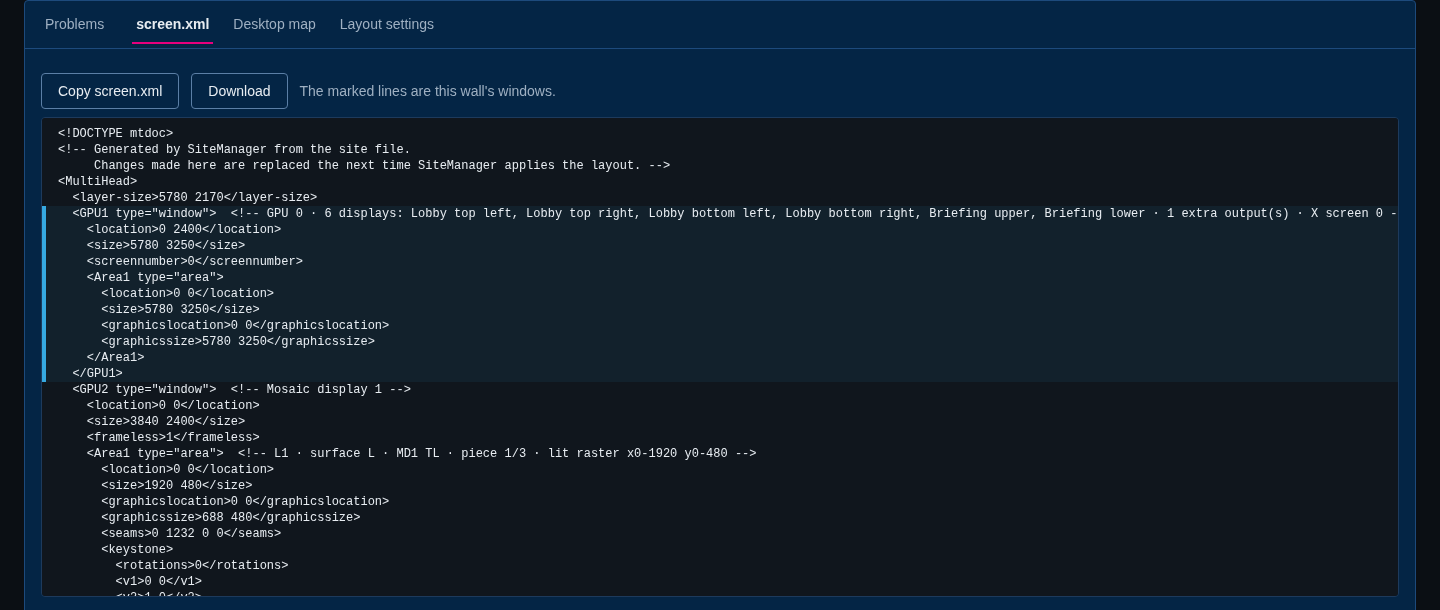
The comment on each window names the displays in it, for example GPU 0 · 6 displays: Lobby top left, … · 1 extra output(s) · X screen 0.
config.txt: where touch goes
config.txt is the touch setup. For every placed MultiTaction display SiteManager writes one NetBridge block:
NetBridge {
  host = "10.254.0.12"
  input-translate = "1930 0"
}
hostis the address of the display.input-translateis where the display's touch area starts in graphics pixels. Here the second display starts at 1930, which is one display width (1920) plus the 10 pixel gap. A touch offset from the inspector is added to it.input-rotateis written only for a display that is turned. In the Touch settings (config.txt) you choose the Rotation notation: negative writes a display turned 270° as-90, and positive writes it as270.input-scaleis written only when the display's size is not 1920 × 1080 pixels.
Planned displays and screens that SiteManager does not manage get no block. A display with no address yet gets none either, and SiteManager warns you: run Discover. Other touch blocks, which you can type under Touch settings (config.txt) on This computer, are written first. A NetBridge block that came from an imported file is kept as it was, and SiteManager does not write a second one for the same address.
mt-canvus.ini: video outputs
mt-canvus.ini is the Canvus configuration. SiteManager only manages the [output:Name] sections in it:
[output:Teams screen]
location=3860 2170
size=1920 1080
There is one section for each Canvus video output: an extra output with Configure as Canvus video output ticked, and a display that streams its own rectangle. Everything else in the file stays exactly as it was. SiteManager never creates mt-canvus.ini. The file must exist already, and --canvus-ini must point to it. Without video outputs the site generates no mt-canvus.ini at all, and no file is written for it.
What a room adds
A room adds windows to screen.xml. It adds nothing to config.txt, because projectors have no touch connection to SiteManager. It adds nothing to mt-canvus.ini.
Backups
Before SiteManager writes any of the files, it makes a backup of the files it is about to replace. The Backups list at the bottom of the Cornerstone files page keeps the 50 newest.
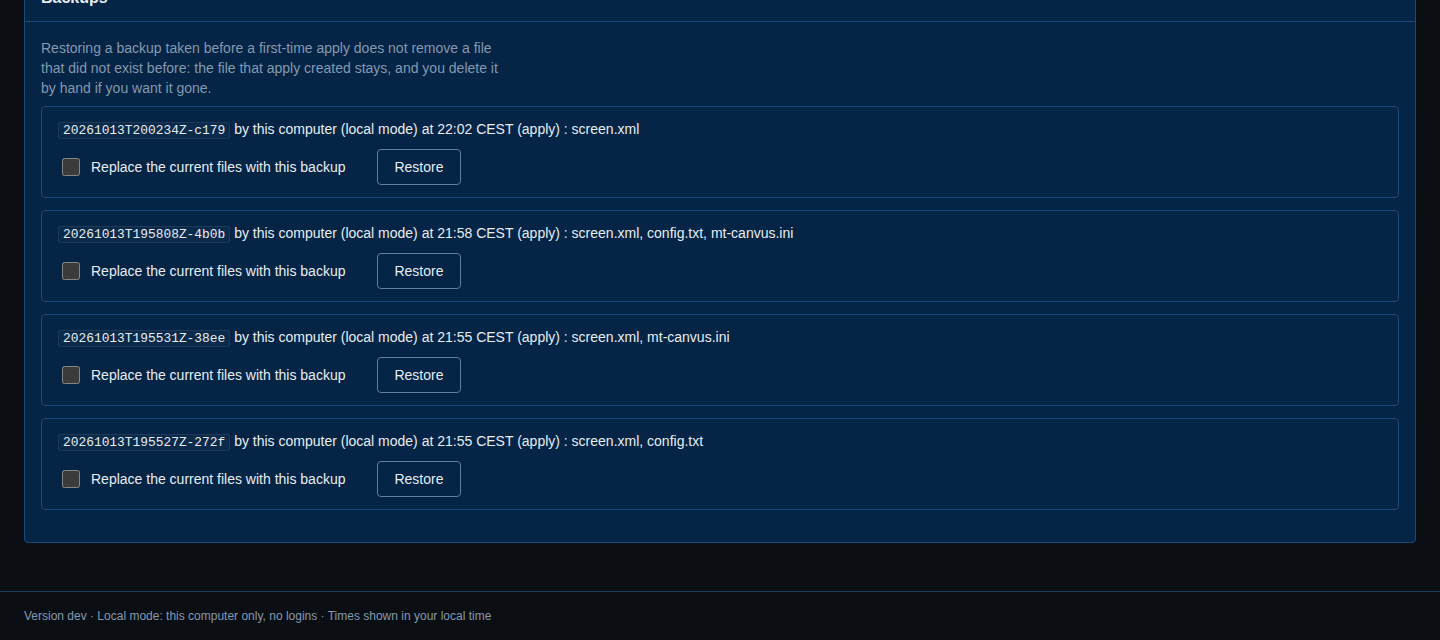
To go back, tick Replace the current files with this backup and select Restore. SiteManager backs up the current files first. See Backups and restore.