Sequencer
The Sequencer builds Sequence Widgets: timed shows that open and close other widgets on a schedule. You lay the show out on a timeline, like a simple video editor: a title that fades in, product photos that follow one another, a video beside them, and a card that pops out for visitors to keep. On the wall, the Sequence Widget plays the show by itself, then stops, holds its last scene, loops or plays backwards.
This page starts with a tutorial that builds a complete sequence and puts it on the wall, step by step. The reference after it lists every control.
Before you begin
- MT Showcase 26.10.4 or later on the server and on every player that will show the sequence. A player older than 26.10.4 cannot play sequences and shows nothing where one is placed.
- The Sequencer is turned on. From MT Showcase 26.11.0 it is on for every server. In 26.10.4 to 26.10.x an administrator has to turn it on first; see Turn the Sequencer on or off.
- An Editor account with the admin or author role. Other roles do not see the Sequencer.
- Some media in the Media Library: the tutorial uses three product photos and a video. Use your own; any images and video will do.
How a sequence is put together
| Term | What it is |
|---|---|
| Sequence | The whole show. It has a duration, a size and an end mode, and it is saved in the Widget Library as a Sequence Widget. |
| Track | A row on the timeline. Tracks run at the same time, so two things shown together go on two tracks. |
| Clip | One widget on a track: a text, an image, a video, a web page or any other widget, with a start time, a length, a fade in and a fade out, and a position and size on the stage. Clips on the same track cannot overlap. |
| Fire and forget | A clip that launches a separate copy of its widget instead of showing it inside the sequence. The copy stays open after the sequence has ended, like any widget a visitor opened. |
| End mode | What the sequence does when it reaches its end: Stop, Pause, Reverse or Loop. |
| Placement | Where the sequence is put in an app: on the Main layer, in a menu, a content hotspot or a Widget Group. Each placement can have its own size. |
Clip positions and sizes are percentages of the Sequence Widget, so the whole show scales with the widget: a sequence placed full screen and the same sequence in a small hotspot keep the same layout.
Tutorial: build a product showcase
You will build a 16-second sequence called Product showcase:
- a title, New this season, across the top for the whole 16 seconds;
- three product photos on the left, one after another, five seconds each;
- a video on the right from 2 to 16 seconds;
- at 14 seconds, a card that pops out on its own and stays open after the sequence ends.
Then you place it in an app and watch it on the wall.
Step 1: Create the sequence
- Click Sequencer in the left navigation, below Widget Library.
- Type a name in New sequence name, for example Product showcase.
- Click New sequence.
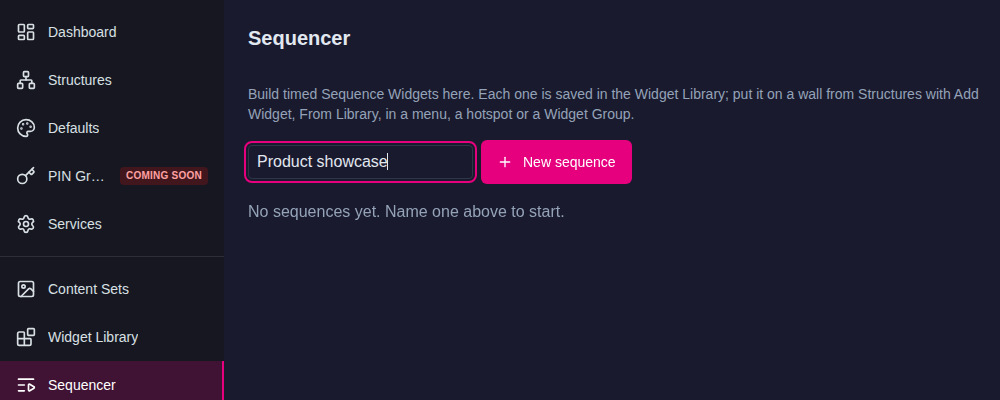
The Sequencer opens the new, empty sequence. The sequence is already in the Widget Library, and every Save writes to it there.
Tip
You can also start a sequence from the Widget Library: click New sequence at the top right of the page.
Step 2: Get to know the Sequencer page
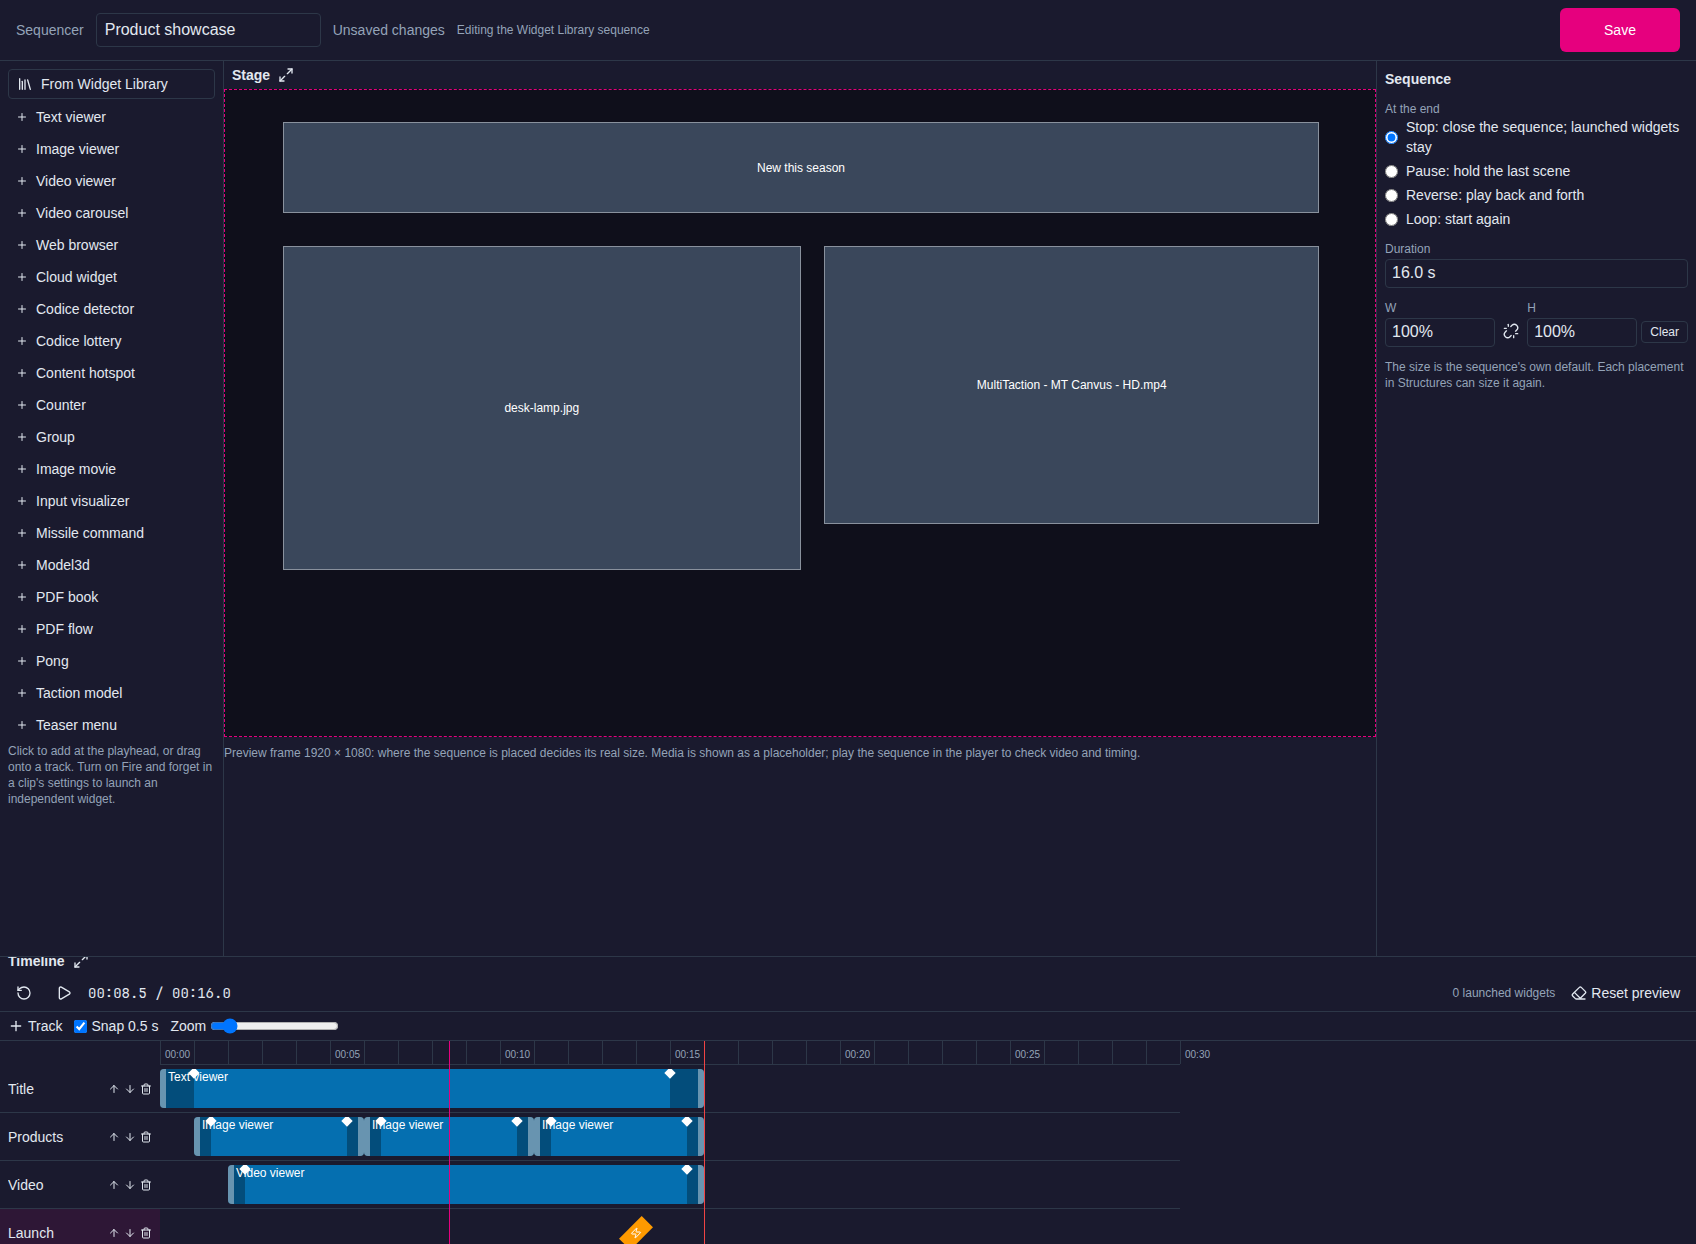
- Header (top): the sequence's name, which you can change here, the save status, which copy you are editing, and Save.
- Widgets (left): the widgets you can add as clips. From Widget Library at the top adds a widget you have already set up elsewhere.
- Stage (middle): a 1920 × 1080 preview of the sequence at the playhead's time. Each clip shows as a box at its position and size, faded as it will be at that moment. Images and videos are shown as named placeholders, not their pictures; play the sequence on a player to see the real content.
- Inspector (right): the settings of the selected clip. When no clip is selected, it shows the settings of the whole sequence.
- Timeline (bottom): the play controls, the tracks and their clips. The red line is the playhead.
The button next to the Stage and Timeline titles makes that panel larger, which helps with long sequences and many tracks. Click it again to go back.
Step 3: Add the tracks
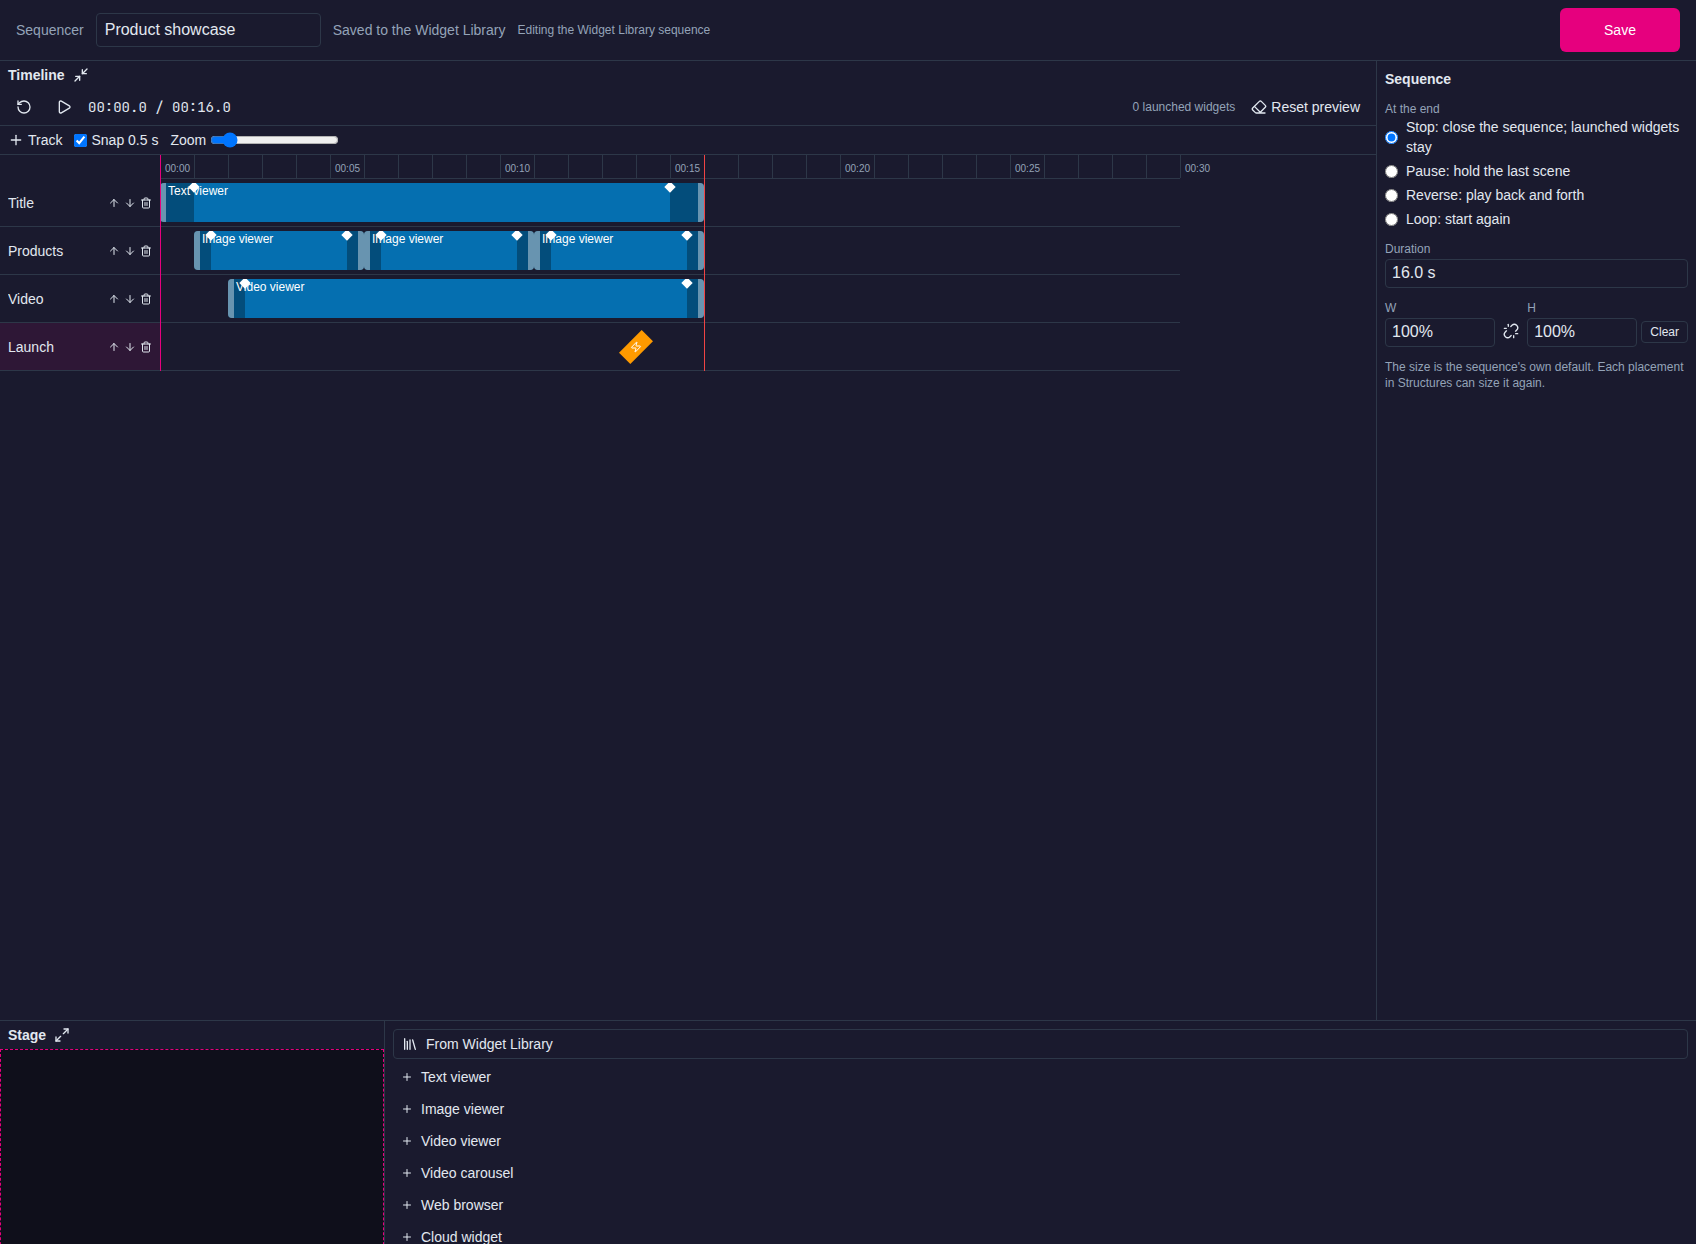
- Click + Track above the timeline four times.
- Double-click each track's name and rename them Title, Products, Video and Launch. Press Enter after each name.
Names are only for you; the wall never shows them. Use the arrows next to a track to move it up or down. The bin deletes the track with its clips.
Step 4: Add the title
- Click the Title track's name to select the track.
-
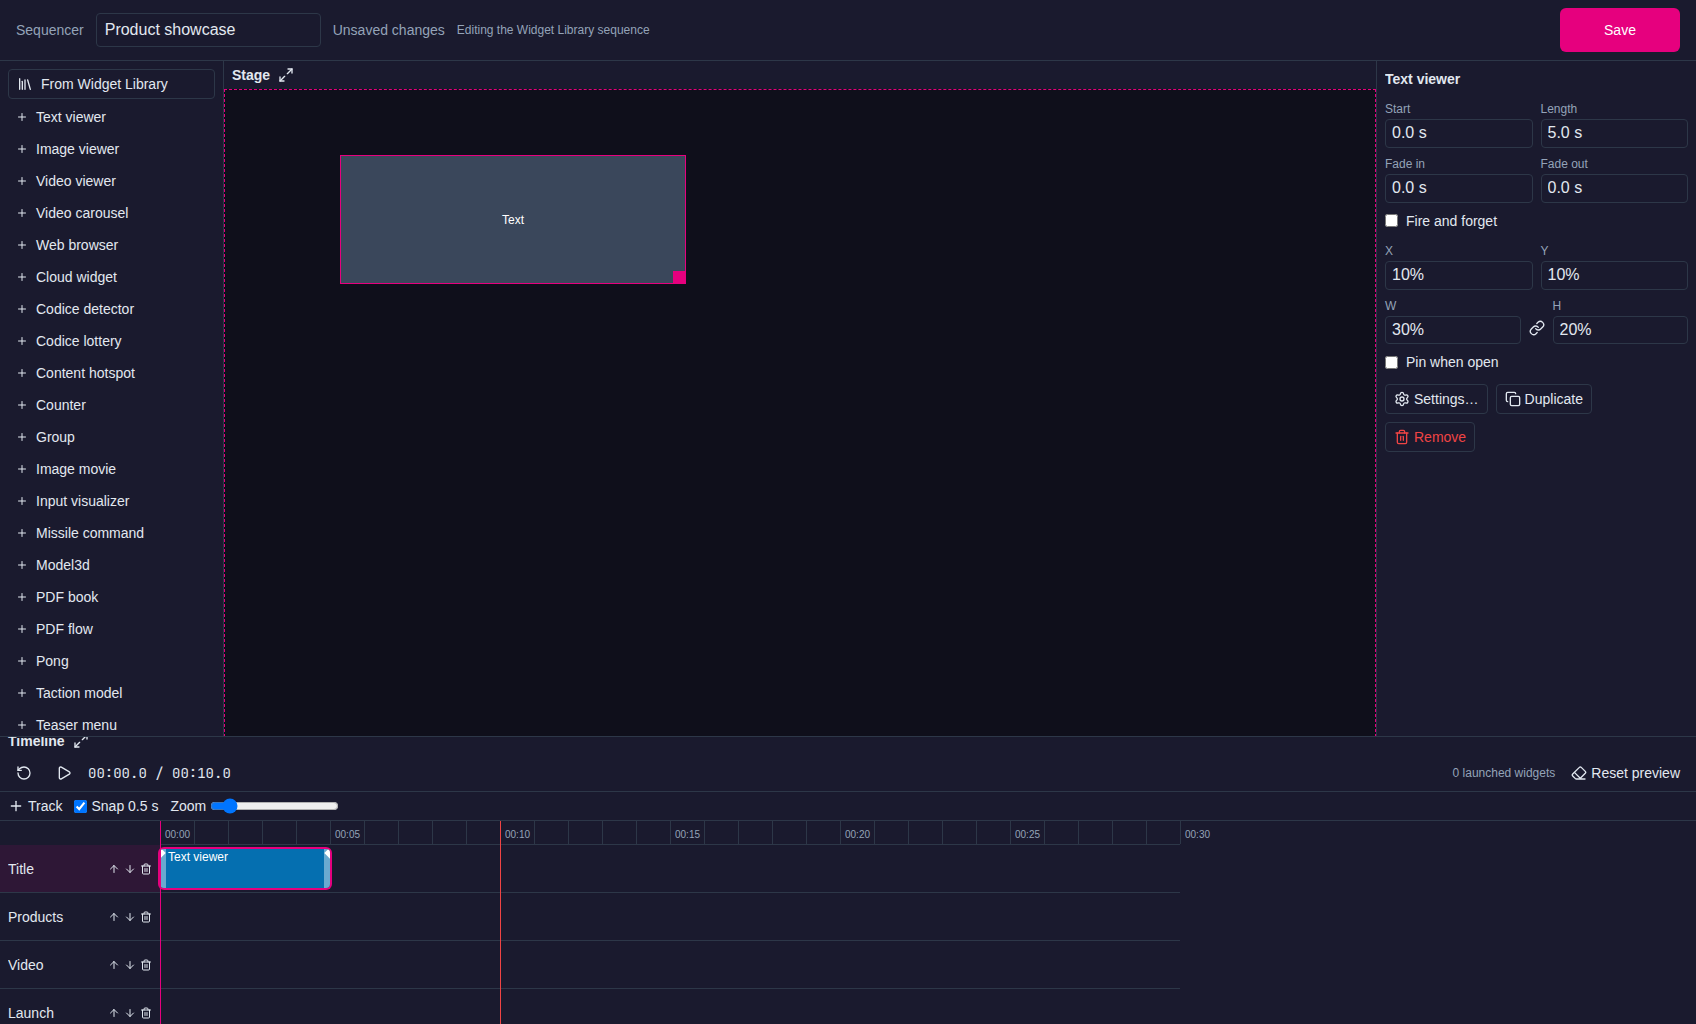
In Widgets, click Text viewer. A clip appears on the Title track at the playhead, and the Inspector shows its settings.
-
In the Inspector, set the timing. Type each value in seconds and press Enter:
- Length:
16 - Fade in:
1 - Fade out:
1
- Length:
- Click the link button between W and H so it shows a broken link. While it is linked, changing one of them changes the other to keep the box's proportions.
- Set the position and size, as percentages of the sequence:
- X:
5%, Y:5% - W:
90%, H:14%
- X:
-
Click Settings…. The dialog has the clip's timing and place again, and below them every setting of the Text viewer, the same as in Structures. In Text content, type New this season.
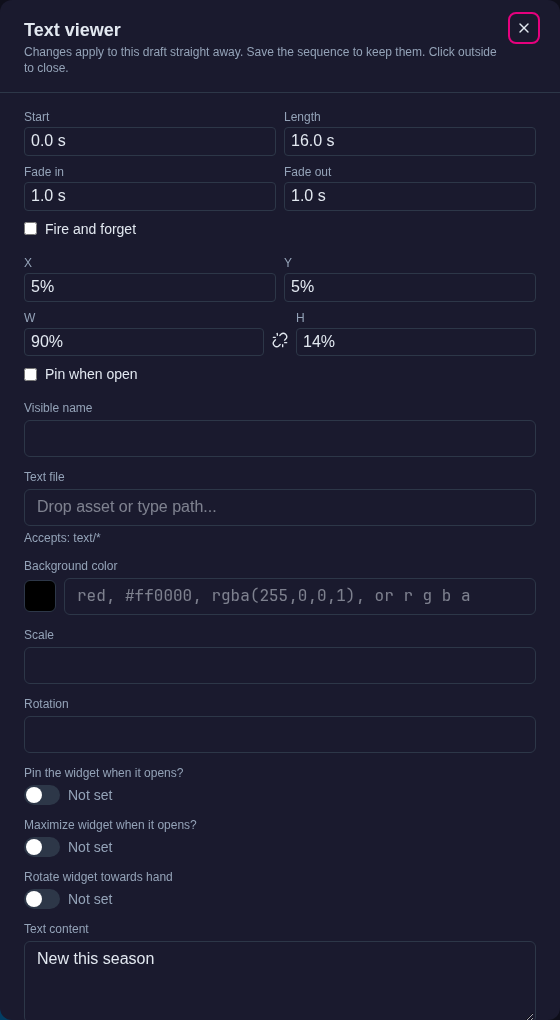
-
Close the dialog with the ×, or click outside it. Changes in the dialog apply straight away; there is no OK button.
The sequence grows to 16 seconds to fit the clip. The shaded ends of the clip on the timeline show its fades.
Step 5: Add the product photos
- Select the Products track and click Image viewer in Widgets.
- In the Inspector, set Start
1, Length5, Fade in0.5and Fade out0.5. - Click Settings…:
- In Image file, choose the first photo. Drag it in from the Media Library panel, or type its path in the Media Library, for example
Demo Products/lounge-chair.jpg, and press Enter. - Unlink W and H, then set X
5%, Y24%, W45%, H50%.
- In Image file, choose the first photo. Drag it in from the Media Library panel, or type its path in the Media Library, for example
- Close the dialog and click Duplicate. The copy starts where the first photo ends, at 6 seconds. Click Settings… and change its Image file to the second photo.
- Click Duplicate again for the third photo, at 11 seconds, and change its image.
The three photos now follow each other on one track, each fading out as the next fades in.
Note
Clips on the same track cannot overlap. If a change would make two clips overlap, the Sequencer refuses it and says so. To show two widgets at the same time, put them on different tracks.
Step 6: Add the video
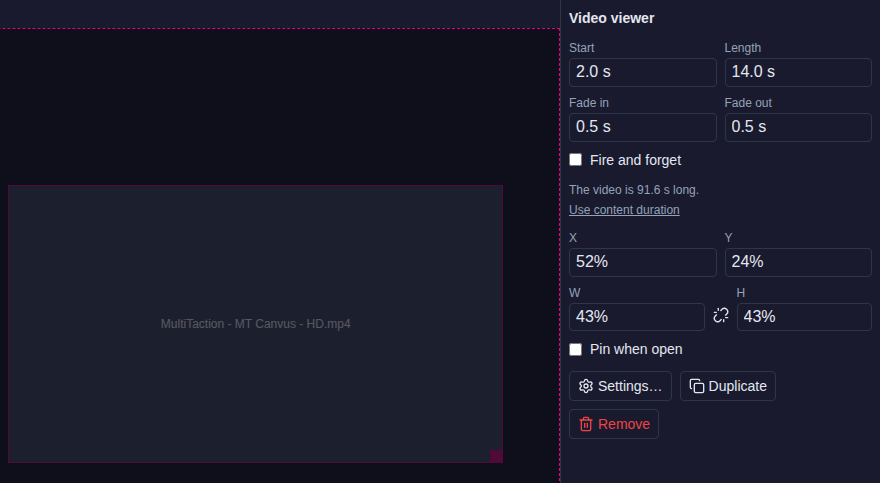
- Select the Video track and click Video viewer.
- Set Start to
2. - Click Settings…:
- In Video source, choose the video.
- Turn on Start video automatically, so the video plays when its clip opens. Turn on Mute video if the wall should be silent.
- Unlink W and H, then set X
52%, Y24%, W43%, H43%.
- Close the dialog.
As soon as the video source is set, the clip takes the video's own length. A long video makes the whole sequence that long. For the tutorial, set Length to 14, so the video ends with the sequence at 16 seconds. Set Fade in and Fade out to 0.5.
The Inspector now shows how long the video really is. Click Use content duration at any time to make the clip exactly as long as the video again.
Step 7: Launch a card with fire and forget
- Select the Launch track and click Image viewer.
- Set Start to
14. - Tick Fire and forget. Length and Fade out are cleared: a launched widget has no end, because the sequence does not close it.
- Click Settings…, choose an image, unlink W and H, and set X
55%, Y30%, W30%, H37.5%.
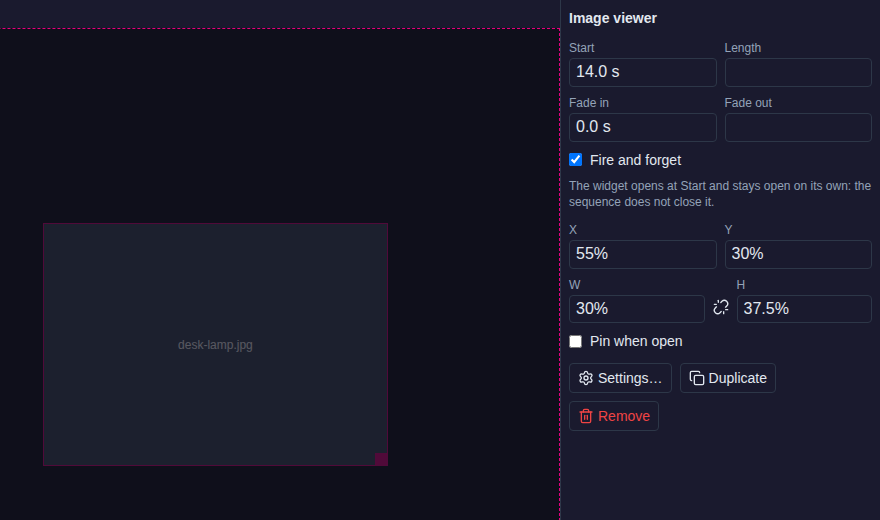
On the timeline, a fire-and-forget clip is a lightning marker at its start time instead of a bar.
At 14 seconds the sequence opens a separate copy of the image on the Main layer. Visitors can move, resize and close it like any widget they opened, and it stays open after the sequence ends.
Step 8: Set what happens at the end
Click an empty part of the stage, so that no clip is selected. The Inspector shows the sequence's own settings.
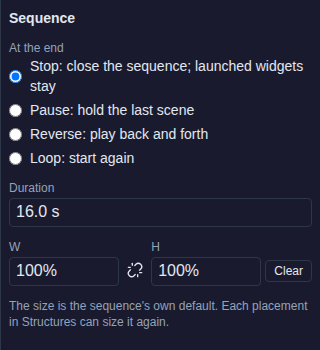
- Under At the end, keep Stop. See End modes for the others.
- Check Duration is
16.0 s. If you let the video run at its full length in Step 6, the sequence grew to fit it; type16here. - Unlink W and H and set both to
100%. This is the sequence's own size: a new placement in Structures starts at this size, here the full screen. Each placement can still be sized on its own.
Step 9: Preview the sequence
Use the controls above the timeline:
- Play and Pause.
- Restart: play from the start.
- Reset preview: close the widgets launched during the preview and return to the start.
- Click or drag on the time ruler to move the playhead.
Play the sequence through. The stage shows each clip as it opens and fades. At 14 seconds the launched card appears, marked Independent, and the counter beside Reset preview says 1 launched widget. The × on an Independent box closes it in the preview.
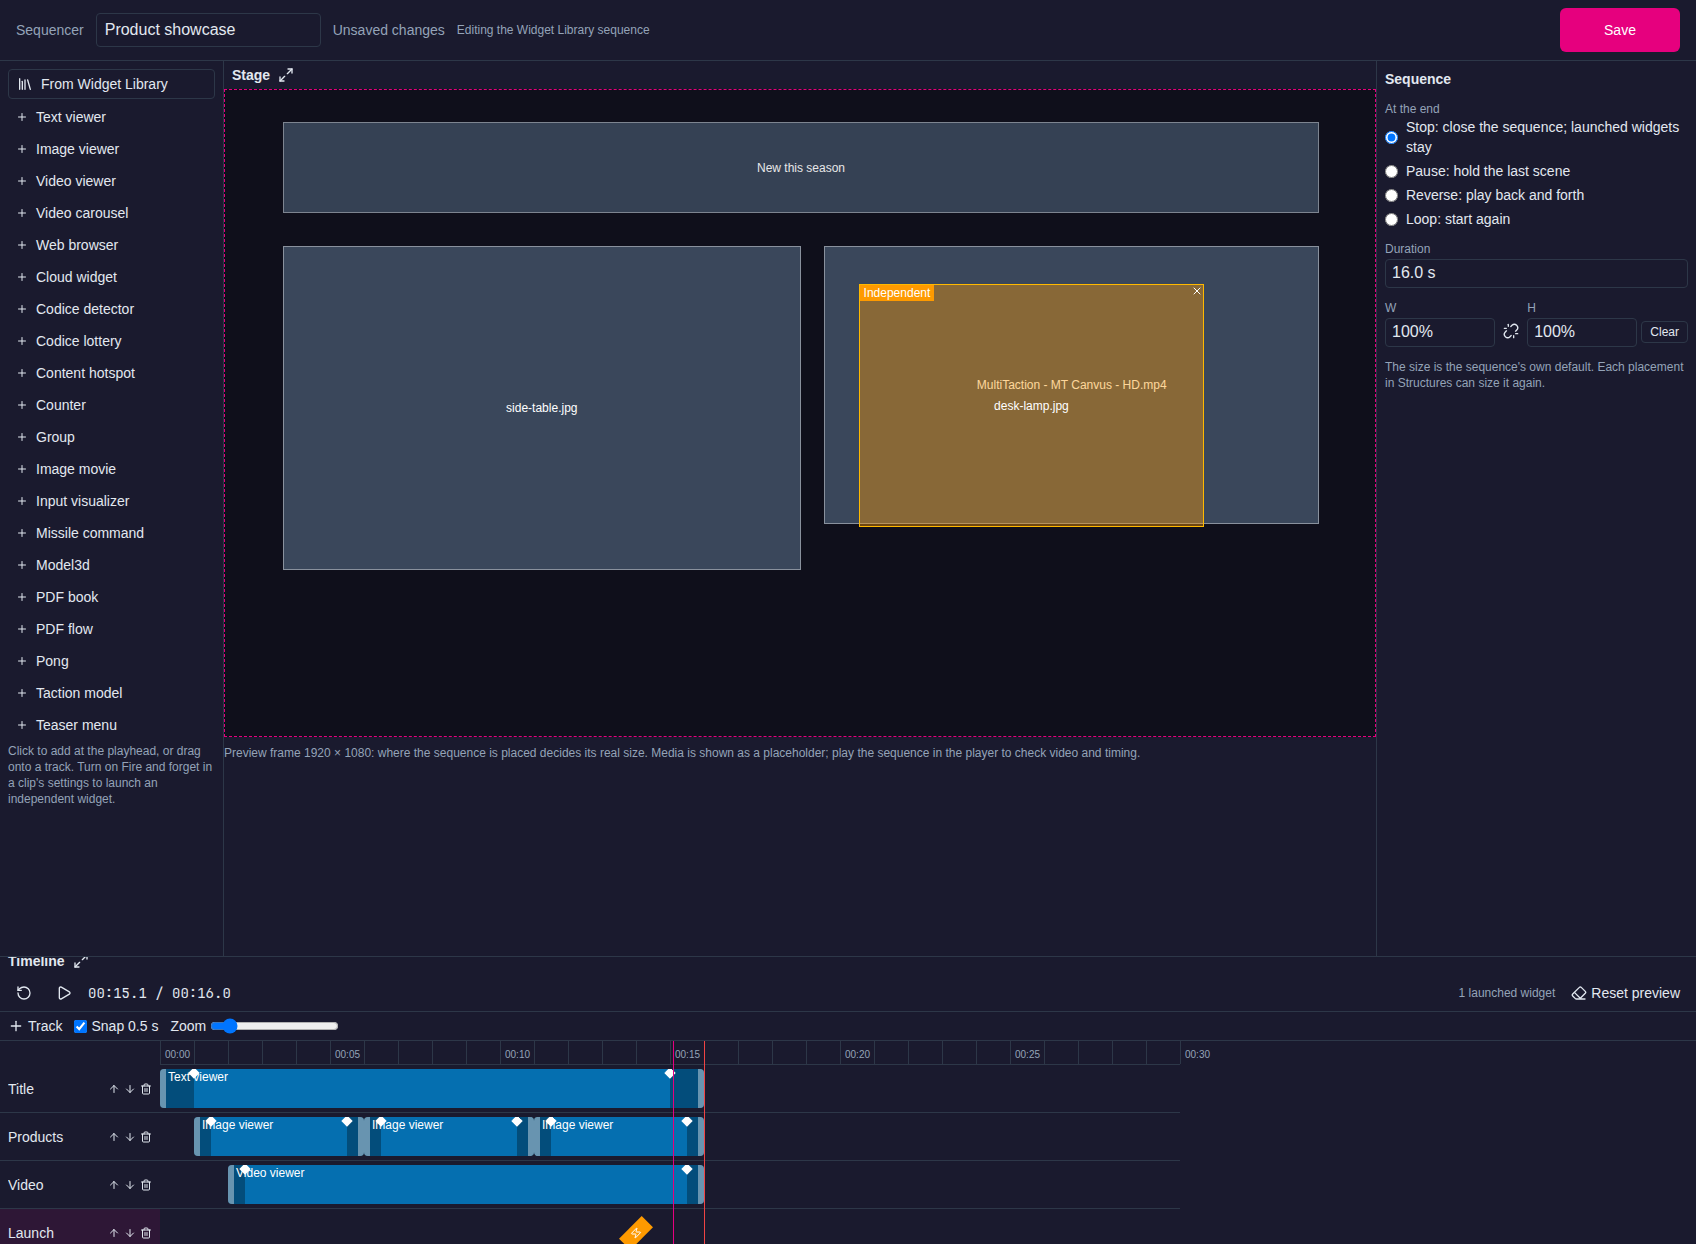
The preview checks timing and layout. It does not play media, so check the real thing on a player in Step 12.
Step 10: Save
Click Save. The status next to the name changes to Saved to the Widget Library.

Until you save, the status says Unsaved changes. If you leave the page or close the browser tab with unsaved changes, the Editor asks you to confirm first.
If the sequence has a problem, it is not saved. A banner lists the problems, and the clips that have them are outlined in red on the timeline; point at a clip to read its problem. Fix them and save again.
If someone else saved the same sequence while you were working on it, the Sequencer says so and offers Reload, to load their version, or Keep mine, to save yours over it.
Step 11: Put the sequence in an app
A sequence goes into an app from the Widget Library, like any shared widget. This example puts it on the Main layer of an app, full screen.
- Click Structures and select the app's structure.
- On the Main layer row, open the … menu and choose Add Widget.
-
Click From Library. Sequences are listed under Sequence. Click Product showcase.
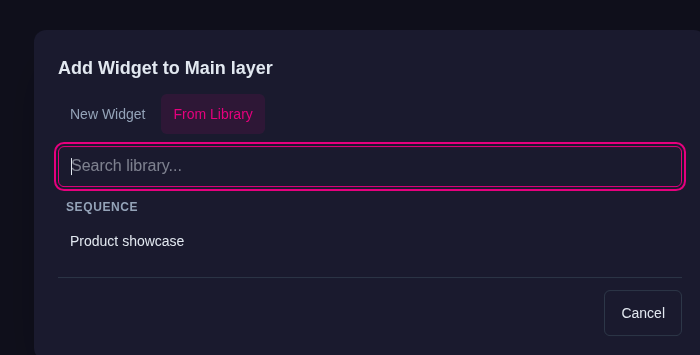
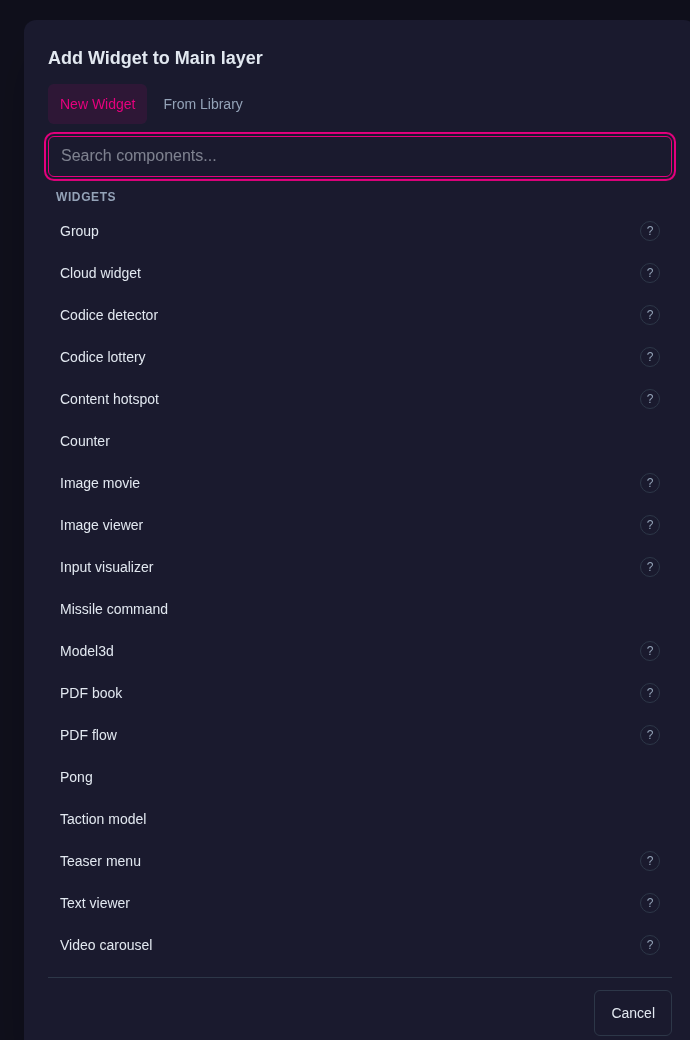
The New Widget tab does not list Sequence Widgets: a sequence is always made in the Sequencer.
-
Select the new Product showcase row in the structure. The panel shows the placement's settings:
- Size comes from the sequence's own size, 100% × 100% here. Change it to make this placement smaller or larger; the clips scale with it.
- Location, Scale and Rotation place it like any widget.
- Edit timeline in Sequencer at the top opens this placement in the Sequencer.
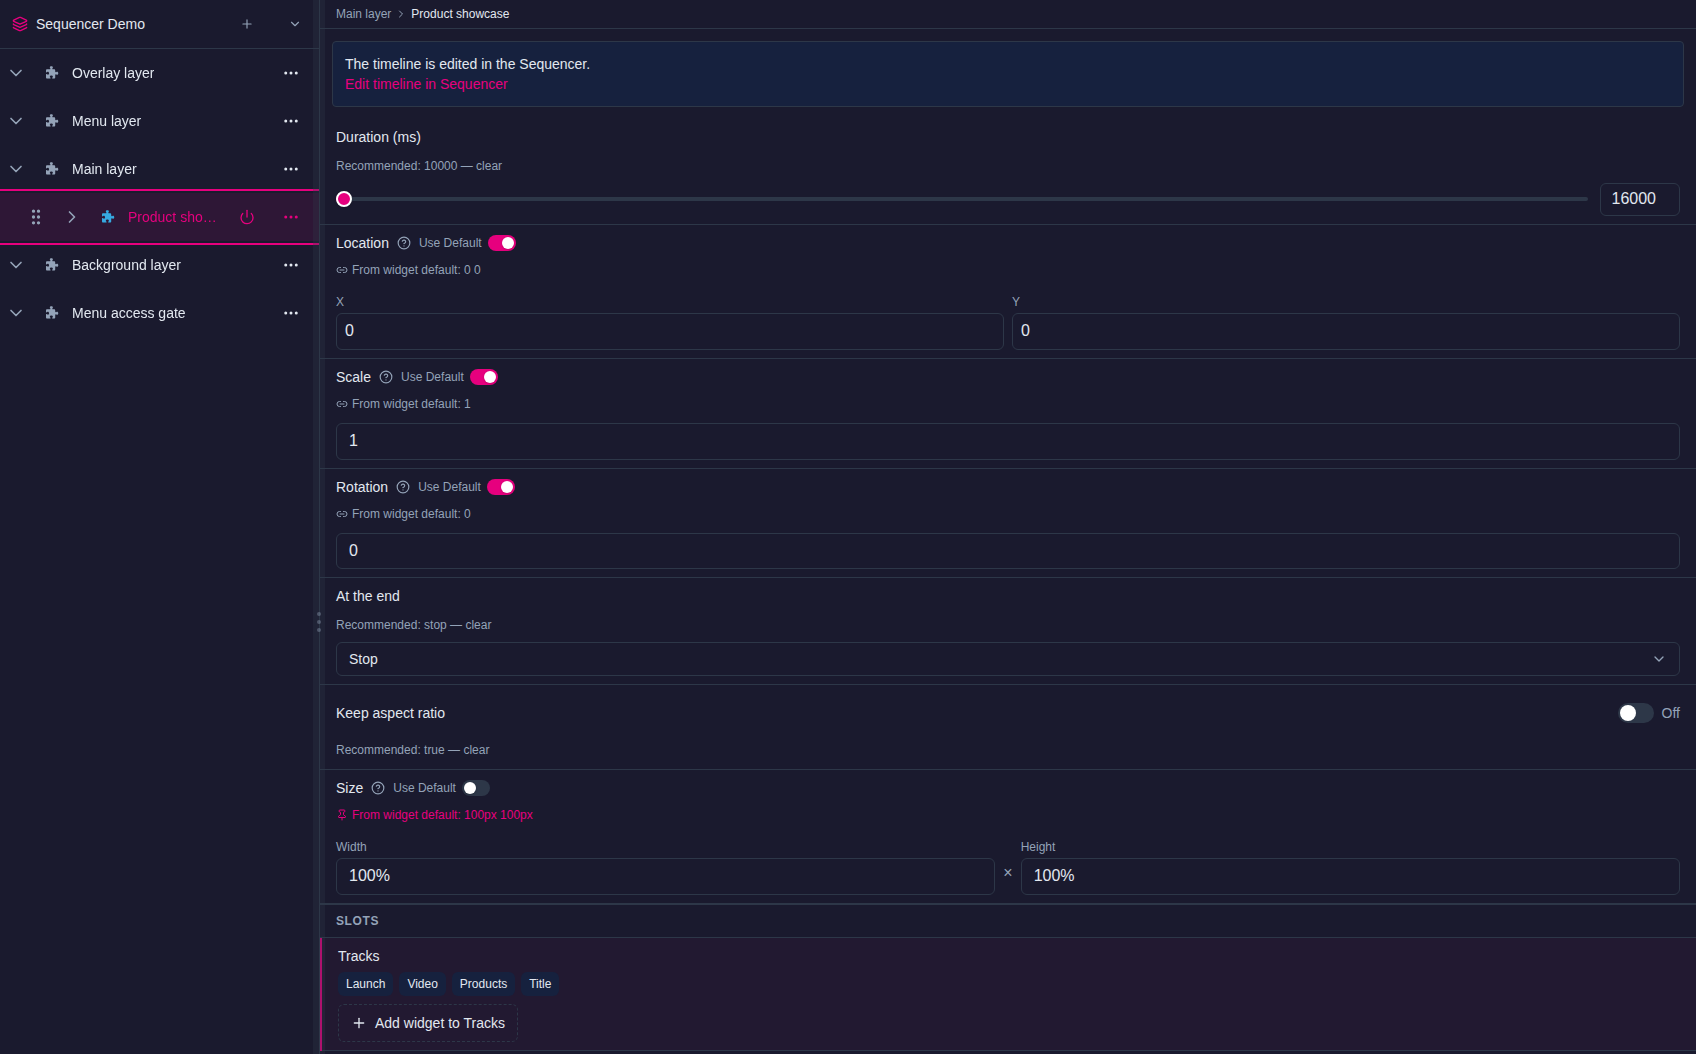
If the sequence has no size of its own, a new placement comes in at 100 × 100 pixels. Set its Size in the panel.
Step 12: See it on the wall
When the app opens, the Sequence Widget on the Main layer starts by itself. A sequence in a menu, a hotspot or a Widget Group starts when a visitor opens it.
A player waits until it has received the whole sequence, then starts the timeline. If it still has not got every clip after 10 seconds, it does not start the sequence and logs why, rather than playing part of it.
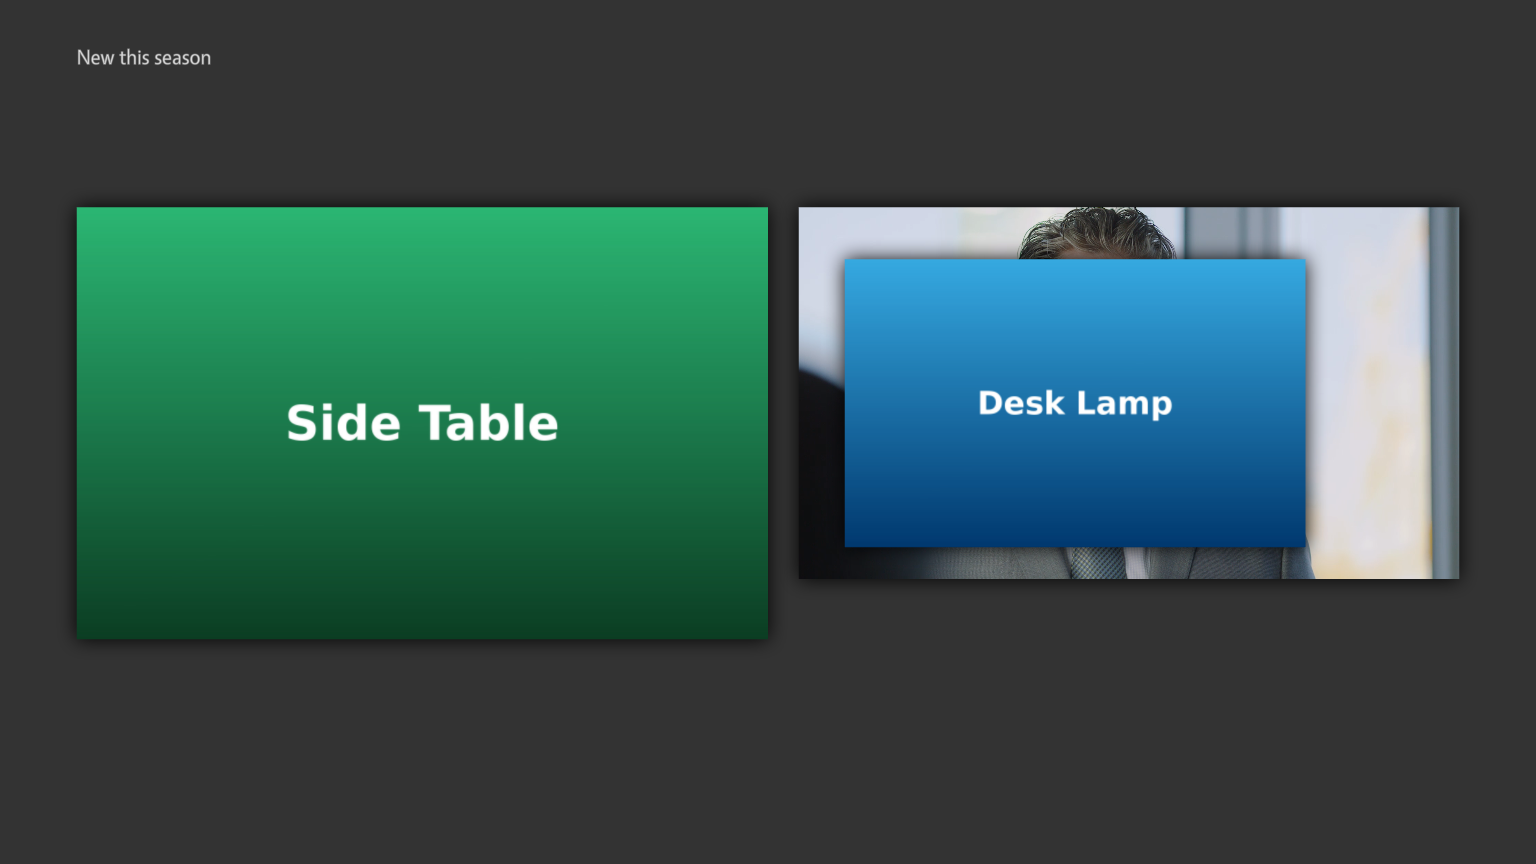
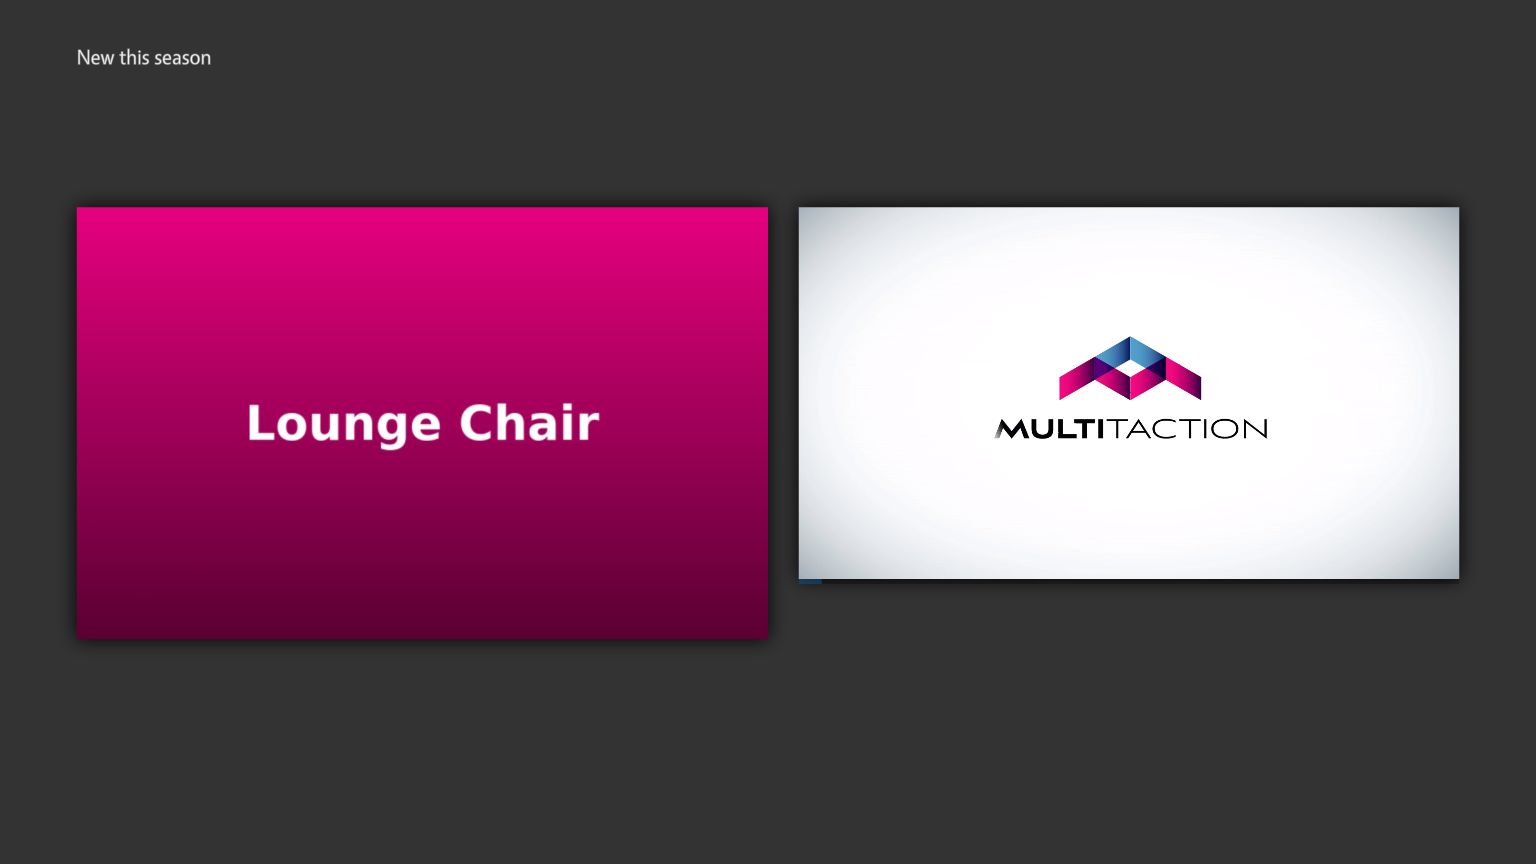
At about 5 seconds the title, the first product and the video are open:
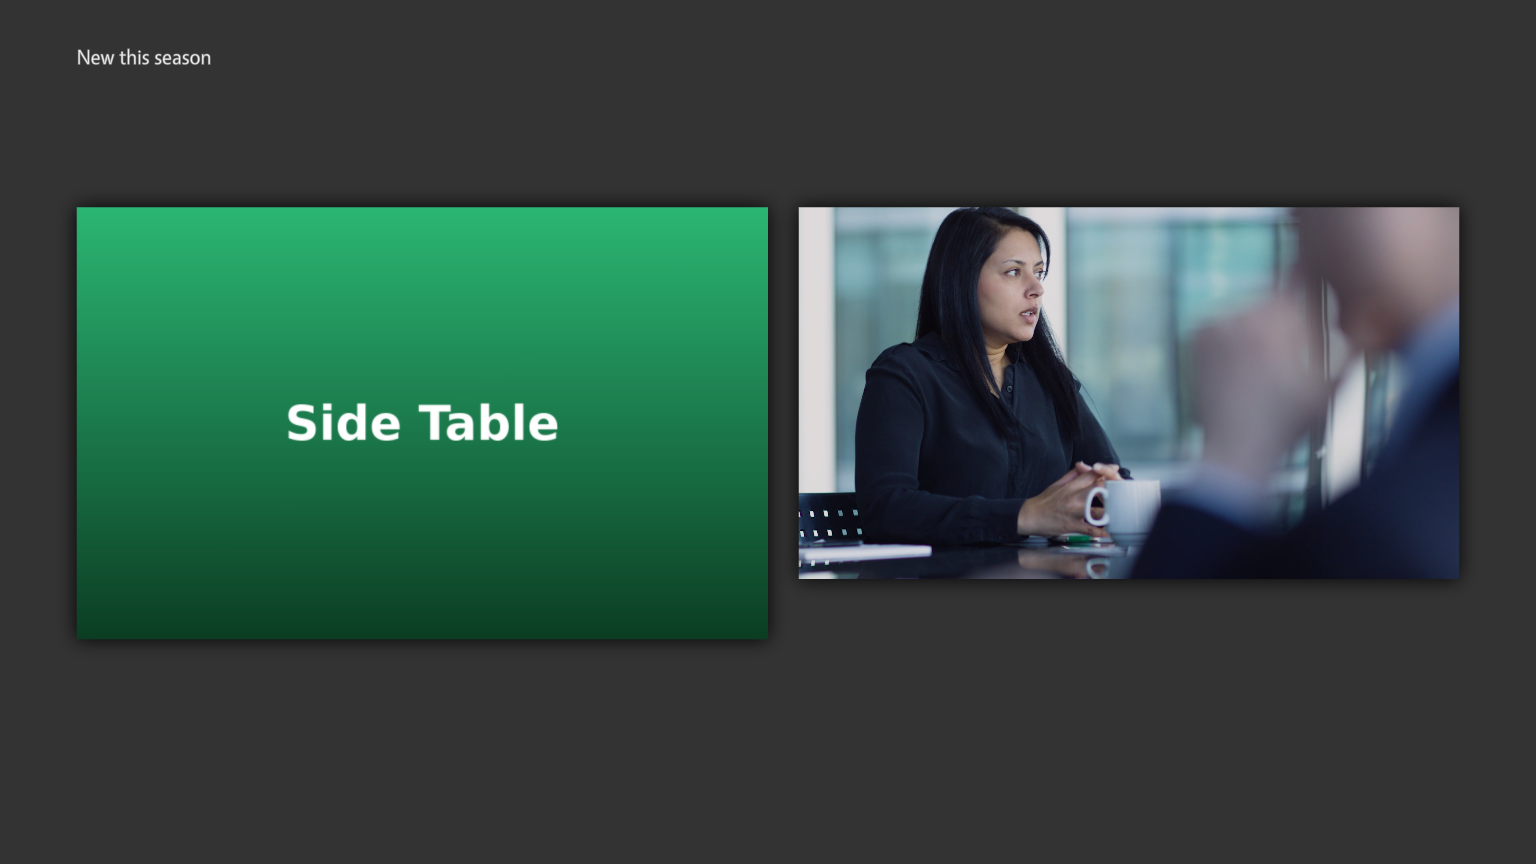
At 12 seconds the third product has faded in:
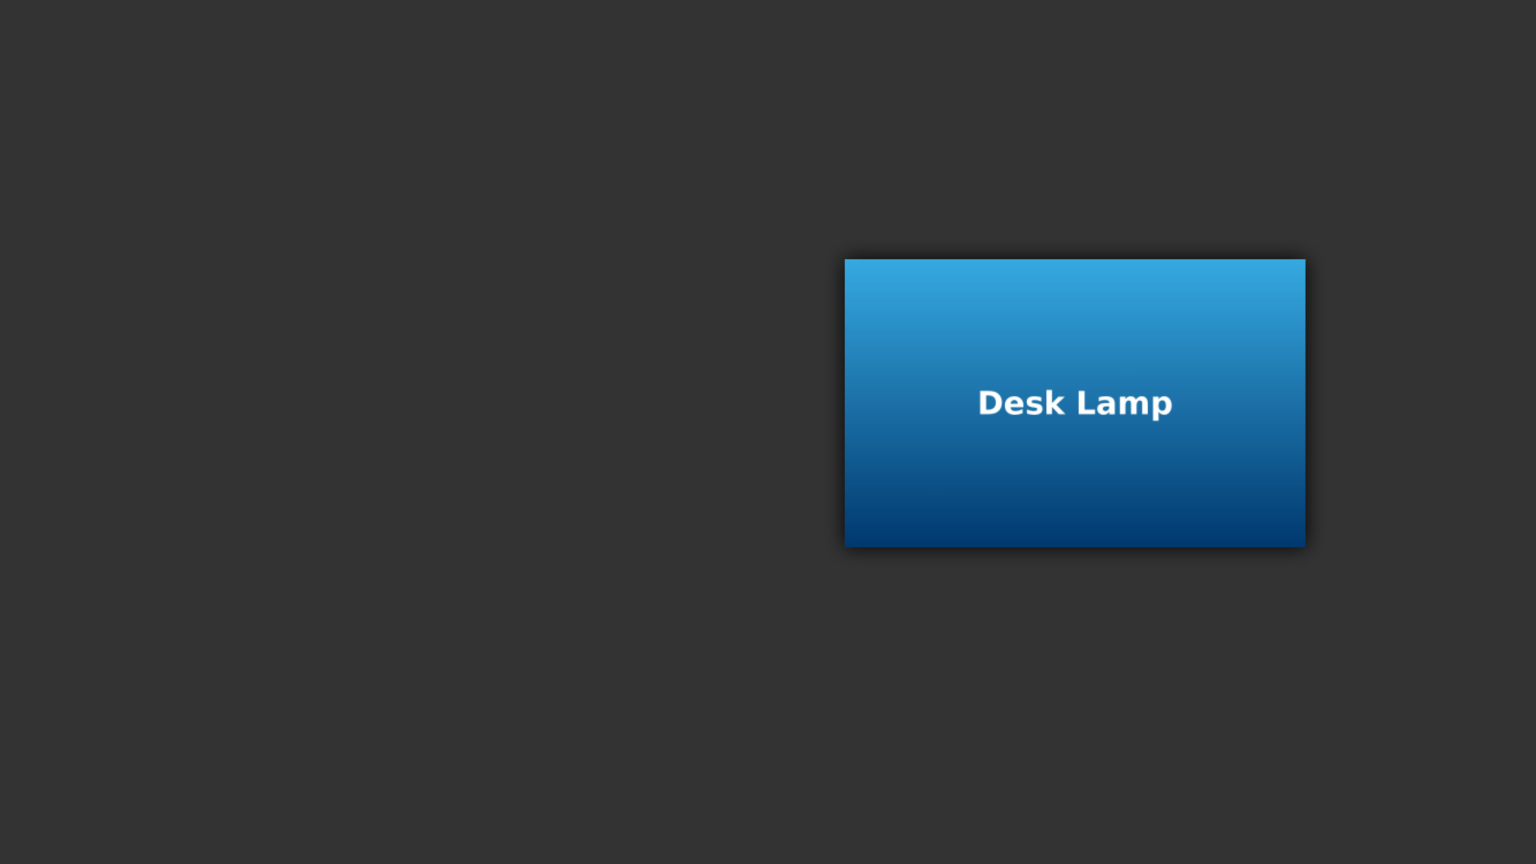
At 14 seconds the fire-and-forget card opens on top. At 16 seconds the sequence stops and closes its clips. The launched card stays open on the Main layer until a visitor closes it:
Reference
Timeline controls
| Control | What it does |
|---|---|
| + Track | Adds a track at the bottom. |
| Track name | Click to select the track: widgets clicked in Widgets are added to it. Double-click to rename it. |
| ↑ ↓ | Move the track up or down. |
| Bin | Deletes the track. If it has clips, the Sequencer asks first. |
| Drag a clip | Moves it along its track. |
| Drag a clip's ends | Makes it start later or end earlier, or longer. |
| Drag the white markers on a clip | Changes its fade in and fade out. |
| Snap 0.5 s | Keeps times on half seconds while you drag. |
| Zoom | Changes the timeline's scale. |
| Time ruler | Click or drag to move the playhead. |
With a clip selected, and no text box in use:
| Key | What it does |
|---|---|
| Left and Right arrows | Move the clip by 0.5 s (with Snap 0.5 s on) or 0.1 s. |
| Enter | Open the clip's settings. |
| Delete or Backspace | Remove the clip. |
Adding clips
- Click a widget in Widgets: the clip goes on the selected track at the playhead.
- Drag a widget onto a track: the clip starts where you drop it. Dropping on an empty timeline makes the first track.
- From Widget Library: choose a widget you have already set up, for example a web browser with its toolbar, or a styled text. The Sequencer copies it into the clip, so later changes to the library widget do not change the sequence. A Sequence Widget cannot contain another sequence.
Clip settings
The Inspector shows a clip's main settings. Settings… opens all of them.
| Setting | What it does |
|---|---|
| Start | When the clip opens, in seconds from the start of the sequence. |
| Length | How long it stays open. Not used for a fire-and-forget clip. |
| Fade in, Fade out | How long it takes to appear and disappear. |
| Fire and forget | Launch a separate copy of the widget on the Main layer at Start, which the sequence does not close. |
| X, Y | Where the clip's top-left corner sits, as a percentage of the Sequence Widget. |
| W, H | The clip's size, as a percentage of the Sequence Widget. The link button between them keeps the proportions. |
| Pin when open | Pins the widget so visitors cannot move it. |
| Use content duration | Shown for videos: makes the clip as long as the video. |
| Duplicate | Copies the clip, right after the original on the same track. |
| Remove | Deletes the clip. |
You can also drag a clip's box on the stage to move it, and drag its corner to resize it.
End modes
| End mode | At the end of the sequence |
|---|---|
| Stop | The sequence closes its clips and stops. Widgets launched with fire and forget stay open. |
| Pause | The sequence holds its last scene on screen. |
| Reverse | The sequence plays backwards to the start, then forwards again, back and forth. |
| Loop | The sequence starts again from the beginning. Fire-and-forget clips launch a new copy on every lap. |
Where a sequence can go
Place a sequence with Add Widget, From Library, anywhere a widget can go:
- on the Main layer, where it starts when the app opens;
- in a finger menu or branching menu, as an item of its content set;
- in a content hotspot, so it starts when a visitor taps the hotspot;
- in a Widget Group.
You can place the same sequence in as many apps and places as you like.
Edit a sequence later
Open a sequence from any of these:
-
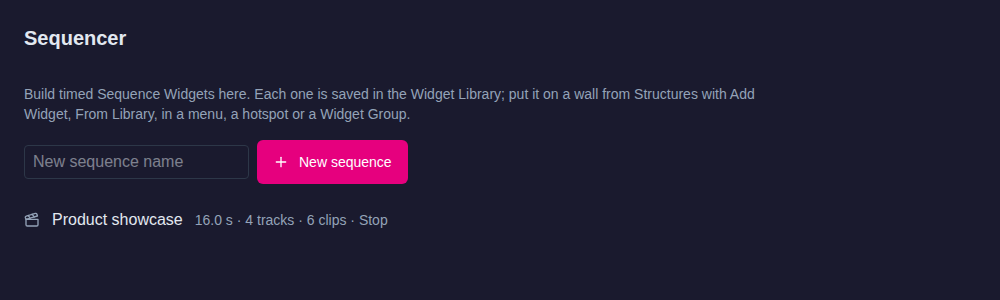
the Sequencer page: click its name. Each entry shows its length, tracks, clips and end mode;
-
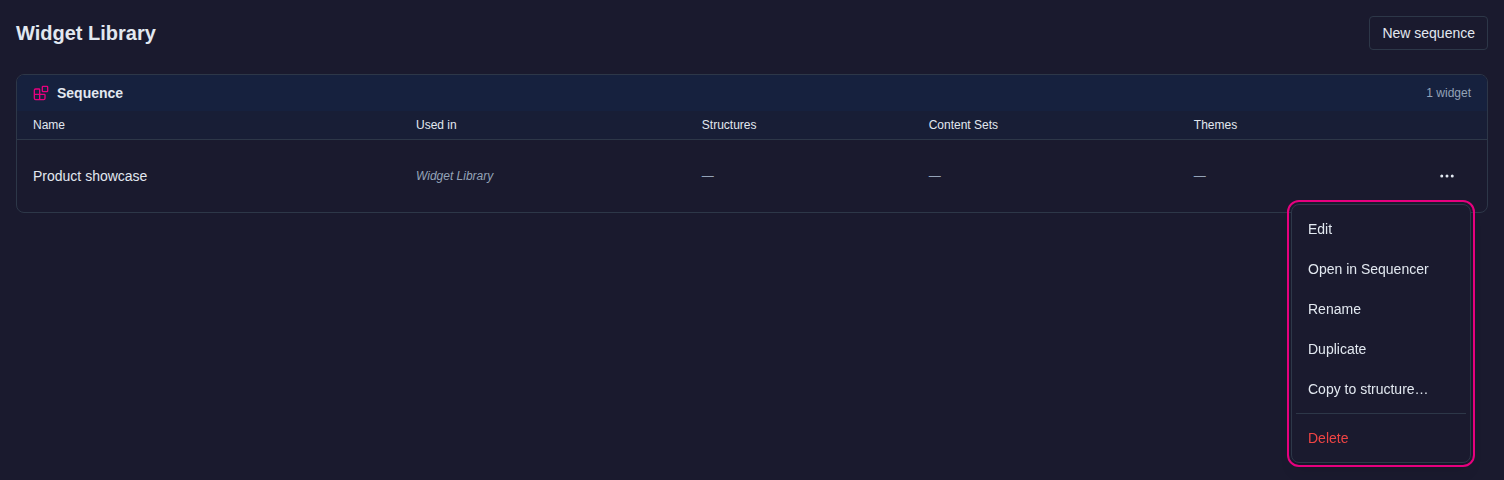
the Widget Library: sequences are listed under Sequence. Click the row, or choose Open in Sequencer from its … menu, which also has Rename, Duplicate, Copy to structure… and Delete;
-
Structures: select a placed sequence and click Edit timeline in Sequencer.
The line next to the save status says which copy you are editing:
- Editing the Widget Library sequence: you are changing the library entry.
- Editing a placed copy: changes affect only this placement: you are changing the sequence where it is placed in that structure. The library entry and other placements are not changed.

Troubleshooting
The Sequencer is not in the navigation, or it says "The Sequencer is not enabled on this server". The server has the Sequencer switched off; see Turn the Sequencer on or off. The Sequencer is also hidden from roles other than admin and author.
Nothing shows on the wall where the sequence is placed. Check that the player is MT Showcase 26.10.4 or later. If the player log says the sequence was refused, a clip did not arrive within 10 seconds: check that every clip's media file is still in the Media Library.
The stage shows grey boxes instead of my photos and video. That is expected. The stage previews timing and layout only. Check the content on a player.
The sequence is much longer than I expected. A video clip takes the video's full length when its source is set, and the sequence grows to fit. Shorten the clip's Length, then set the sequence's Duration.
With Loop, launched cards pile up. Each lap launches the fire-and-forget clips again, and launched widgets stay open until visitors close them. Use Stop or Pause, or leave fire and forget off in a looping sequence.
Turn the Sequencer on or off
The Sequencer is controlled by the server setting sequencer_enabled. From MT Showcase 26.11.0 it is true by default. In 26.10.4 to 26.10.x it is false by default.
To change it:
- Open
production_users.yaml. See File locations for where it is on Linux, Windows and macOS. -
Add one line, or change it if it is already there:
sequencer_enabled: trueUse
falseto hide the Sequencer. -
Restart Showcase Server.
Switching the Sequencer off hides the Sequencer page. Sequences that are already placed keep playing, and nothing is deleted. See also the Settings reference.