A tour of SiteManager
This page is a tour. It walks through the menu from left to right and says, for every page, what the page is for, when you will use it, and what it looks like. It ends with an order of work for your first day. For the detail of any page, follow its link to the reference part of this manual.
The screenshots show a small demonstration site: two walls (Lobby wall, a two-by-two wall, and Briefing table, two displays in a column with a Teams screen below them), one projector room (Immersive room), six displays, one profile and a few alert rules.
The menu in one minute
The menu at the top of every page has four groups. The groups follow the order in which you work.
- Site is for looking at the whole site: Overview, Walls, Rooms.
- Commission is for setting a site up: Discover, Import, Cornerstone files, This computer.
- Maintain is for changing displays: Select displays, Settings, Profiles, Firmware, Security, Jobs.
- Monitor is for watching: Alerts, Drift, Diagnostics, Audit.
The current page is underlined. The black band above the menu also holds the alert pill (No alerts, or a count such as 4 warnings), and a Light / Dark button for the theme.
Under the menu, a line shows where you are, for example Maintain › Jobs, and when the page was last updated. A green live means the page follows changes by itself, so you never have to reload it.
On a phone
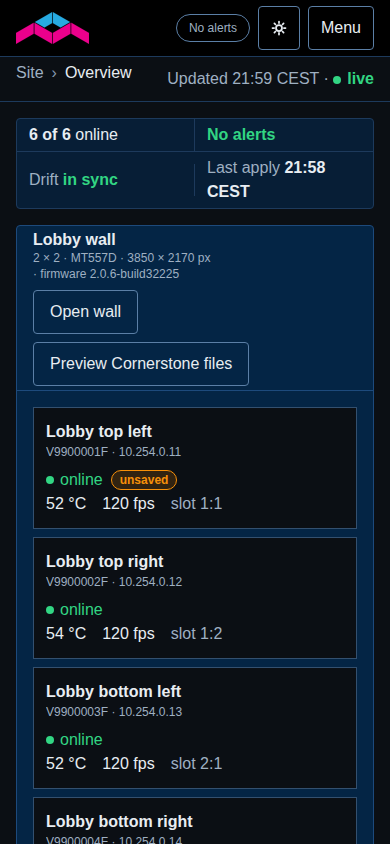
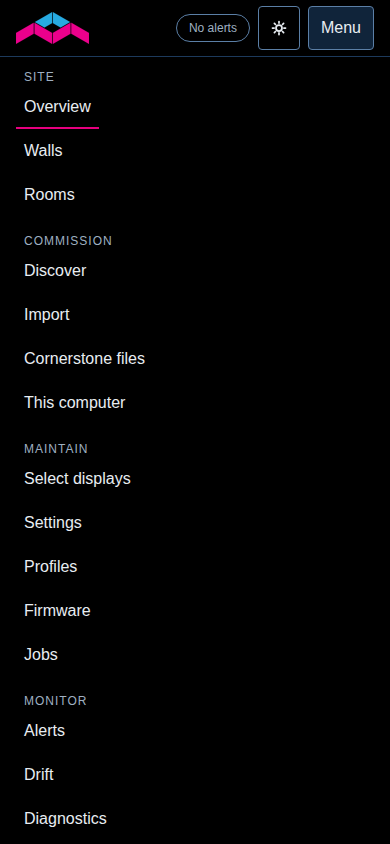
SiteManager works on a phone. Below a certain width the menu folds behind a Menu button, and the displays of a wall are stacked one under the other instead of drawn as a grid. Each tile still shows the display's name, address, state, temperature and frame rate, and a slot 1:2 note says where it is on the wall.
Site
Overview
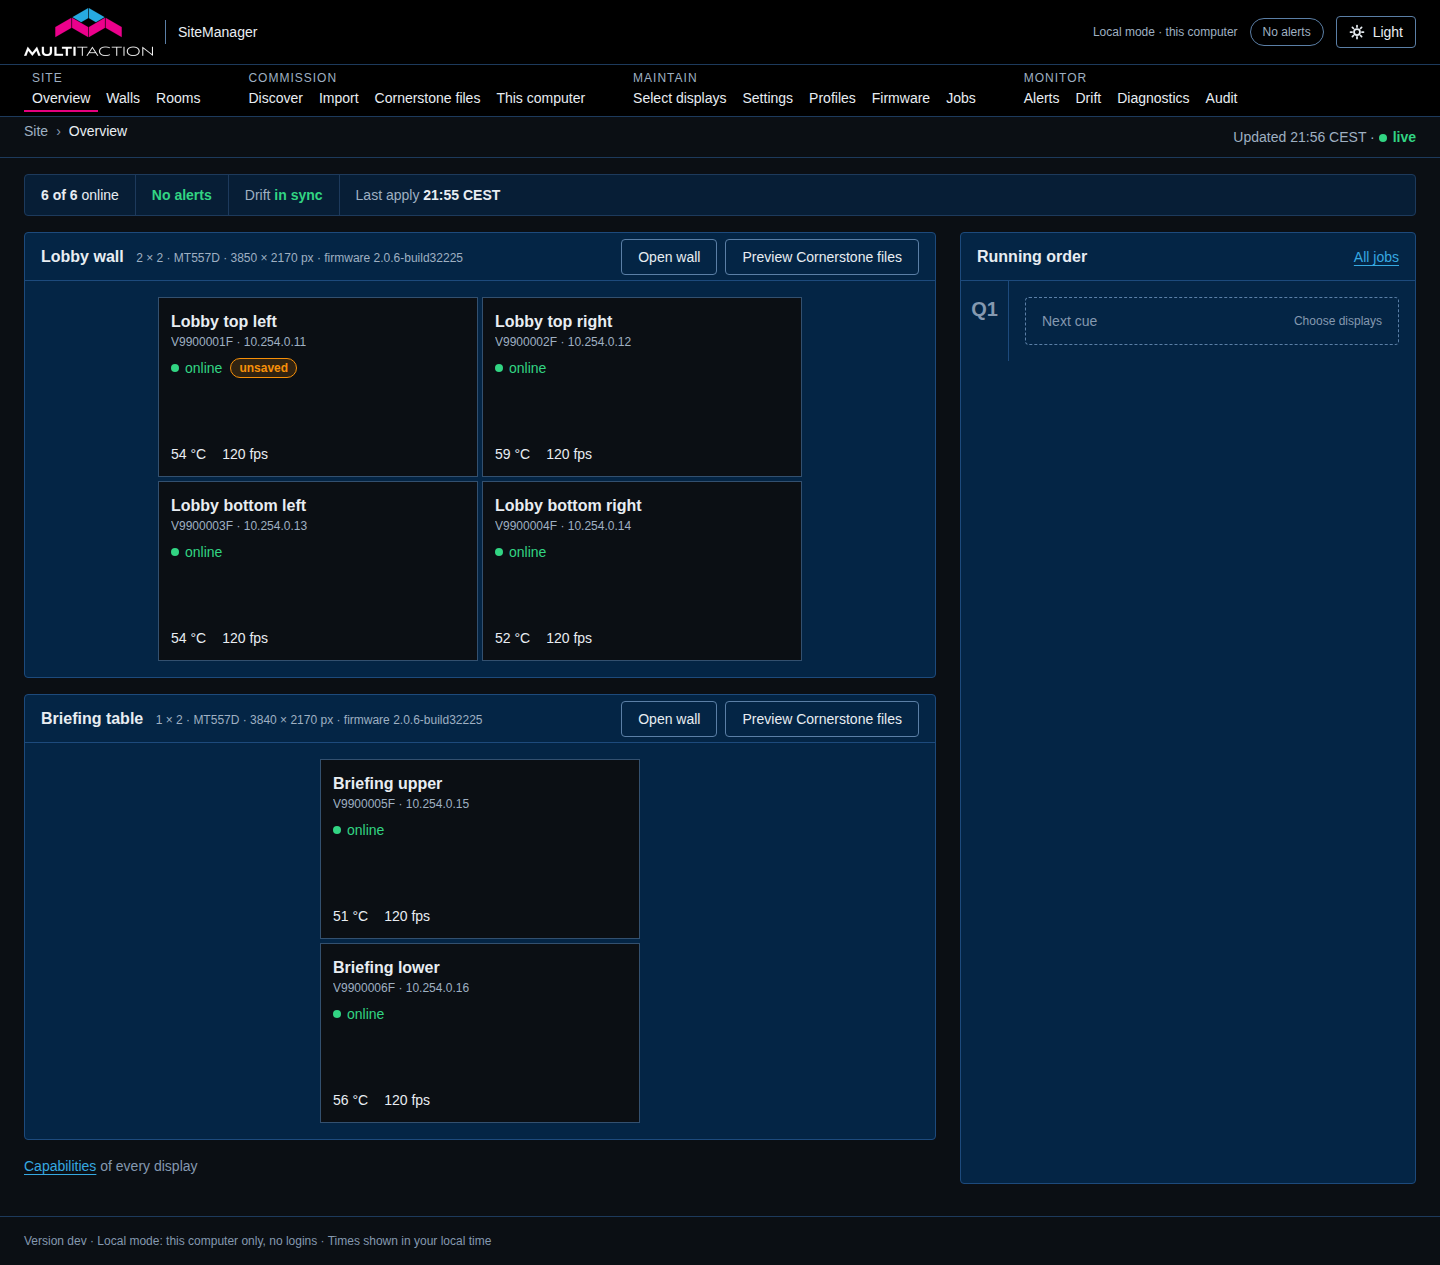
What it is for. The overview is the home page. A strip at the top sums up the site: how many displays are online, how many alerts are active, whether any display has drifted, and when Cornerstone files were last applied. Under it, each wall is drawn like the real wall, with one tile per display. A tile with a warning has an orange outline. The Running order on the right lists jobs and the cues that wait for your go-ahead.
When you use it. Every time you open SiteManager. Select a tile to open that display's own page.
Details: The overview, Standby and Go.
Walls
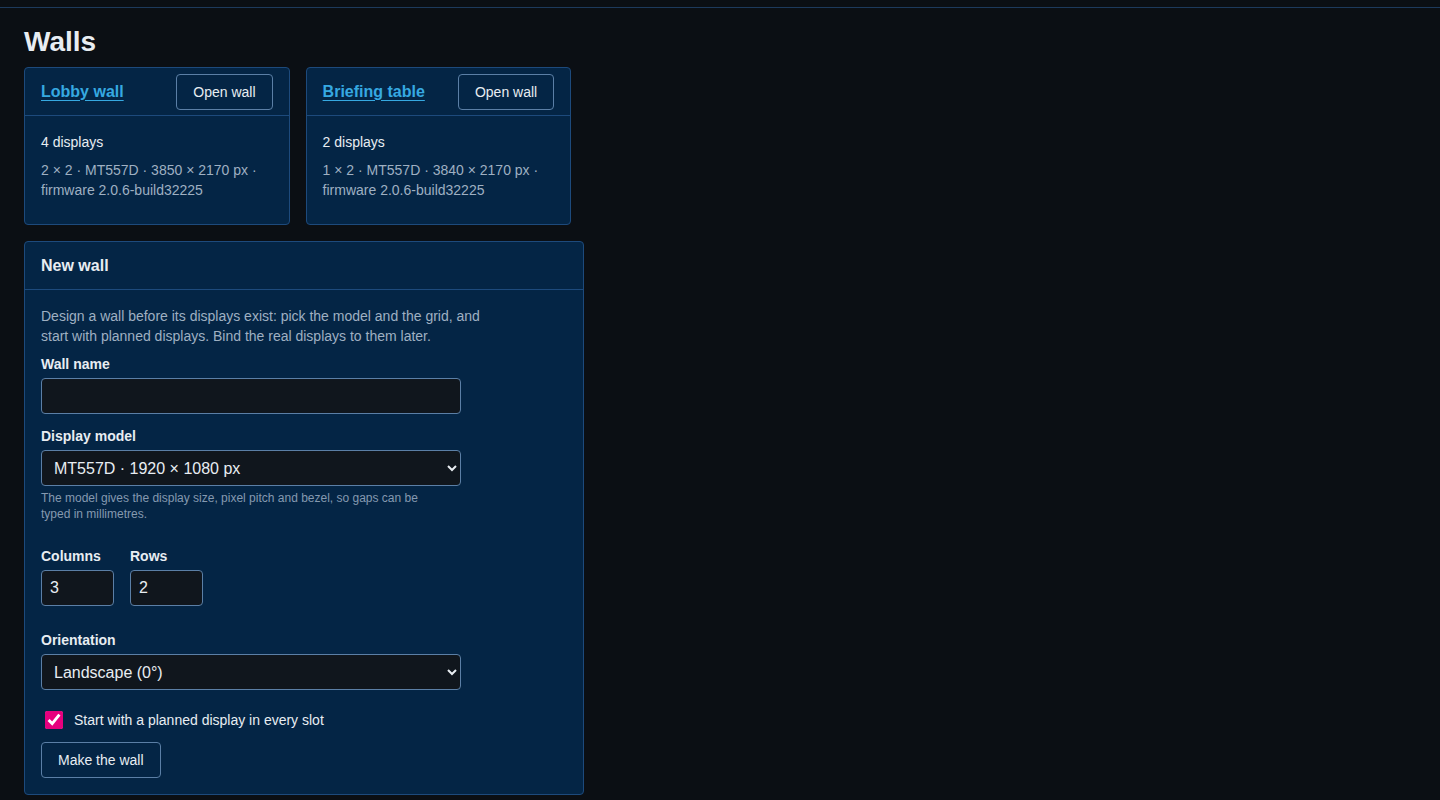
What it is for. The list of your walls, and the place where you make one. Each wall is a card with its number of displays, its model and grid, and its size. Open wall opens the wall designer, where you place displays, add extra outputs and preview the files. The New wall form asks for a name, a display model, columns and rows, and an orientation. Import a wall makes a wall from a file exported from another wall.
When you use it. When you set up a wall, and whenever a wall changes shape.
Details: The list of walls. Step by step: Set up a wall. What a wall is: Walls and rooms.
Rooms
What it is for. Projector installations use rooms instead of walls. A room is made of projection surfaces covered by projectors that overlap and blend. The page lists the rooms and has a New room form (Id, Name, projector columns and rows, the size of one projector's picture and the overlap).
When you use it. Only if the site has projectors. A site with only display walls never needs it.
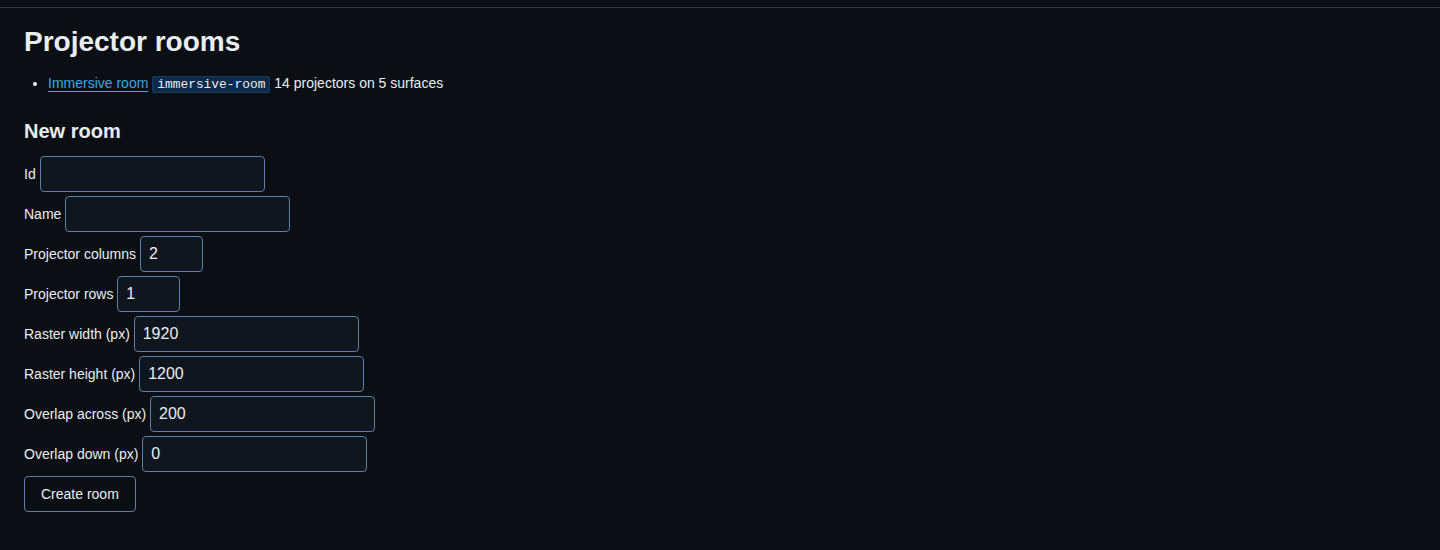
Details: Projector rooms. Step by step: Set up a room.
Commission
Discover
What it is for. Finding displays on the network and adding them to the site. There are three ways: Broadcast (asks every display on this computer's networks to answer), Sweep a network range (asks every address in a range such as 10.254.0.0/24), and Add by IP or list (type an address, or paste a list). Found displays appear under Found displays. Nothing joins the site until you add it.
When you use it. On the first day, and again when you add a display. Displays are identified by their serial number, so a display that gets a new address is still the same display.
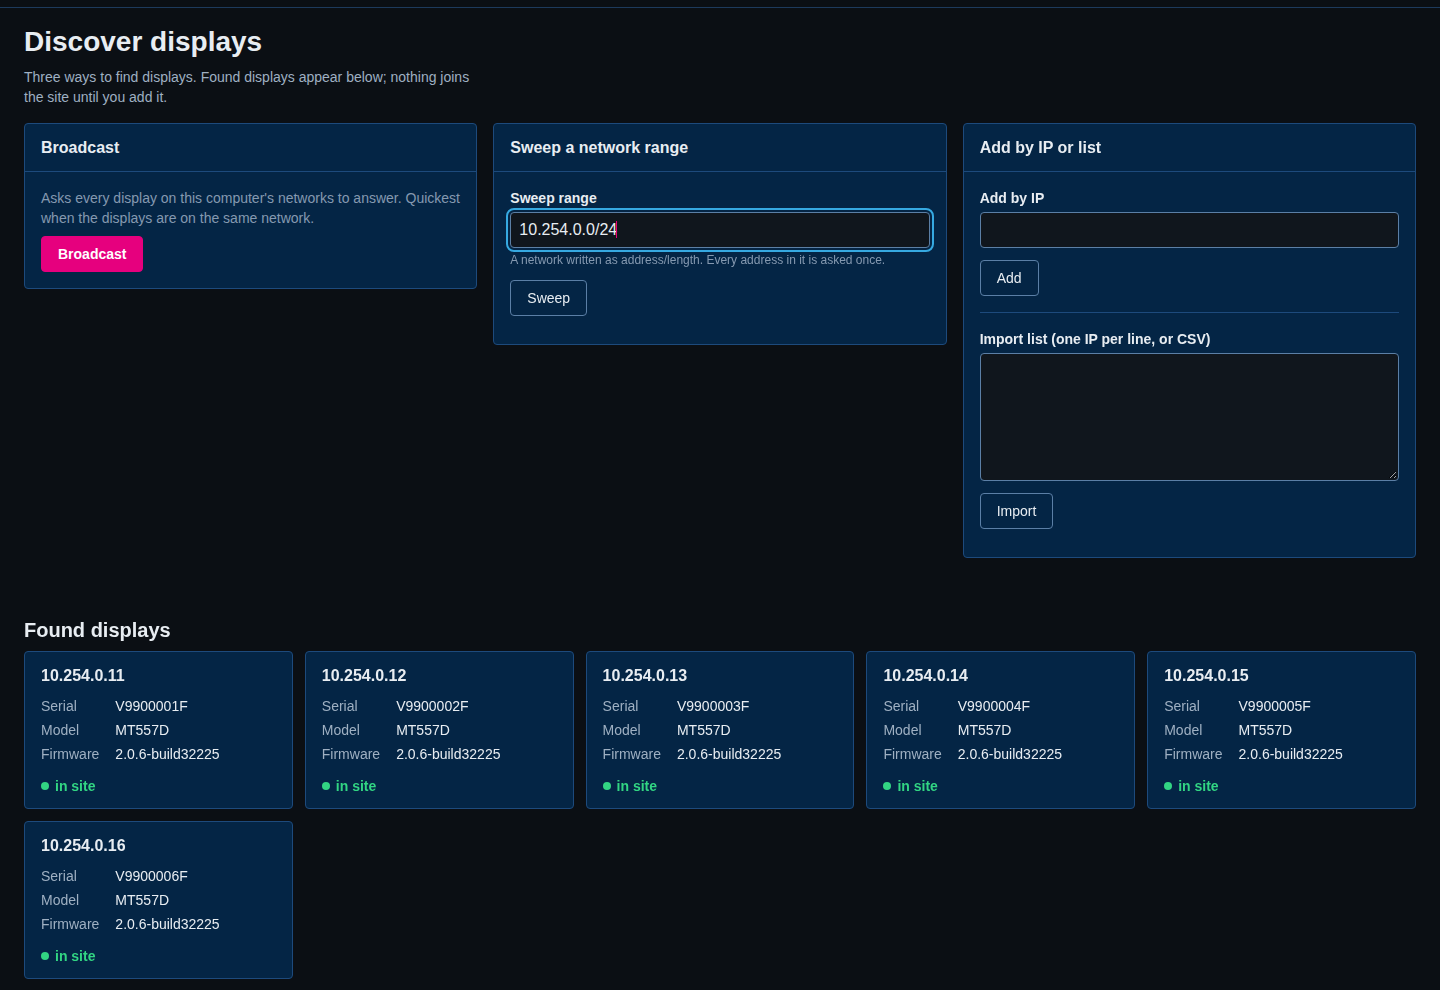
Details: Find and add displays.
Import
What it is for. Bringing in a project saved by the SiteManager 2.x desktop app (a .mtspf file). The page shows a preview and saves nothing until you confirm. A link on the same page, Import Cornerstone files, leads to the import of screen.xml, config.txt and mt-canvus.ini from a wall that is already set up.
When you use it. Once, when you take over a wall that was set up with SiteManager 2.x or by hand.
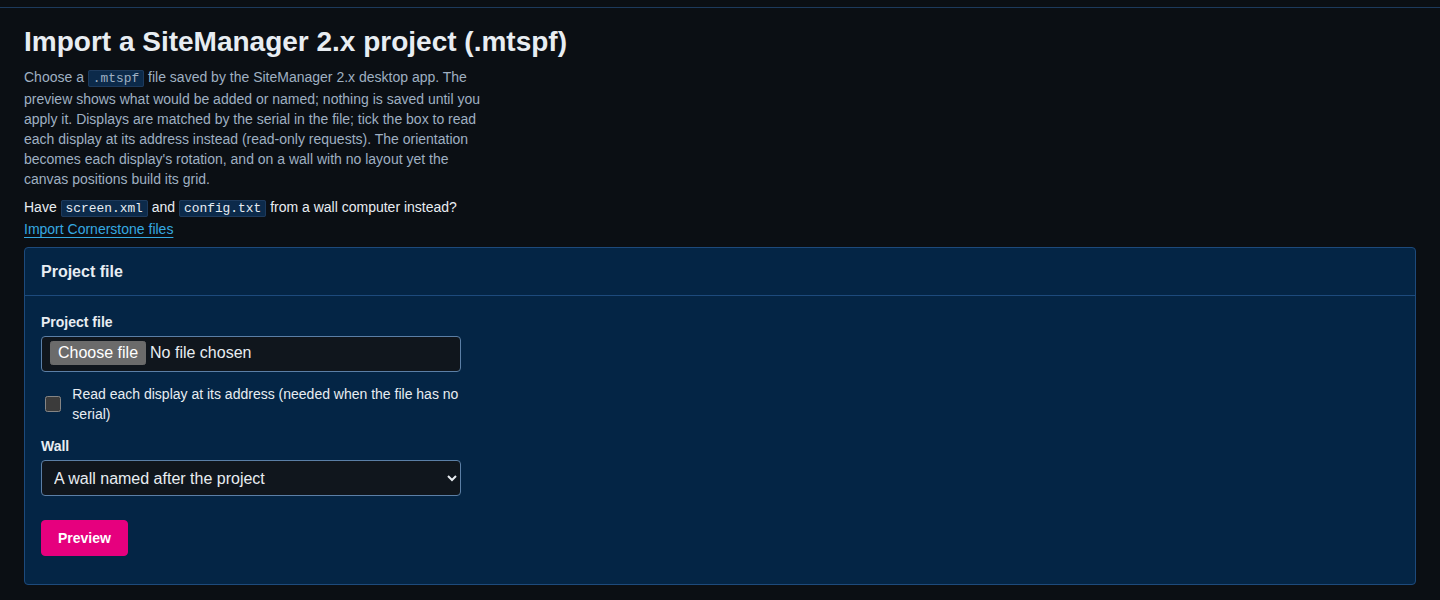
Details: Moving from SiteManager 2.x. Step by step: Bring in an existing wall.
Cornerstone files
What it is for. This page writes the files that Canvus and Showcase read: screen.xml, config.txt and mt-canvus.ini. It shows the Windows the files define, the Generated files and where each one will be written, and a Preview that compares each generated file with the one on the computer now. Apply the ticked files writes them. It makes a backup first. Under it are a Touch preview and the list of Backups, each with a Restore button.
When you use it. After every change to a wall, a room or the settings on This computer. SiteManager never restarts Canvus or Showcase: restart the application yourself after an apply.
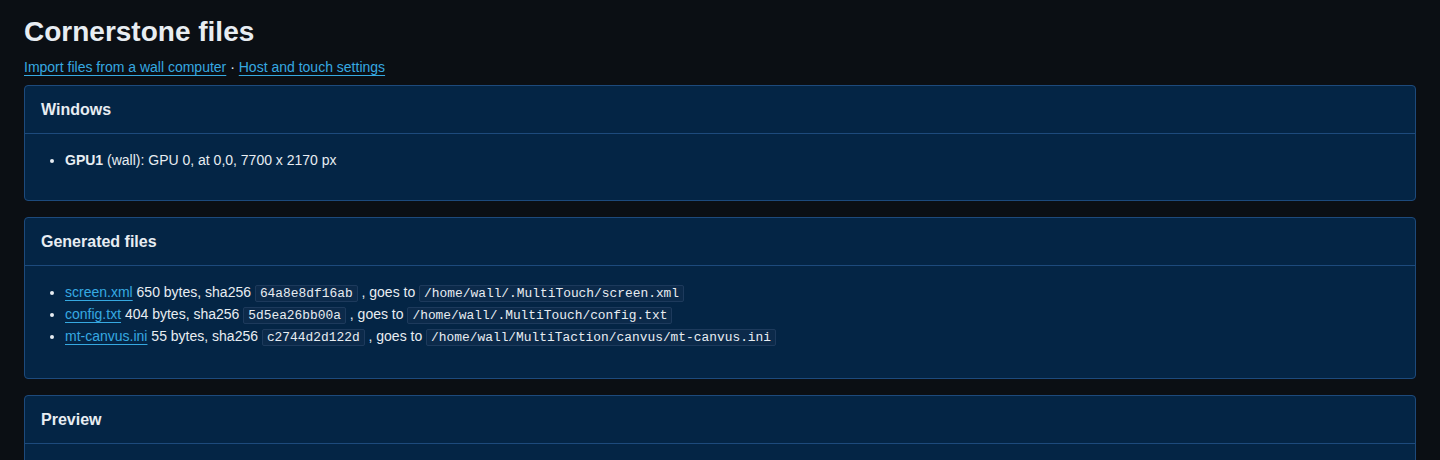
Details: Write the Cornerstone files. What the files contain: Walls and rooms.
This computer
What it is for. The settings of the computer that runs the service and of the files it writes: the video outputs and render groups (which GPU and X screen each window is drawn on, and where), Video outputs that Canvus streams to, Touch settings (config.txt) that are not generated from a layout, and Render options (screen.xml).
When you use it. Rarely: when the computer has several GPUs or X screens, when two walls would otherwise land on the same part of the desktop, or when you add a Canvus video output.
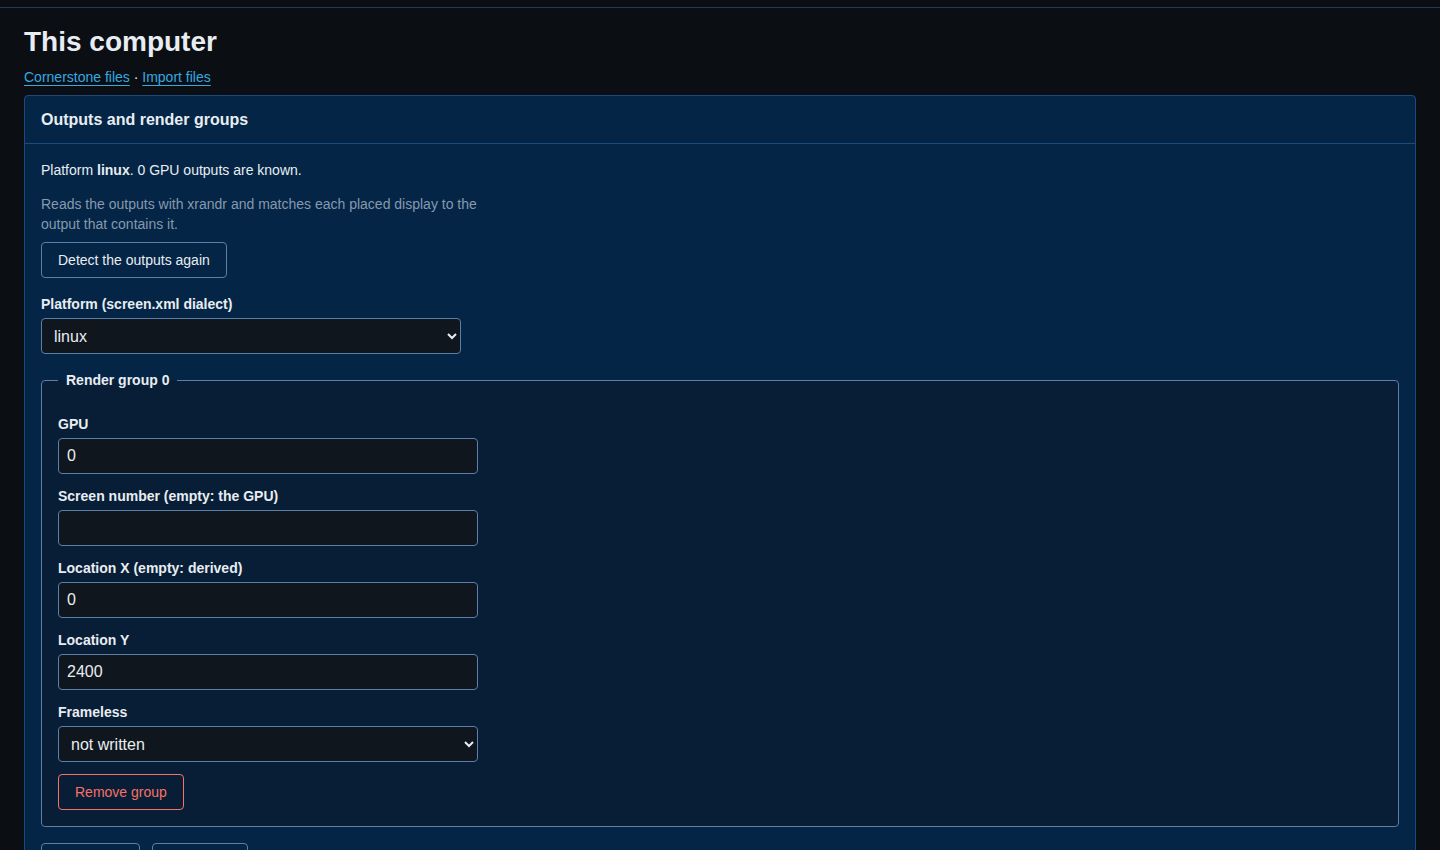
Details: This computer.
Maintain
Select displays
What it is for. Choosing displays to change together. Each wall is a group with a Whole wall box and one box per display. After you tick some, four buttons say what to do with them: Settings, Tracker parameters, Reboot, calibrate, identify and Update firmware.
When you use it. Whenever a change should reach more than one display.
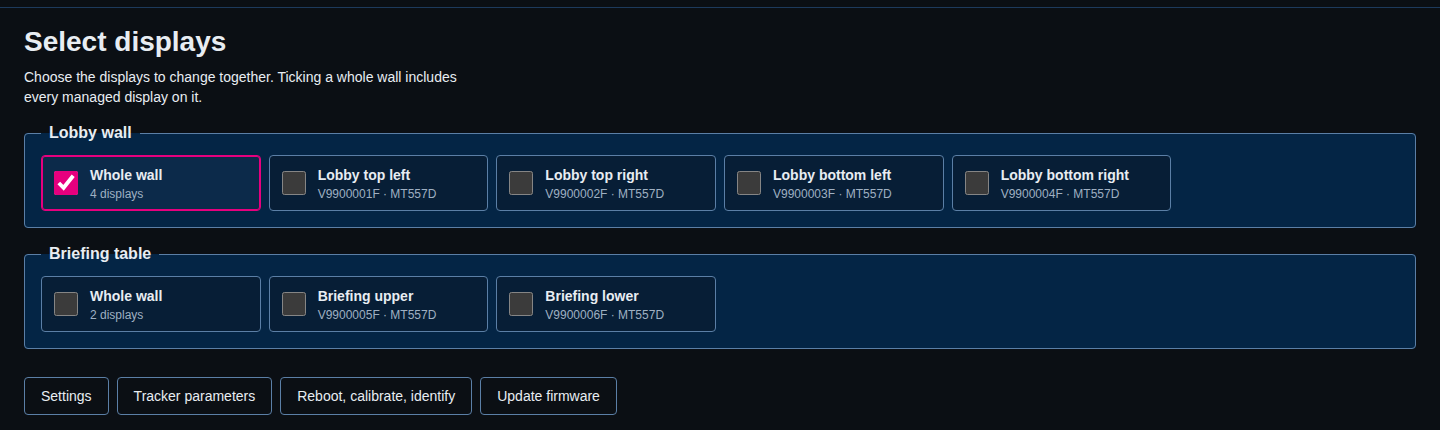
Details: Change several displays at once.
Settings
What it is for. The settings of the displays you chose, in groups: Network, On-screen display, Picture, Remote control, SSH, Syslog, TUIO, Standby and Video source. A field that is different on the chosen displays shows varies and is left alone unless you change it. Applied settings stay pending until you select Save to the displays.
When you use it. To give several displays the same settings. If Settings in the menu shows the list of displays, choose some first.
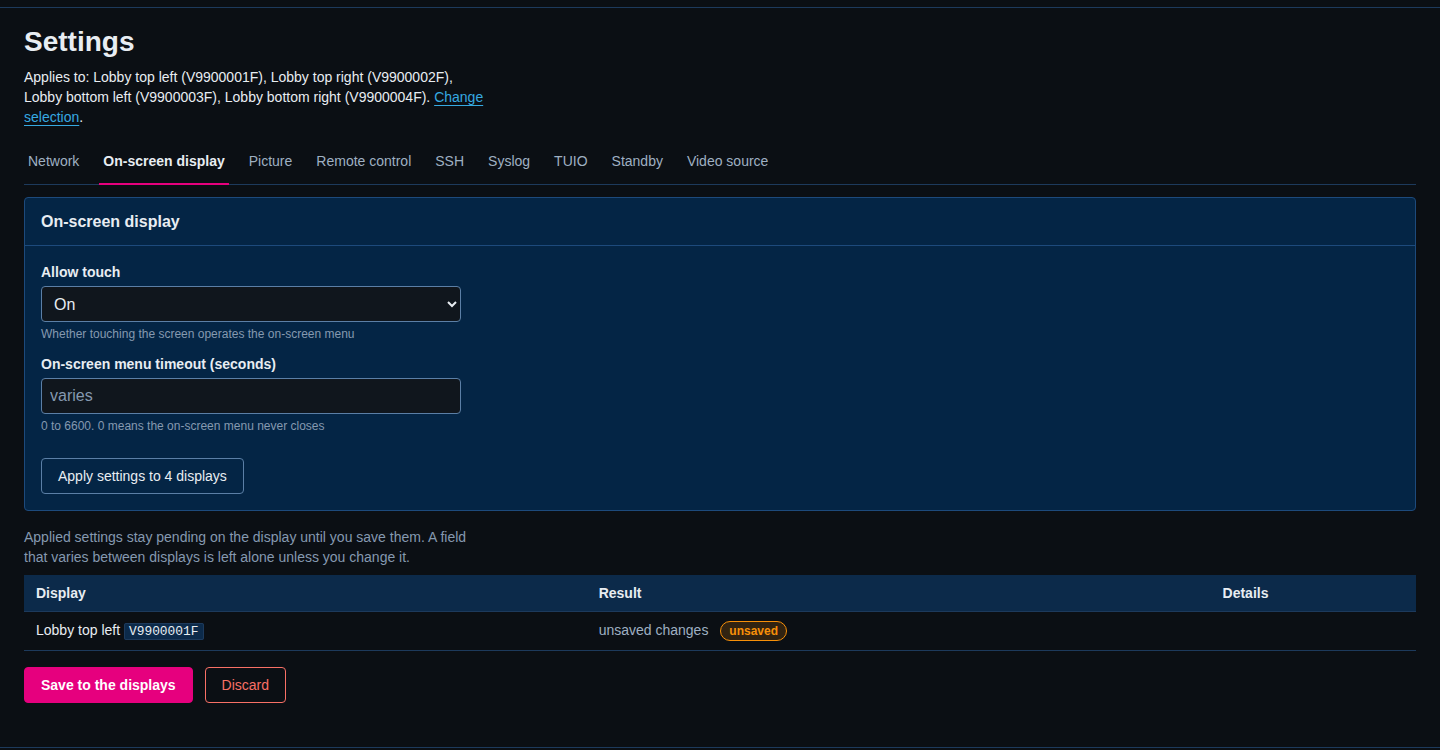
Details: Settings.
Profiles
What it is for. A profile is a named set of settings, for example the standard for every wall in a building. Give a profile to a wall or to single displays, then apply it. SiteManager then warns when a display no longer matches. The page lists the profiles and has a New profile form.
When you use it. When you look after more than a few displays and want them to stay the same.
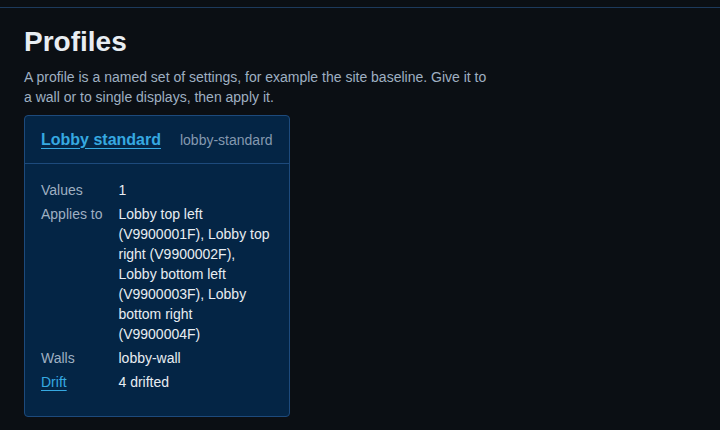
Details: Profiles and drift.
Firmware
What it is for. The firmware catalogue, the images SiteManager holds on this computer (Cached images), and Import a .swu file for a computer with no internet. SiteManager checks the signature of every image it keeps. You start an update from Select displays, with Update firmware.
When you use it. When MultiTaction publishes new firmware, or before an installation with no internet.
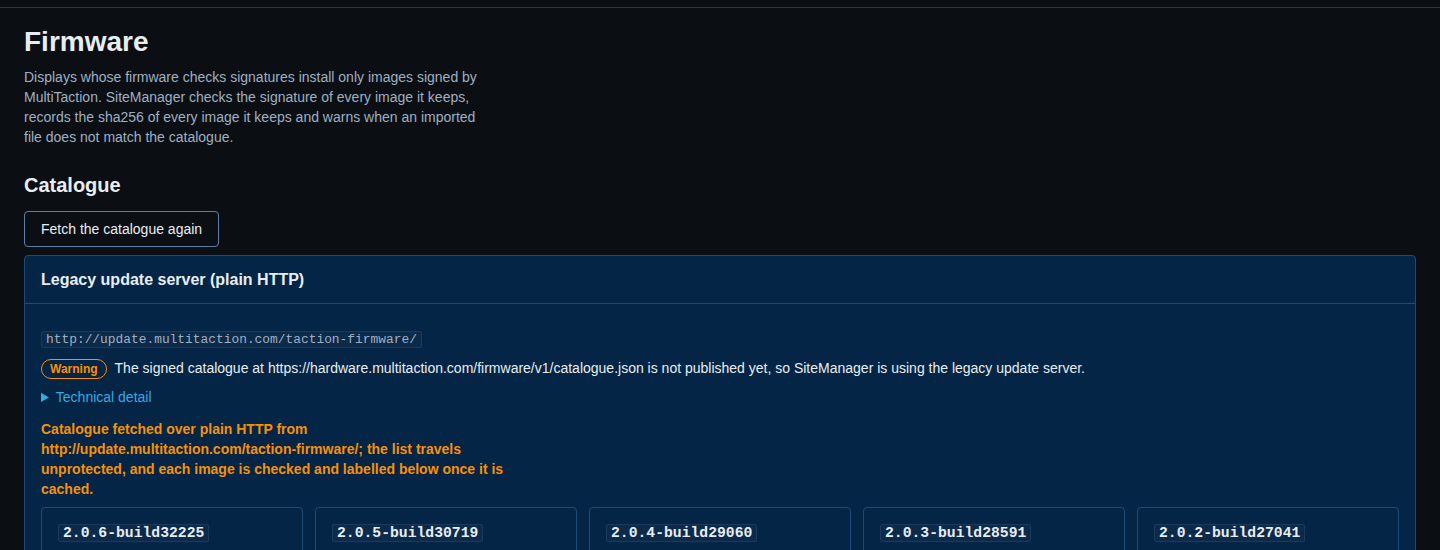
Details: Firmware. Step by step: Update firmware.
Security
What it is for. Each display's encrypted connection and access key, its SSH keys and the update server it uses. One row for each display, and a form to secure, change the keys of, or release the ticked displays, to add or remove an SSH key, and to set the update server and branch. The setting Secure new displays when they are added is here too, and is off by default.
When you use it. When you want to protect displays with an access key, when SiteManager reports a security problem on a display, or when you change who may sign in to a wall. Read Secure your displays first: securing a display locks out older SiteManager versions, SiteManager 2.x and other tools until it is released.
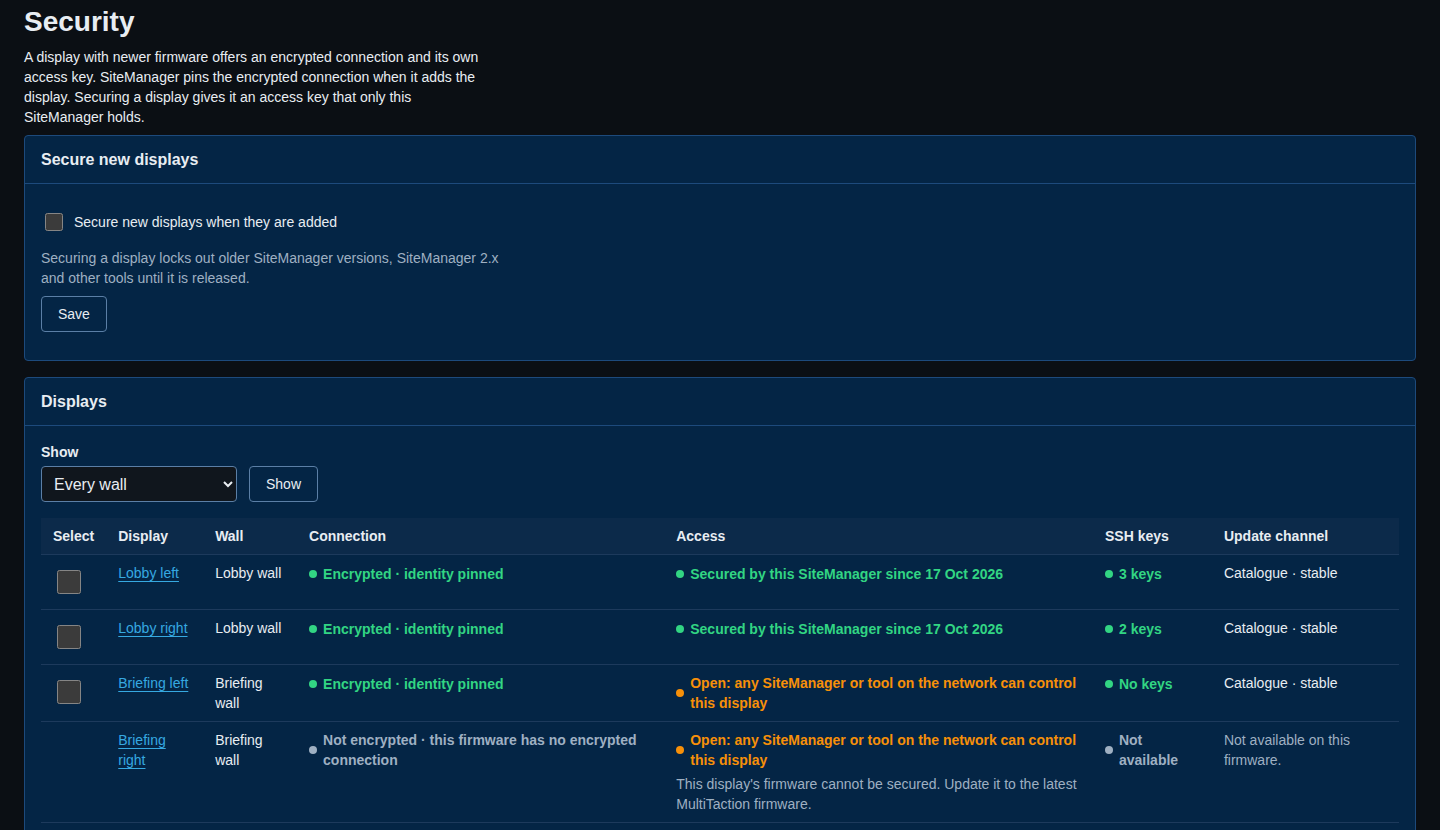
Details: Display security. Step by step: Secure your displays, Manage SSH keys and Set where displays look for firmware.
Jobs
What it is for. The running order. Reboots, calibrations, firmware updates and profile applications run as jobs, and a job keeps running if you close the browser. A job that would disturb a wall waits on Standby until you press Go. The screenshot shows a reboot cue on Standby. It was stood down afterwards, so nothing was sent to a display.
When you use it. To follow a job, to answer a job that waits for you, or to cancel one.

Details: Jobs. Day to day: Day to day.
Monitor
Alerts
What it is for. Active alerts (each with an Acknowledge button), Rules (when an alert starts: offline, temperature, frame rate and others), Delivery channels (where messages go: email, webhook, syslog), and Recent events. In the screenshot, one alert comes from a rule made for this demonstration, "Lobby wall running hot", which watches one wall only.
When you use it. On the first day, to set up a channel so that someone hears about problems. After that, when the alert pill is not No alerts.
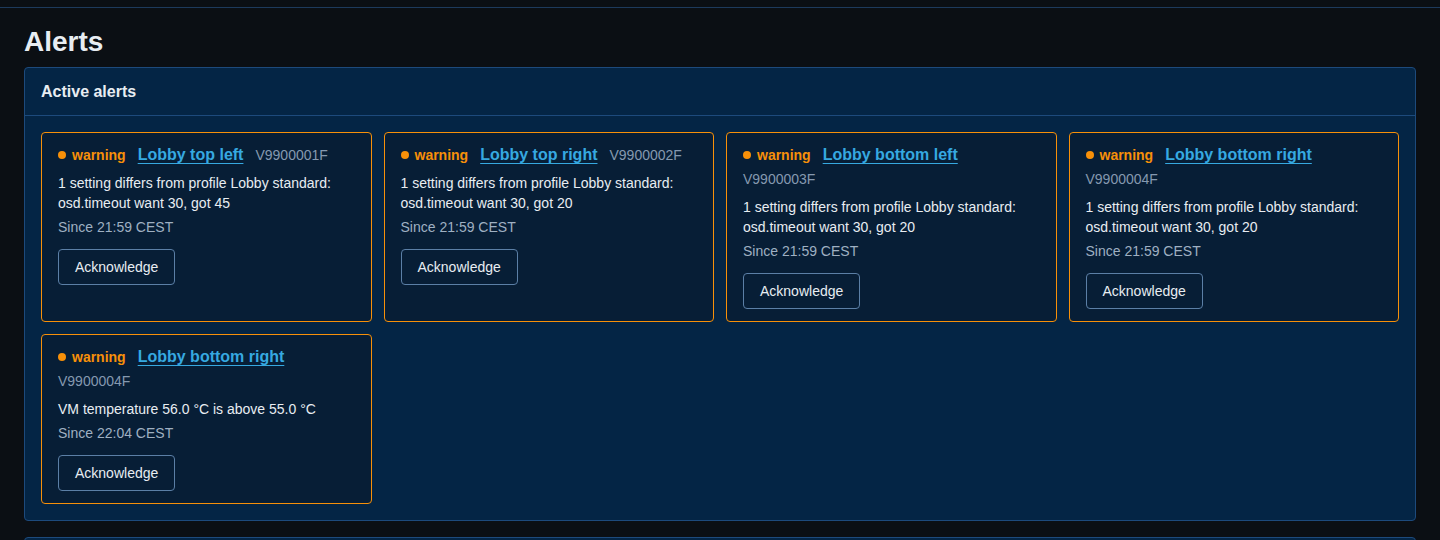
Details: Alerts.
Drift
What it is for. Drift is a difference between what a display or a file holds now and what it should hold. The page compares each display with its profile and each Cornerstone file with what SiteManager would generate. Check now runs a check at once. It only reads.
When you use it. To find out which display someone changed by hand, or whether the files on the wall computer still match the design.
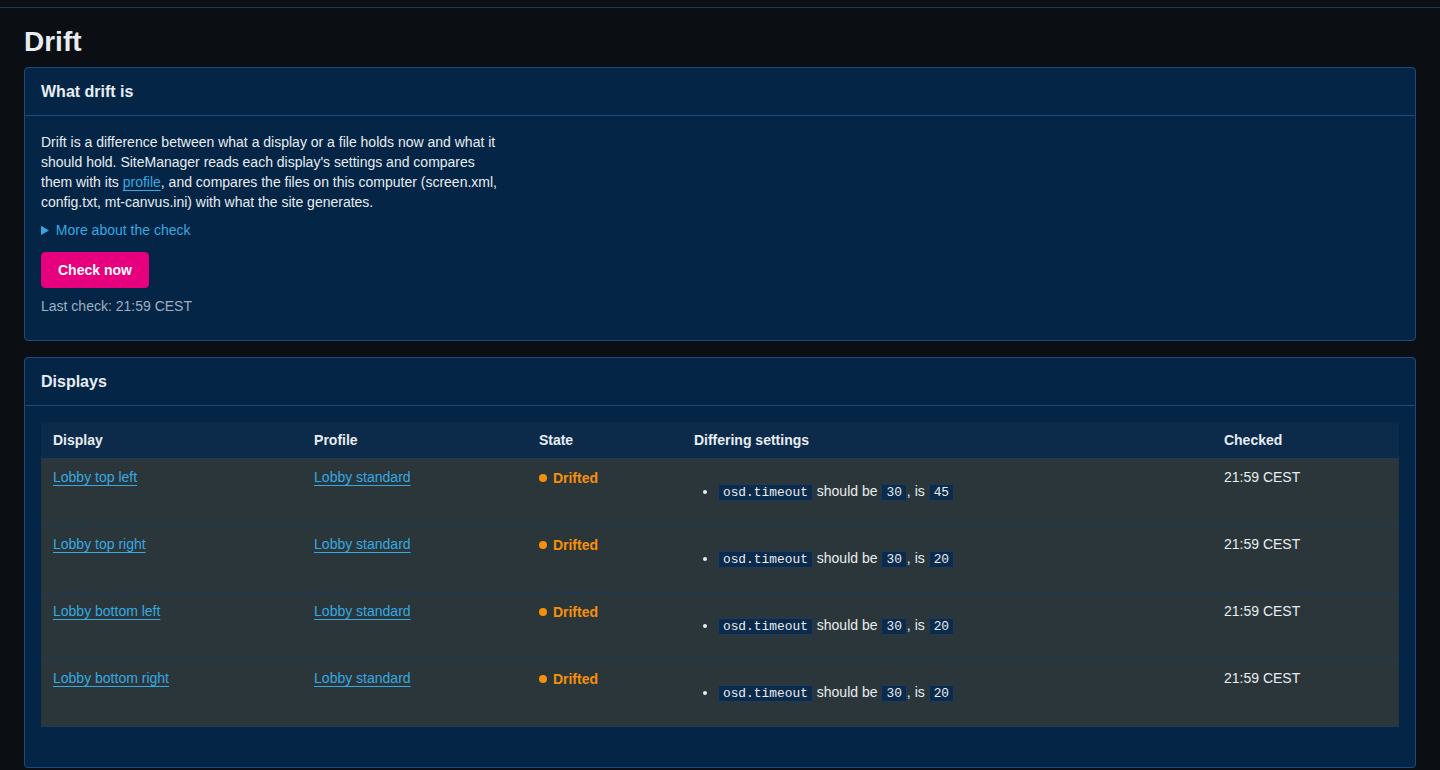
Details: Drift.
Diagnostics
What it is for. One download for MultiTaction support. For each display you tick it holds info.json, status.json, firmware.json, unsaved.json, capabilities.json, the settings/ and tracker/ folders, syslog.txt and diagnostics.gz, in displays/<serial>/. From the service it holds service/site.json, the generated and on-disk Cornerstone files in service/generated/ and service/on-disk/, service/sitemanagerd.log, service/alerts.log, service/alerts-active.json, service/polling.json and service/version.txt, and manifest.json at the top. Under Files from this computer you can also tick Canvus, Canvus Server, Showcase, the launcher and crash dumps (administrators only): they go in computer/canvus/, computer/canvus-server/, computer/showcase/, computer/launcher/ and computer/crash-dumps/. Passwords and tokens are replaced by * or <hidden>. Download bundle makes it. Every file, with where each one is read from on Linux, macOS and Windows, is listed in Diagnostics bundle.
When you use it. When you ask support for help.
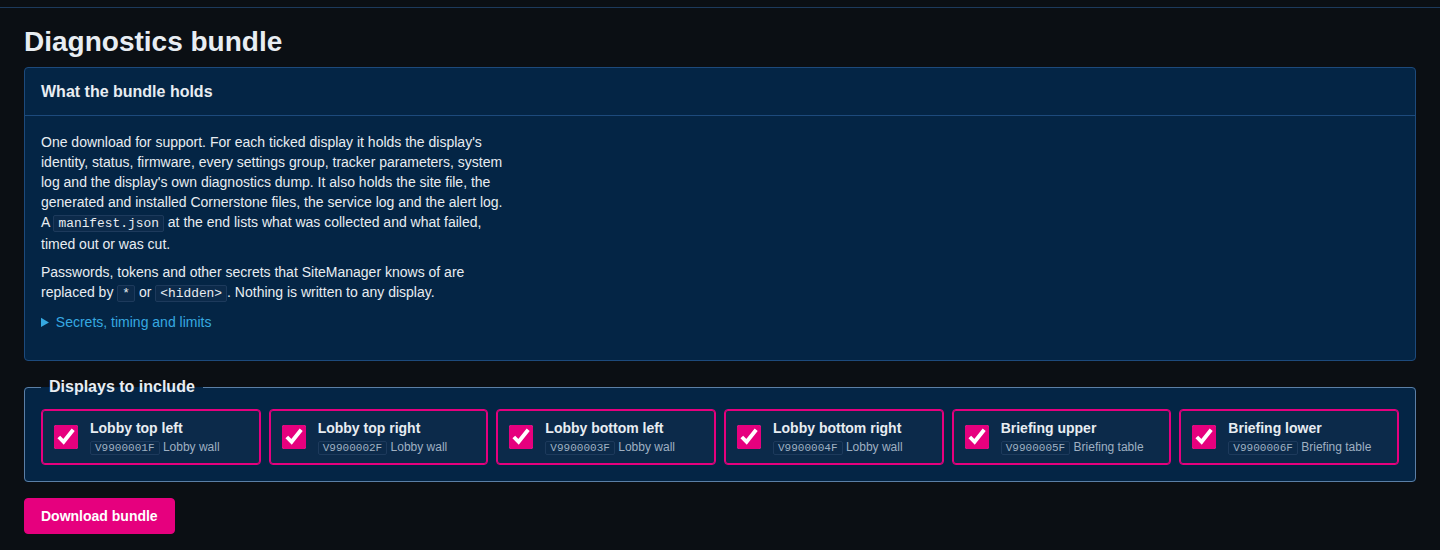
Details: Diagnostics bundle. Step by step: Logs and diagnostics.
Audit
What it is for. The log of every change made through SiteManager, with the time, the user and what was done. Only administrators see it. In local mode everybody at the computer is an administrator, and the user is shown as this computer (local mode).
When you use it. To answer "who changed this, and when?".
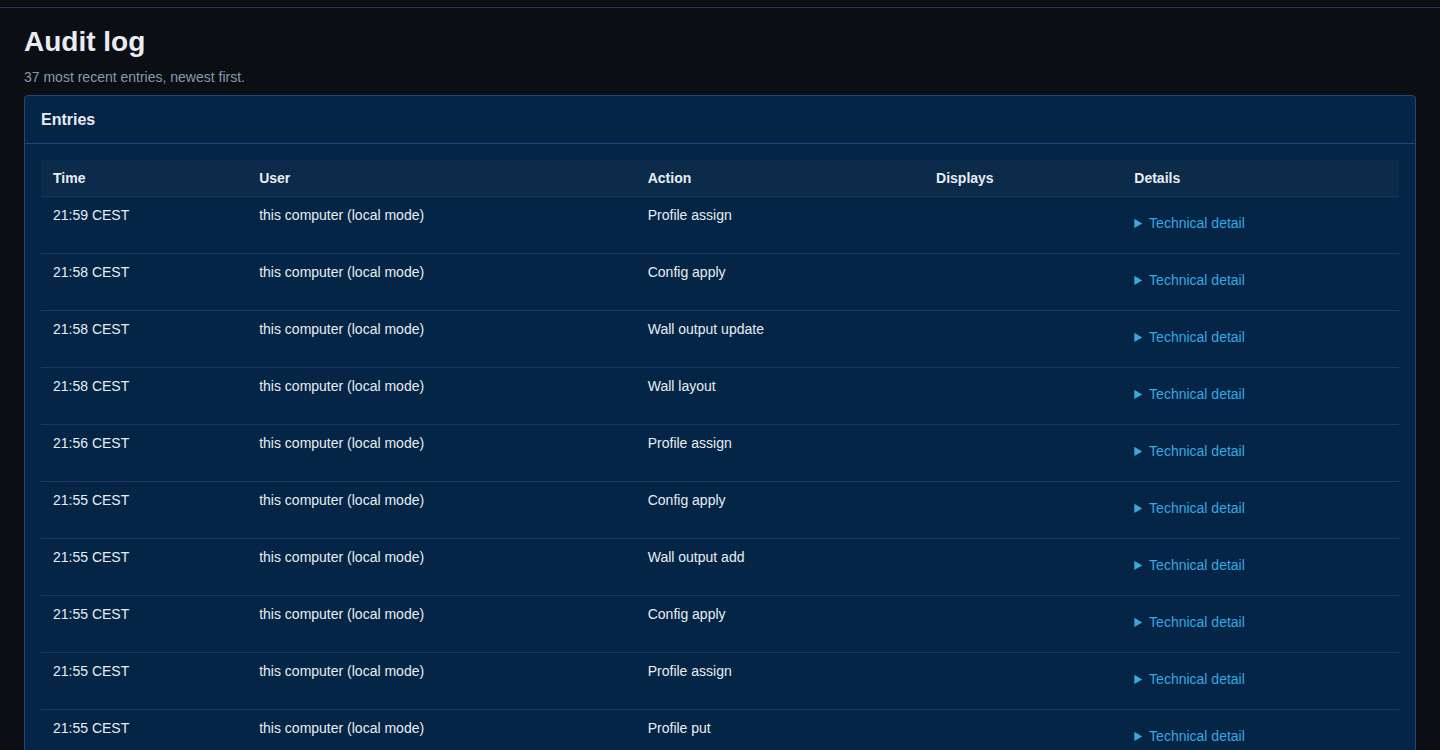
Details: Audit log.
Pages that are not in the menu
A display's own page
Select a tile on the overview, a name in a list, or a display in a designer to open its page. It has four tabs: Overview, Settings, Tracker parameters and History. The overview tab has the live tile, Actions (Identify, Reboot, Calibrate), Properties (Name, Wall, Profile) and Details. Use it to give a display a name, move it to a wall, or light up its screen with Identify so you know which one it is.
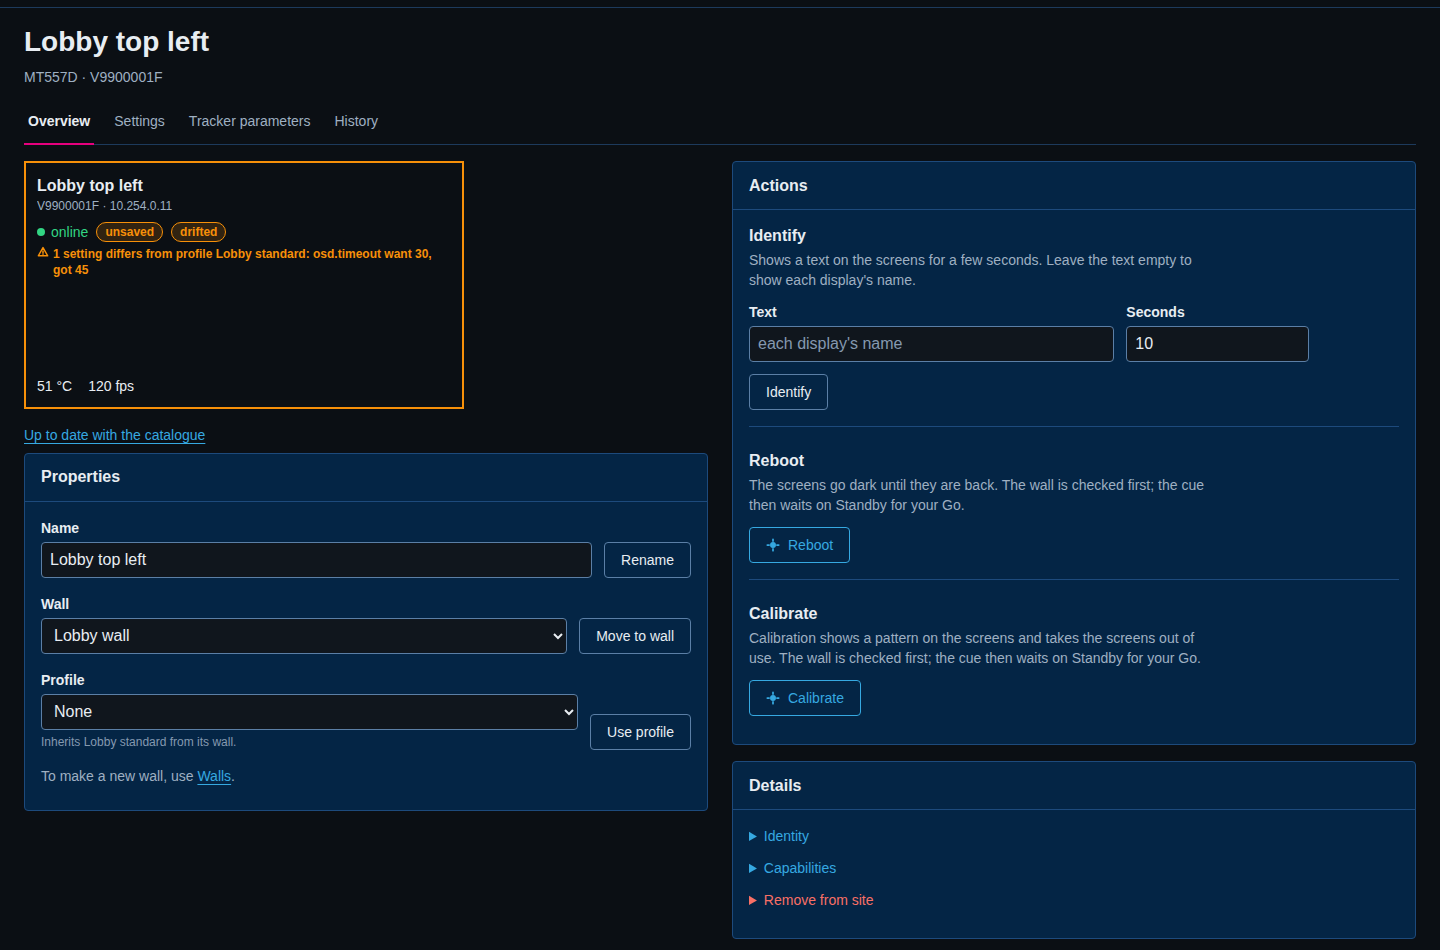
Details: The display page.
History
The History tab of a display, and the History… link at the bottom of a wall page, show charts of temperature, power, frame rates, how often the display answered, and tracker restarts, over 1 hour to 1 year. The charts fill as time passes. On a site that was just set up they show only a short line.
Details: Status history.
Capabilities
A link at the bottom of the overview opens Capabilities: what each display says its software can do. SiteManager only reads it, and Probe now reads one display again. Most of the time you never need it.
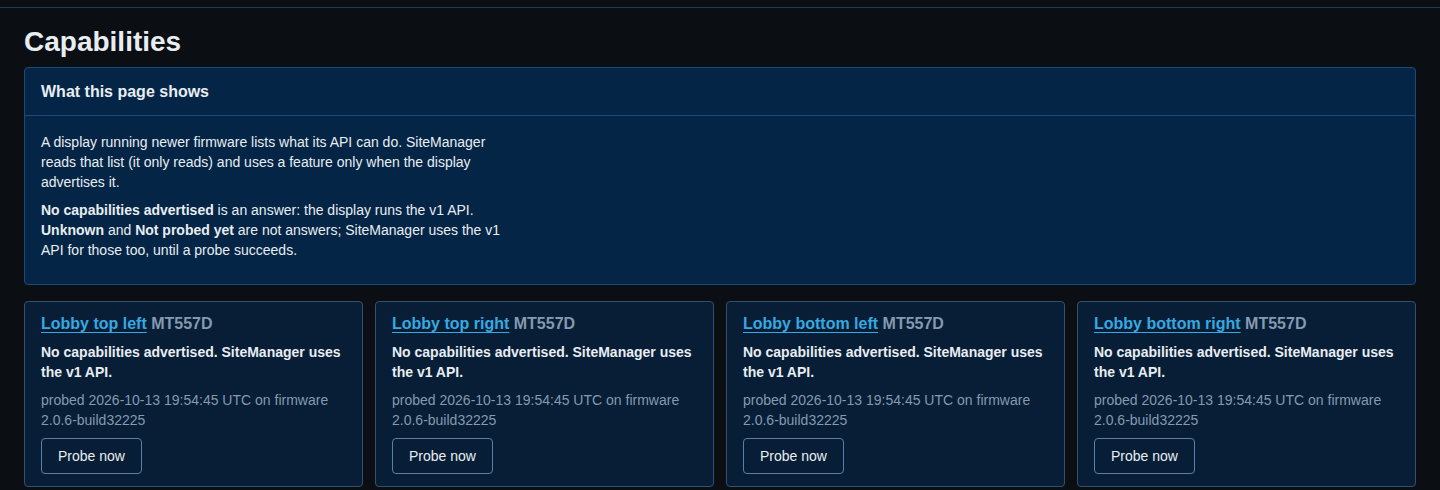
Details: Capabilities.
Account and Users (network mode only)
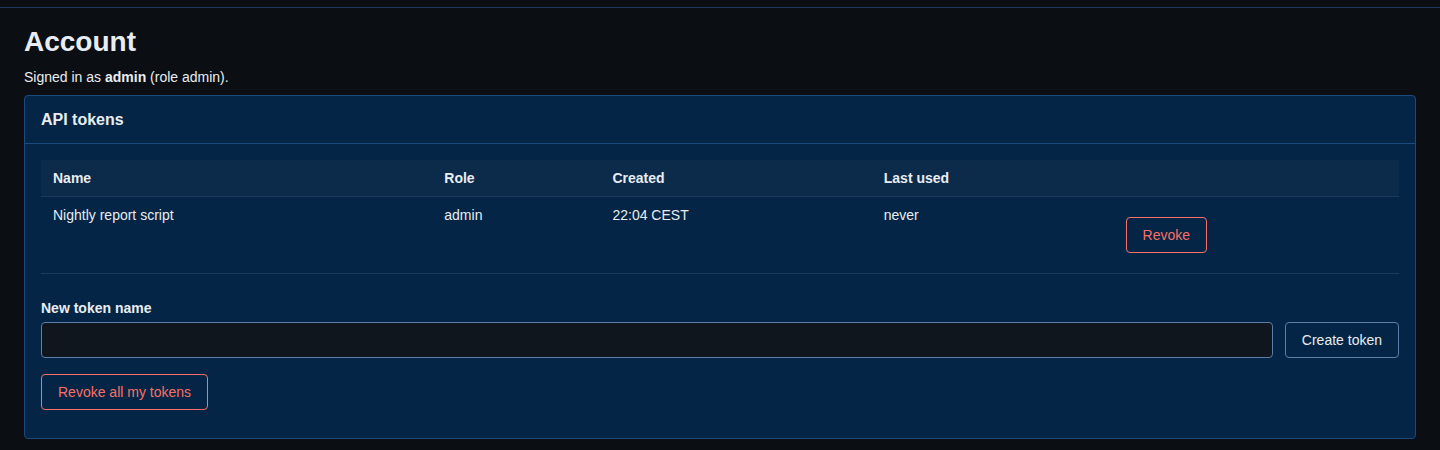
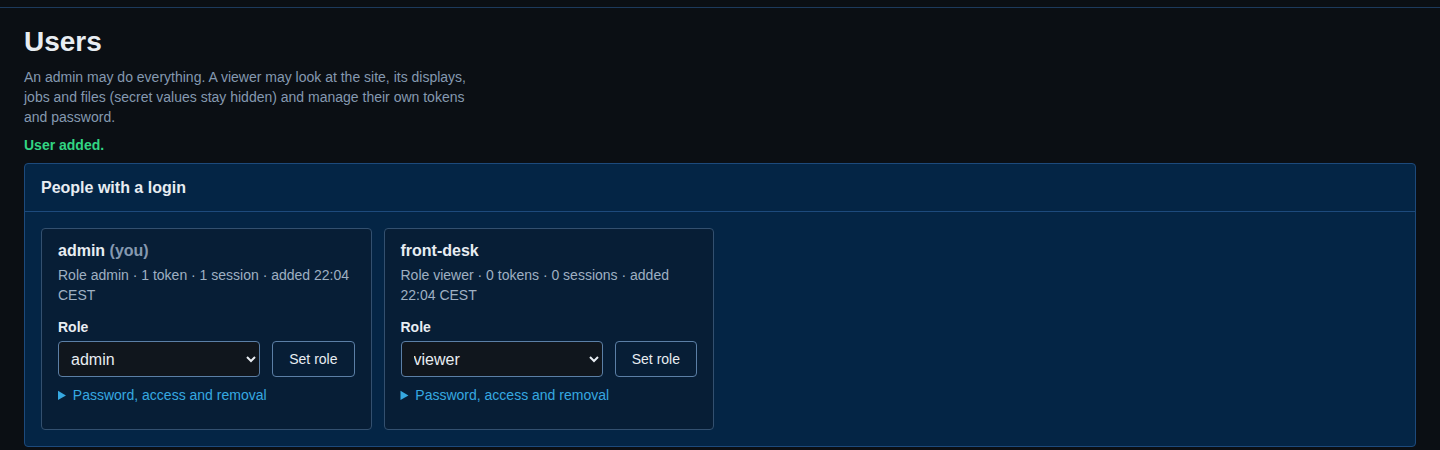
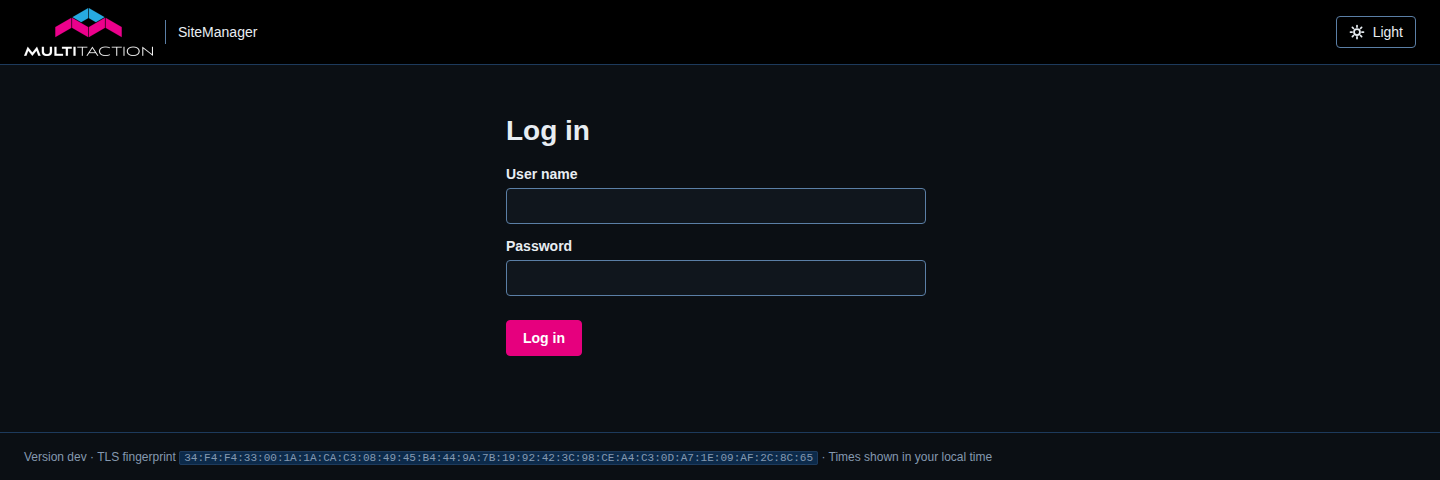
In network mode the black band shows your user name. Select it for Account, Users (administrators only) and Log out. In local mode there are no logins, so none of this appears. The screenshots below come from a separate demonstration service in network mode.
Account is where you create API tokens for scripts and the command line, change your password, and end browser sessions.
Users lists the people with a login. An administrator can add a user, set a role (admin or viewer) and remove a user.
Before you sign in, the Log in page shows the certificate fingerprint in its footer, so you can check you are talking to your own service. See First start.
Details: Your account, Users.
Your first day
This is the order that works. Each step links to the page that carries it out.
- Install SiteManager and open it. See Installing SiteManager and First start. In local mode there is nothing to sign in to.
- Find your displays. Open Discover and run a broadcast or a sweep, then add the displays. Give each one a name on its own page, so that tiles, alerts and the audit log say "Lobby top left" and not a serial number.
- Decide: wall or room. Display walls use walls, projectors use rooms. Walls and rooms explains the difference and what SiteManager writes for each.
- Lay it out. Set up a wall or Set up a room. If a wall already works and you only want SiteManager to take it over, use Bring in an existing wall.
- Write the Cornerstone files and restart Canvus. Preview, apply, and keep the backup SiteManager makes. The wall guide covers the touch preview, which checks that touch input lands on the right display before anyone uses the wall.
- Make sure somebody hears about problems. Add an alert channel, and decide whether a profile should keep the displays the same. See Day to day.
- Know how to update, and decide about security. Update firmware explains the catalogue, signatures and staged rollouts. When every SiteManager on the site is upgraded, Secure your displays explains access keys, and Manage SSH keys says who may sign in.
- Know where to look when something is wrong. Logs and diagnostics says where the logs are and how to send a bundle to support.
- Learn the shortcuts. Tips and tricks, and the FAQ for the questions people ask most.