Clouds
The cloud is arguably the most striking widget available in MT Showcase. It displays a rotating collection of items (previews of images, movies, browsers, or tweets), clustered together in a ball. Users can rotate and resize the cloud to find the item they want.
When they see an item of interest, the user can tap it to detach it from the cloud. The user can then move and resize the item in the normal way. Note that the cloud is 'self-restoring'. After a period of inactivity, the detached item automatically drifts back to rejoin the cloud.
Note that items in the cloud are in fact previews. To see a full version of any item, you must tap the Open button (this button displays when you tap an item in the cloud). When the full version opens, you can interact with it in the normal way. For example, you can follow hyperlinks in a browser or tweet, or you can annotate an image or save it into your personal space.
Note
You can configure the length of the inactivity period (also called the 'idle timeout').
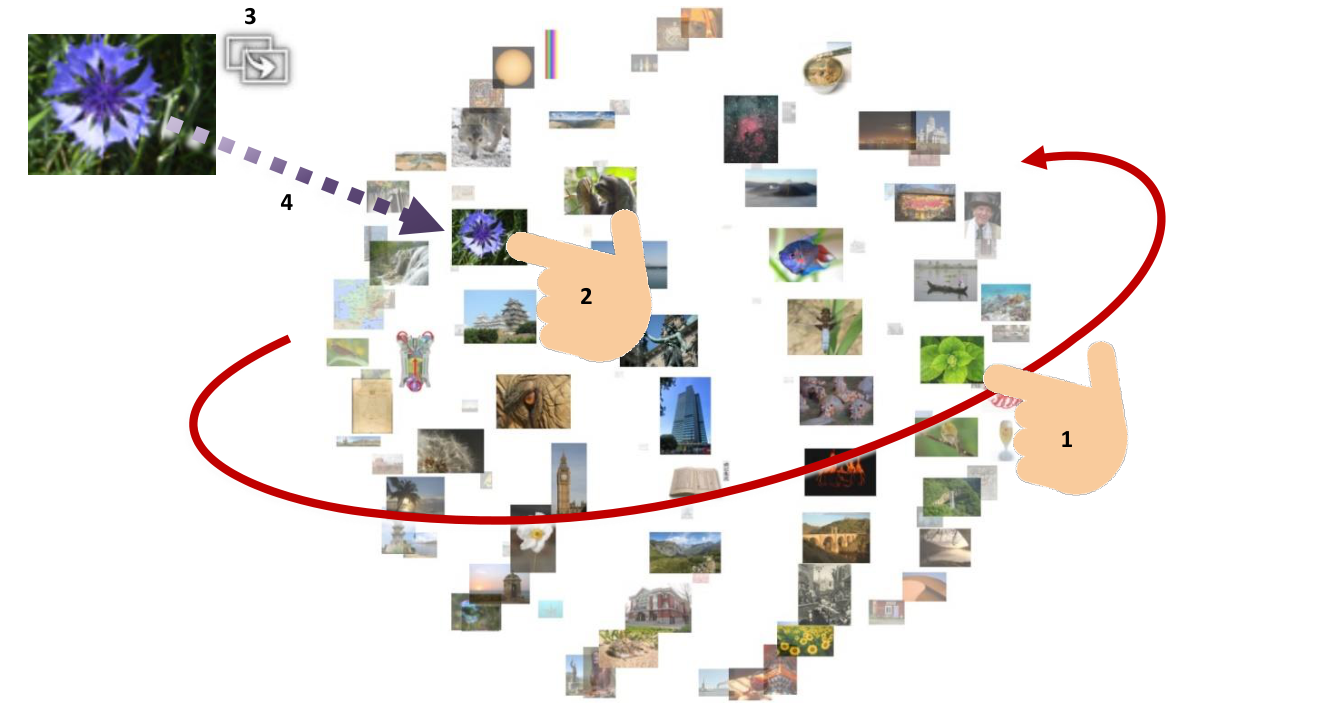
Cloud widget. Tap an item to detach it from the cloud. 1 Drag with your finger to rotate and resize the ball. 2 Tap an item to detach it from the cloud. 3 When you tap an item, the Open button displays. Tap this button to open a full version of the item. 4 Idle detached items automatically drift back to re-join the cloud.
- align
center
- alt
Cloud widget interaction detail
Cloud widget interaction detail.
- align
center
- alt
Open button on a detached cloud item
Open button on a detached cloud item.
- align
center
- alt
Detached item drifting back to rejoin the cloud
Detached item drifting back to rejoin the cloud after idle timeout.
Cloud Size
The cloud widget is particularly suited to large content sets (say, 20 or more images).
The cloud can even handle very large content sets (over 100 items) and at this level its visual impact is undeniably dramatic. However, you need to balance visual impact against ease of finding an item. If you simply want users to enjoy browsing an extensive collection of images, then a very large cloud is ideal. But if you want users to be able to quickly find specific items, then you may want to limit the size of the cloud.
Conversely, the cloud's visual impact is somewhat reduced if the number of items falls below ten or twelve.
Set Up a Content Set
Before creating a cloud, you must create the content set that supplies it with media such as images and videos, or with URLs or tweets. Follow these steps:
If you want to add images, videos or PDFs to the cloud's content set, you must first ensure that the items you want have been added to your media library.
Create a new content set.
Click Content sets in the left-hand pane.
Click the Create New button.
Enter the name of the new content set. For example, Content for Cloud.
In the Content Set screen, drag items into the content set:
Click the media library button to open the media library pane.
Drag images from the media library to the root folder of the new content set.
Tip
You can drag folders directly from the media library. You do not need to drag items individually.
Close the media library pane.
Click the Save button to save the content set.
Add a Theme to Your App
Although themes are optional, we strongly recommend that your app uses a theme if it also includes a cloud widget. This is because you must define the content viewers for all opened items in the cloud. For example, you need to ensure if a user opens an image from the cloud, it will display in an image viewer widget, and that an opened video will display in a video viewer widget, and so on.
If your app uses a theme, these content viewers are specified by default in the theme. Conversely, if your app does not use a theme, you will need to manually specify the content viewer for each item in the cloud. This could be a slow and laborious task!
Add a Cloud to Your App's Structure
Now you need to add a cloud to your app's structure. Then you need to configure the menu to use a new content set.
Follow these steps:
Click Structures in the left-hand pane.
Click your structure. The Editing a Structure screen opens.
Go to the Main section and click Add a new widget to Main.
From the pop-up menu, add a Cloud widget.
In the Cloud Widget Attributes pane, set the following attributes:
Size and Cloud location: These attributes are self-explanatory. You will probably want to change the default values. As a minimum, we recommend that your cloud is at least 1000 x 1000 pixels.
Pin the widget when it opens: A cloud must be pinned before users can spin the ball and select items. For this example, set this attribute to Enabled.
Note
If you pin the cloud when it opens, users will be unable to move or resize the cloud unless you also provide a toolbar with a Pin button.
Timeout for detached items and Return velocity: The timeout determines how long detached items wait when idle. The return velocity determines how fast they float back to rejoin the cloud when the timeout expires.
Now you must select the content set that supplies your cloud.
Go to the Content set attribute.
Select the content set you created earlier, Content for Cloud, from the drop-down menu.
Click the Save button to add the cloud to your structure.
Test the Cloud
You have now updated the structure to use your new cloud widget. To test the cloud:
View your app on your video wall. The cloud is already displayed. (It was added to the app automatically when you clicked the Save button in the previous section. You do not need to restart the app to display the cloud.)
If you enabled the Pin the widget when it opens attribute, you can start browsing the cloud immediately; go to step 3. Otherwise, tap the Pin button in the cloud widget's toolbar.
Find an item in the cloud:
Use your fingers to rotate the ball.
Find an item you want. Then tap it once to activate the item and briefly lift your finger from the screen.
Drag the item out of the cloud.
When the Timeout for detached items expires, the item will automatically rejoin the cloud.
Twitter Clouds
You can add a Twitter cloud to your app. The Twitter cloud comprises a ball of individual tweets that match the specified search terms. To create a Twitter cloud, you simply set up a content set that includes a Twitter Feed widget, and then assign this content set to a Cloud widget.
The tweets in a cloud are previews. If a tweet includes a hyperlink, you can tap the hyperlink directly (you may need to first rotate the cloud to bring the tweet to the front). To open the full version of a tweet --- for example, so you can resize it to make it easier to read --- tap the tweet preview and then tap the resulting Open button. To block inappropriate tweets, you can use a 'tweet blocker' Codice card.
You can also include a Twitter Feed in a conventional cloud, so that individual tweets appear alongside images, movies and browsers in the cloud.
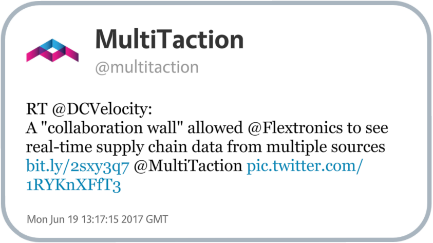
Individual tweet. 1 Hyperlinks. If the hyperlink opens a browser or PDF document, you will have to pin the resulting widget before you can interact with it.
Note
Twitter clouds require the Twitter Connection service to operate.