Getting Started
Using the touch screen
MT Showcase users can interact with the touch screen by using hand and finger gestures, an infrared pen, or Codice cards.
Hand and finger gestures
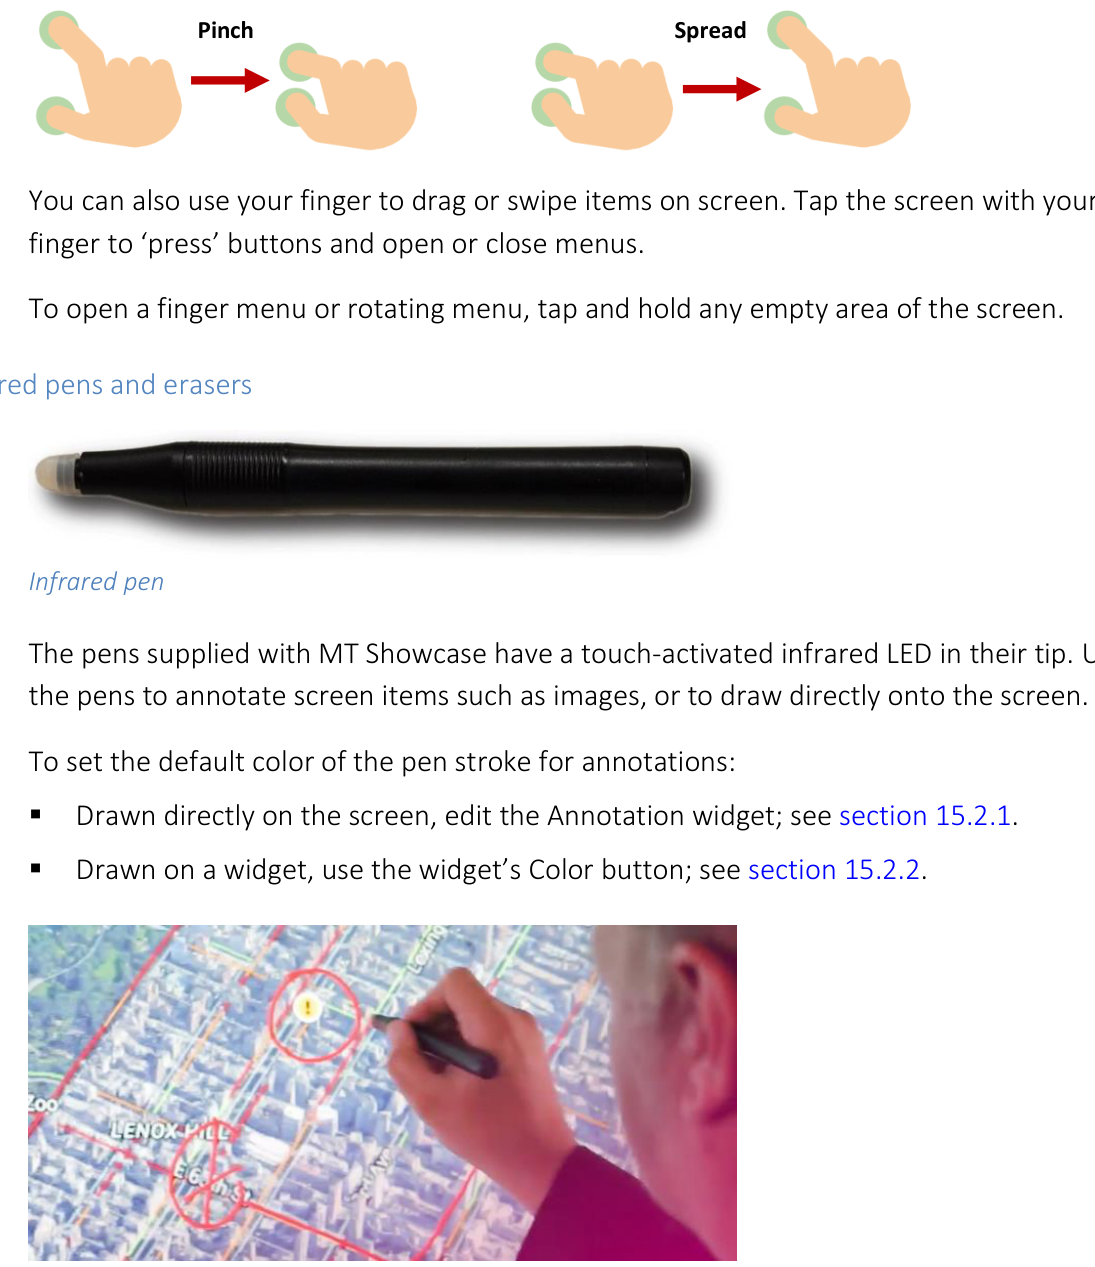
The hand and finger gestures recognized by MT Showcase are generally the same as the gestures for using smart phones or tablets. For example, use the familiar pinch and spread gestures to zoom in or out:
Pinch gesture to zoom out.
You can also use your finger to drag or swipe items on screen. Tap the screen with your finger to 'press' buttons and open or close menus.
To open a finger menu or rotating menu, tap and hold any empty area of the screen.
Infrared pens and erasers
The pens supplied with MT Showcase have a touch-activated infrared LED in their tip. Use the pens to annotate screen items such as images, or to draw directly onto the screen.
To set the default color of the pen stroke for annotations:
Drawn directly on the screen, edit the Annotation widget.
Drawn on a widget, use the widget's Color button.
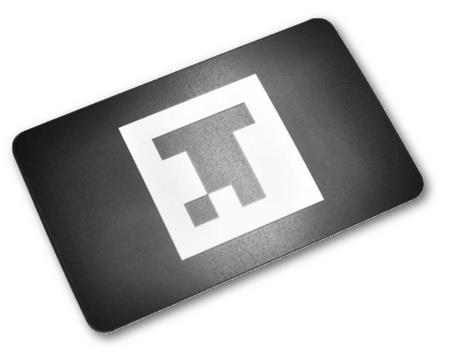
To delete annotations drawn with an infrared pen, use the eraser card supplied with MT Showcase. Place the card face down on the screen and rub out the annotation. (The eraser card is a special Codice card.)
Eraser card
Codice cards
A Codice is simply a 2D barcode (or marker). A Codice card is simply a Codice printed on paper or card. You can issue users with a personal marker or Codice card, or you can make general Codice cards available to your users. You designate the actions associated with each Codice.
For example, users can present their personal Codice card (i.e., hold it against the screen) to open a folder containing their personal items. Or they can present a general Codice card to launch specific content or to erase pen or finger annotations from an MT Showcase app.
Start the Editor
Note
For simplicity, the instructions below refer to 'your laptop' when describing the device you use to run the Editor. Although this device is generally a laptop, you can run the Editor on any compatible device including desktop computers and tablets.
The MT Showcase Editor is a web-based application, so you can browse to the Editor from your laptop.
Follow these steps:
(Mandatory) Verify that MT Showcase is installed on the application computer that drives your video wall. If in doubt, ask your MT Showcase administrator. (Alternatively, you can install MT Showcase on a laptop or desktop computer for app development and testing purposes.)
Note
Deployment instructions, plus recommended computer specifications, are in the MT Showcase Installation Manual.
(Mandatory) Verify that the MT Showcase server is running. If you need assistance, ask your MT Showcase administrator. Instructions for starting and stopping the server are in the MT Showcase Installation Manual.
Note
The MT Showcase server supplies the client with the data it needs to display MT Showcase apps. It also includes a web server that enables app designers to access the MT Showcase Editor.
(Recommended) Verify that the MT Showcase client is running. The client displays MT Showcase on your video wall, allowing you to view changes to your app as you design it in the Editor. Instructions for starting and stopping the client are in the MT Showcase Installation Manual. Briefly, on Ubuntu systems you launch the client from a desktop menu or by running a launch command in a terminal emulator. On Windows systems, you launch the client by double-clicking the MT Showcase desktop shortcut.

MT Showcase desktop shortcut.
Note
The MT Showcase client displays content and handles touch events for MT Showcase apps, based on data received from the server.
(Applies only if the MT Showcase client is running; see step 3) If no app has been set up on the MT Showcase server, MT Showcase displays the setup advisory screen and directs you to the URL for the MT Showcase Editor.

MT Showcase setup advisory screen. This screen displays when no app is running.
(Applies only if the MT Showcase client is running; see step 3) We recommend that you position yourself with your laptop where you can see the video wall. Although you do not need to see the video wall while you are editing an MT Showcase app, for obvious reasons it is better if you can see it to assess how your edits are affecting the application's layout and content.
Start the MT Showcase Editor. To do this, browse to the IP address of the application computer. By default, the Editor listens on port 80 so you do not need to specify a port number. However, if your network administrator specified a non-default port number when installing MT Showcase, you must add a port suffix to the IP address. For example, if the application computer IP address is 10.30.1.75 and the Editor is configured to listen on port 100, browse to:
10.30.1.75:100
When the MT Showcase Editor starts up, it displays the start screen. You can now start creating your first app.
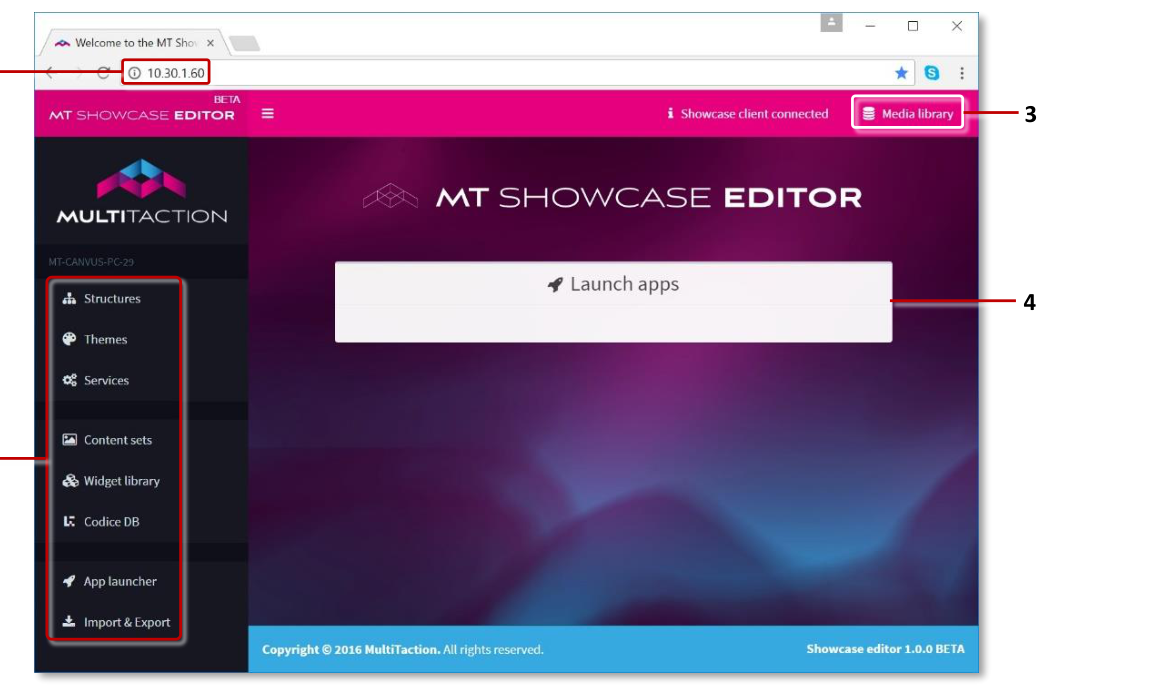
MT Showcase Editor start screen. 1 Editor URL. 2 Editor menu. 3 Media library button. 4 App list. This list is empty until you create your first app.
Create a simple app
In this section, you will create a simple app that contains a browser and animated background.
Follow these steps:
Create a new structure
Click Structures in the left-hand menu.
Enter a name in the New structure name field. For example, My First Structure.
Click the Create New button. The Editing a Structure screen appears.
Add an animated background to the structure
Go to the Background section and click Add a new widget to background.
From the pop-up Background widget menu, choose an animated background. This menu includes two animated backgrounds, Awesome and Shader effect. For this example, click the Add button for Shader effect.
Note
This menu includes animated backgrounds plus other items that can be added to an app's background layer (for example, image and video widgets, and special effects).
Click the Save button to add the background to My First Structure. A preview image of your selected background now displays in the right-hand pane.
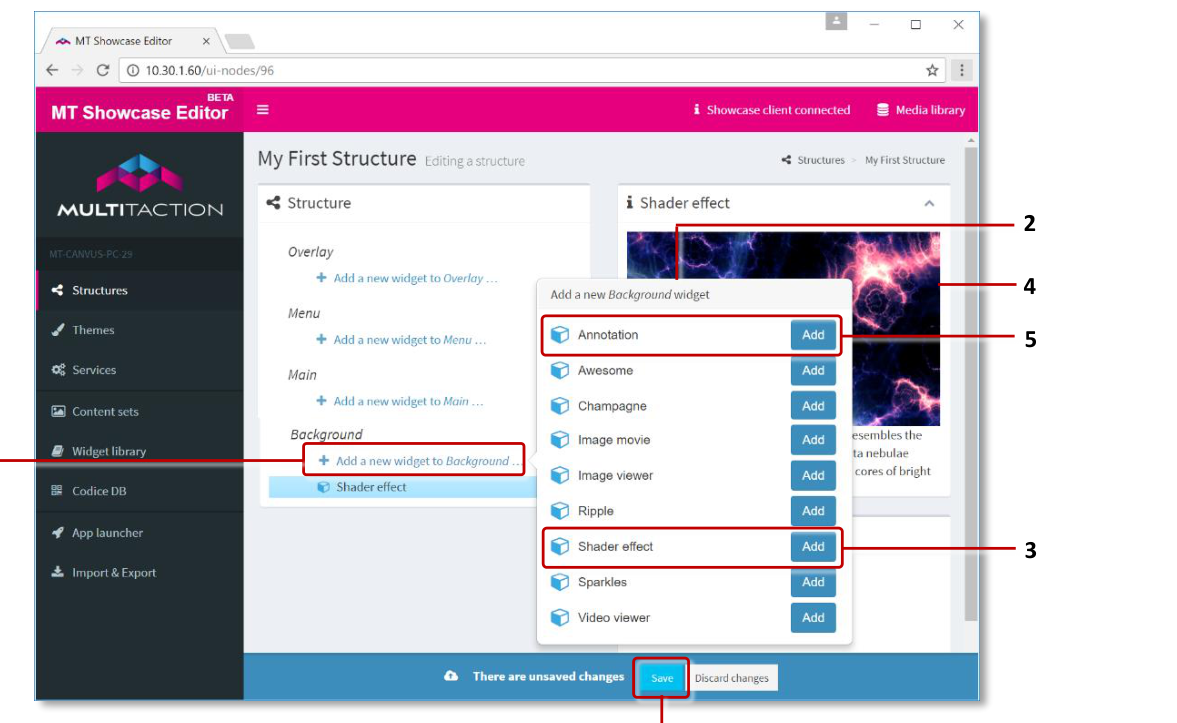
MT Showcase Editor, Editing a Structure screen. 1 'Add a new widget to background' hyperlink. 2 Background widget menu. 3 Shader effect animated background widget and Add button. 4 Preview of shader effect background. 5 Annotation widget and Add button. 6 Save button.
Add a web browser to the structure
Still in the Editing a structure screen, go to the Main section and click Add a new widget to main.
From the pop-up menu, choose a web browser. (You need to click the corresponding Add button.)
Set the web browser attributes. Widget attributes control the appearance and behavior of screen items. For this task, we only want to specify the URL for the web browser. We will experiment with other browser attributes such as location and size later. In the Web browser attributes pane, set the URL attribute to the web site you want. For example,
www.multitaction.com.Tip
Although you may be tempted to enable the Pin the widget when it opens? attribute, we recommend that you don't do this yet. Although this would allow you to browse web pages, it would also mean that you cannot move or resize the browser widget until you add a toolbar. For more information, see the note in step 6.
Click the Save button to add the browser to My First Structure.
Create a new app
Click App launcher in the left-hand menu.
Enter a name in the New app name field. For example, My First App.
Click the Create New button.

MT Showcase Editor, App launcher screen. 1 New app. 2 Edit, Run and Save buttons. 3 New app name field and Create New button.
Add the structure to the new app
Still in the App launcher screen, click the Edit button for My First App.
In the Structure column, choose My First Structure from the drop-down list.
Click the Save button for My First App.
Run the new app
Still in the App launcher screen, click the Run button for My First App. The new app appears on your video wall. Use hand gestures to move, resize and rotate the browser. To remove the browser, drag it off the screen.
Important
If you try to browse pages on the web site, you will not be able to because the widget will move. This is because MT Showcase interprets your touches as move or resize gestures. To fix this, all browser widgets must be pinned before users can use them; this will be covered when you add a toolbar.
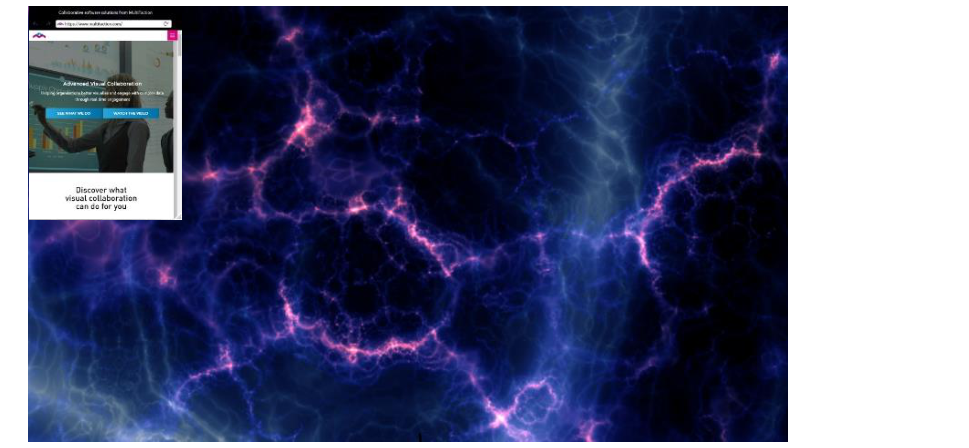
MT Showcase app, with web browser widget in default location.
In the next section, you will learn how to edit your new app.
Edit your app
Like most design processes, designing an MT Showcase app requires trial and error adjustments until you get the results you want. In this section, you will experiment with adjusting the background and browser attributes.
Edit the background
Click Structures in the left-hand menu.
Click the My First Structure hyperlink. The Editing a structure screen appears.
In the Background section, click the Awesome widget.
In the Awesome attributes pane, experiment with the animation speed. Try raising the value for the Effect speed attribute.
Click the Save button.
Review the app changes on your video wall
If My First App is still running, the background change takes effect immediately. Otherwise, follow the instructions in the previous section to run it. If required, keep, adjust or undo the changes to the Awesome background.
Edit the browser
Still in the Editing a structure screen, go to the Main section and click the Web browser widget.
In the Web browser attributes pane, experiment with new values for the browser attributes. For example:
Location: You define a widget's location by specifying the horizontal and vertical coordinates of its top-left corner. By default, the coordinates for widgets in the main layer are (0,0), meaning they display in the top-left corner of the screen. Experiment with new locations. For example, enter co-ordinates of (200,0) to shift the browser 200 pixels to the right.
Scale: Experiment with different scaling factors for the widget. For example, enter a value of 1.5 to display the browser at 150% of its default size.
Enable resize handle: Set this attribute to Enabled to show a resize handle in the bottom right corner of the browser.
URL: Experiment with a different web site URL.
Click the Save button.
Review the app changes on your video wall
If My First App is still running, the browser changes take effect immediately. Otherwise, run the app again. If required, keep, adjust or undo the changes to the browser.
In the next section, you will learn how to extend your new app.
Add a toolbar
It's often useful, or even necessary, to add toolbars to widgets in your app. Toolbars can include Close, Pin and Maximize buttons, plus Color and Clear buttons for widget annotations.
The following sections show you how to add a toolbar containing Close and Pin buttons to your web browser.
Create a new toolbar
Before you can assign a toolbar to the web browser, you must create and name a toolbar widget. Then you must edit the toolbar and select the toolbar buttons.
Follow these steps:
Edit the Web browser attributes
Click Structures in the left-hand menu.
Click the My First Structure hyperlink.
In the Main section, click the Web browser widget.
Add a new toolbar
In the Web browser attributes pane, go to the Toolbar attribute.
Click the New button.
In the Add a new Toolbar widget pop-up, click the Add button.

Add a new Toolbar widget pop-up.
Type a name for the new toolbar widget. For example, My First Toolbar.
Click the Save button.
Assign buttons to the new toolbar
Click the Edit button to display the Editing a widget screen.
In the Toolbar structure pane, click the Add a new widget to Toolbar primary-top hyperlink.
Note
MT Showcase supports primary and secondary toolbars. The toolbar type determines the position of the buttons.
In the pop-up Add a new Toolbar menu, add the Close and Pin buttons. (Click the corresponding Add buttons.)
Click the Save button.
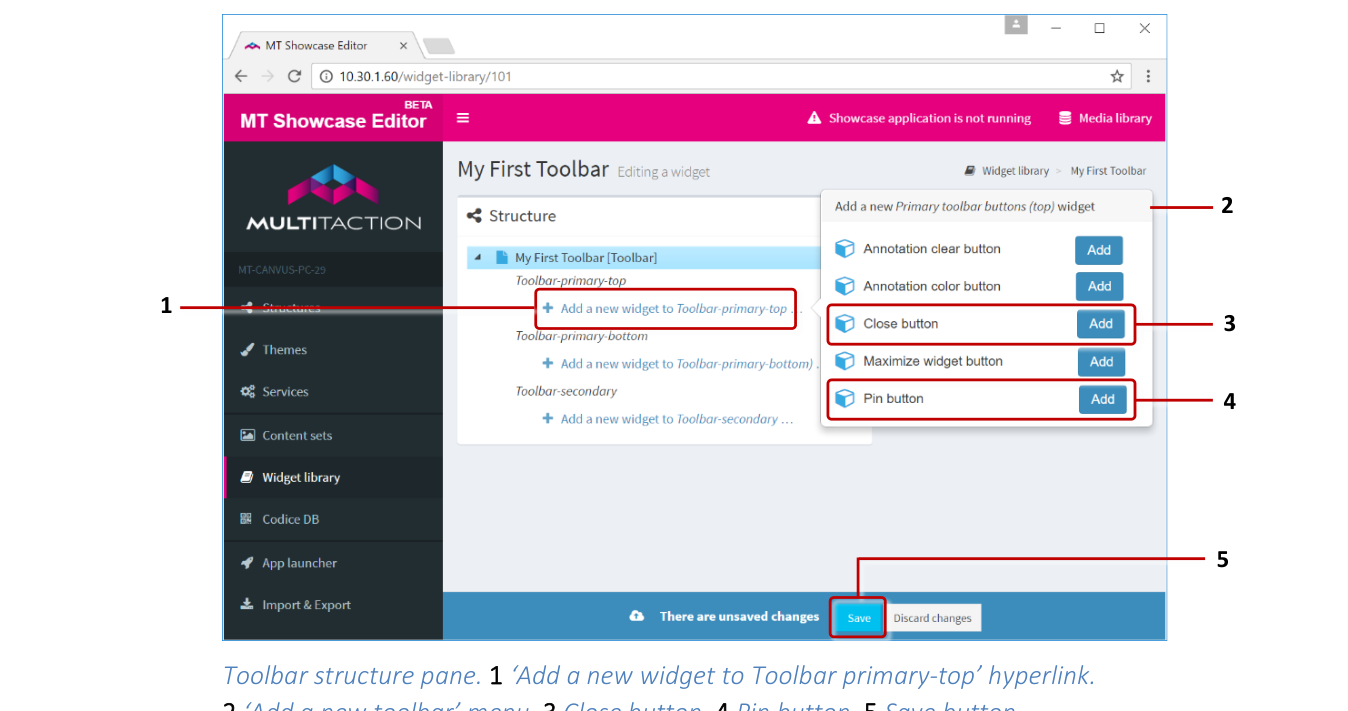
Toolbar structure pane. 1 'Add a new widget to Toolbar primary-top' hyperlink. 2 'Add a new toolbar' menu. 3 Close button. 4 Pin button. 5 Save button.
Test the toolbar
You have now added a new toolbar to your web browser. The Pin and Close buttons in the toolbar allow users to pin or close the browser.
To test the toolbar:
Restart your app.
Go to the App launcher screen.
Click the Restart button for My First App.
The new toolbar is now attached to the web browser. Try using the new buttons. If you close the browser, you can repeat step 1 to re-start your app.
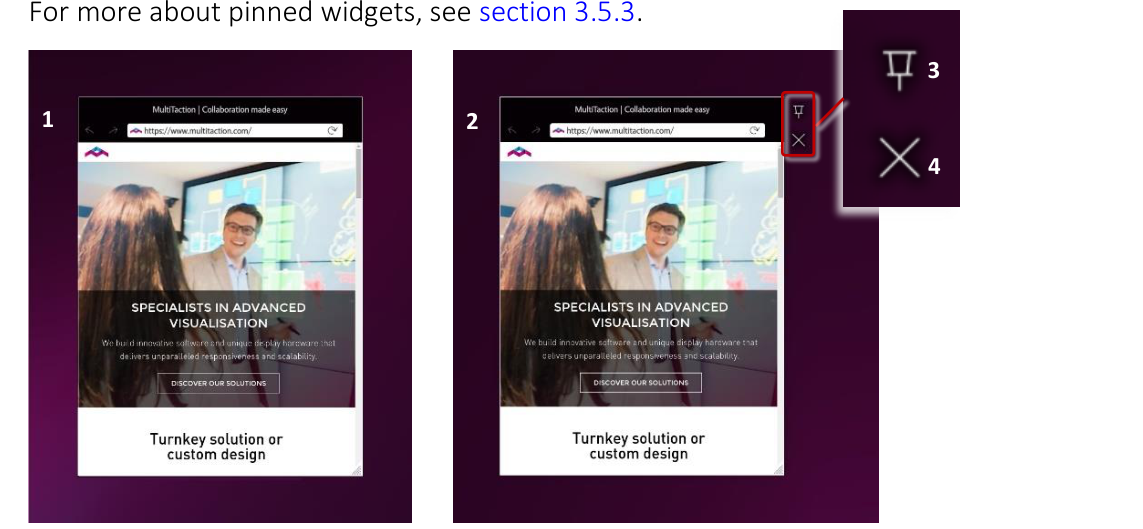
Example widget toolbar. 1 Browser widget with no toolbar. 2 Browser widget with toolbar. This toolbar is in the primary-top position. 3 Pin button. 4 Close button.
About pin
Normally, you can freely move and resize individual screen items (widgets) in an app. But this is not always desired behavior. Sometimes you may want to lock the size and position of an item so you do not inadvertently move it off the screen or make it too small to be useful. The pin feature allows you to lock the size and position of screen items.
When designing your app, you can edit a widget's attributes to determine whether:
The widget is pinned or not when it first opens.
The widget has a toolbar with a Pin button that allows users to pin or unpin it.
Note that many widgets must be pinned before users can use them:
Cloud widgets must be pinned before users can rotate the ball and select items for viewing.
Image movie widgets must be pinned if you want to open the movie in interactive mode, allowing users to control the playback.
Input Visualizer widgets (in the Main layer) must be pinned before users can test touch events.
Tip
An Input Visualizer in the Overlay layer does not need pinning.
Missile Command and Pong widgets must be pinned before users can play these games.
PDF Book and PDF Flow widgets must be pinned before users can page through the document.
Taction model widgets must be pinned before users can interact with a 3D model of a MultiTaction Cell.
Web browser widgets must be pinned before users can browse the web page.